Painted pumpkins are carved jack-o’-lanterns’ cleaner, longer-lasting alternative, but only if the surface is washed with soapy water first.
The waxy cuticle that keeps the rind fresh repels anything you brush onto it, and a patch of missed dirt becomes a bubble of peeling paint within a week.
Thirty minutes between coats is the minimum that works; rushing it leaves ridges and fingerprints you’ll feel every time you pick the pumpkin up.
Stripe It
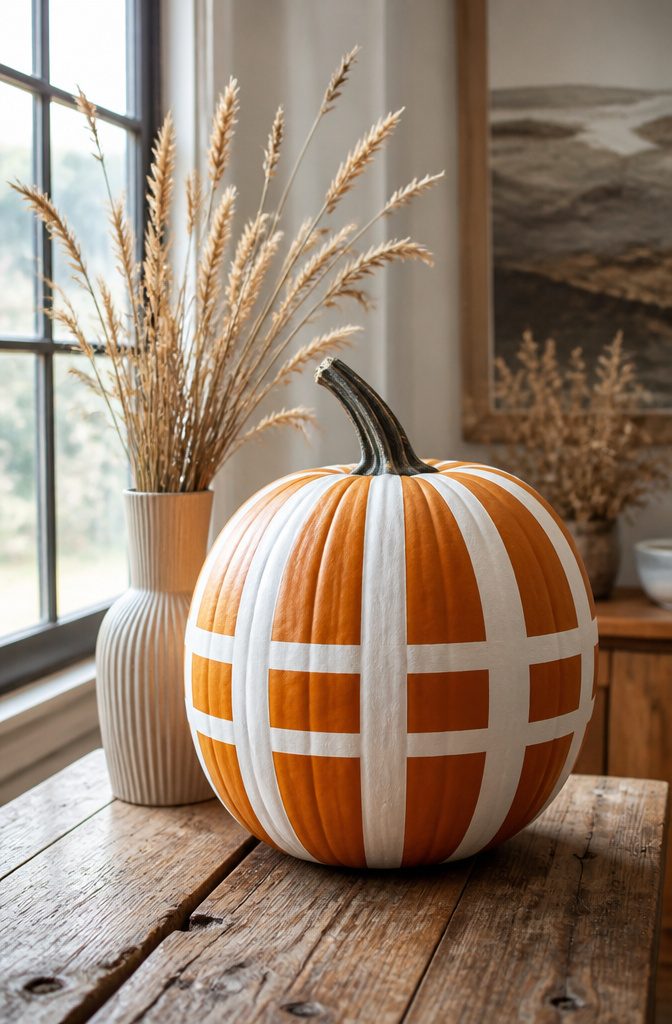
Clean stripes on a pumpkin look harder than they are. The trick is pulling the tape before the second coat goes on, which is the opposite of how most of us learned to paint a room.
I tape off vertical or horizontal bands with standard painter’s tape, press the edges down firmly, and brush on the first coat of craft paint.
The sources say to let that dry about 30 minutes. Here’s the part that saves the edge: peel the tape off while the first coat is still slightly set but not fully cured, then let the pumpkin finish drying bare.
Once it’s dry, re-tape along the exact same lines and paint the second coat. The paint never gets thick enough to bond with the tape, so the line stays crisp instead of tearing.
Two coats with that 30-minute window between them is enough for solid coverage. Chevron works the same way, just with more angles to line up.

You Will Receive - There are totally 12 rolls Halloween washi tapes in different patterns, so you can choose them what are suitable for your requirements to apply in various occasions, a pretty accessory to create festival atmosphere.

Packages Includes - Come with 12 rolls Halloween washi tapes, the patterns includes pumpkin, ghost, bat, spider, candy, skull and more. More surprise and more joy for your Halloween!

This 12-roll Halloween washi tape set comes with multiple widths and classic Halloween-themed patterns, providing sufficient quantity and diverse styles to meet all your DIY craft and decoration needs.
Spot It
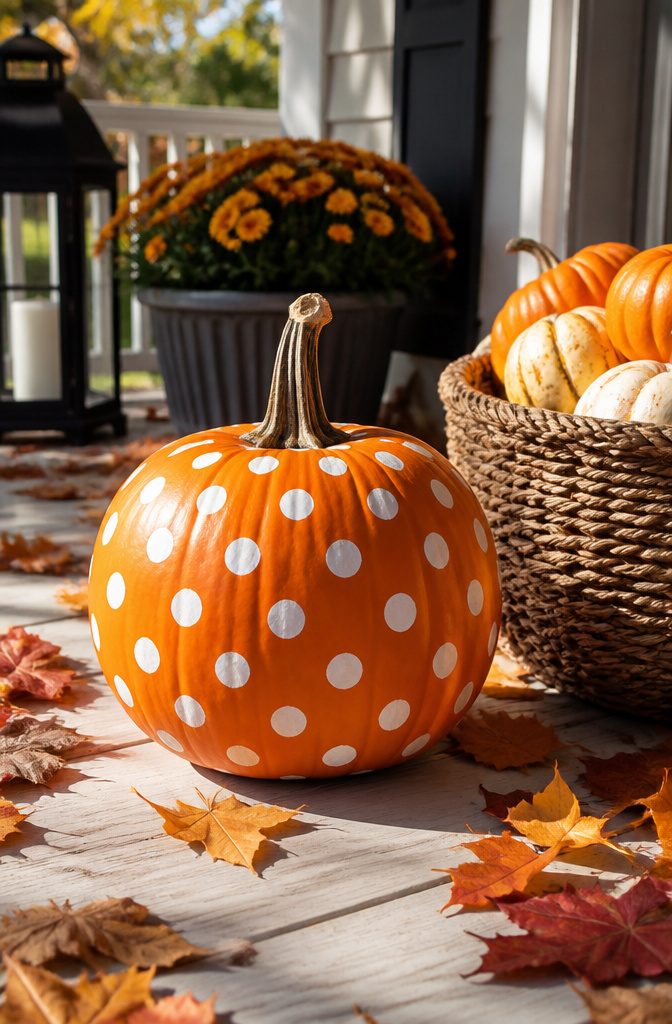
The round end of a glue stick cap makes uniform polka dots that look printed rather than freehanded.
I press it straight down into craft paint, lift without dragging, and the circle lands clean. A pencil eraser works the same way for smaller dots, though the cap gives you more paint on the stamp and fewer reloads.
Wait 30 minutes between coats.
Two layers cover the orange pumpkin skin without that thin, streaky look one coat always leaves behind. The second pass also lets you fix any dots that landed imperfectly the first time.
Spacing is where the look changes. Measured rows read as orderly and graphic; scattered placement feels looser and more playful.
I find the scattered route harder to stop, since there is no grid to follow, so I mark a few key dots first and fill around them rather than working edge to edge.

CREATIVE STENCILS: 36 PCS different pumpkin faces design, give you more Halloween stencil ideas. Perfect for painting on wood, paper, scrapbooks etc.

PACKAGE INCLUDES: one wooden rubber stamp
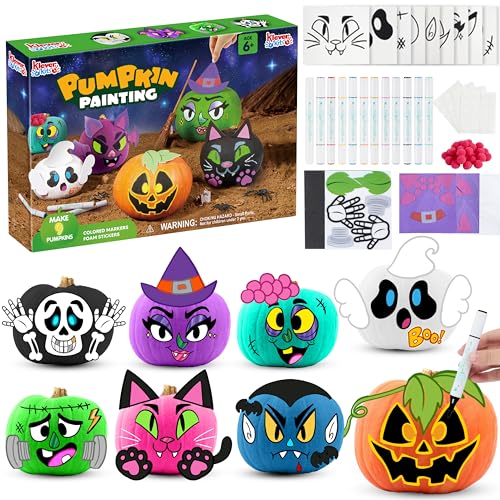
Comprehensive Set: 12 vibrant acrylic markers (red, blue, black, green, light orange, purple, pink, deep orange, gray, light brown, goose yellow), 4 dot glue bottles, 10 fuchsia hair balls, EVA foam stickers, decorating accessories, and 1 easy-to-follow manual. With this kit, you can create a total of 9 adorable pumpkin faces.
Put a Bow On It
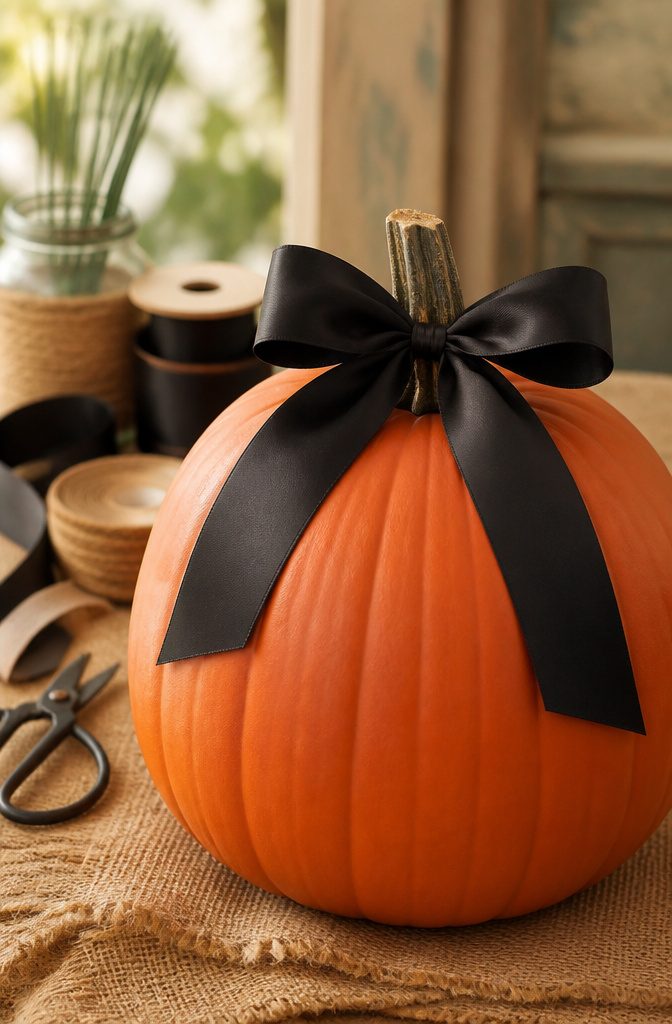
A ribbon turns a painted pumpkin from finished to dressed.
The source material mentions keeping a box of leftover ribbon in patterns and textures, mostly black and white, which suggests the look works best when the ribbon reads as a deliberate contrast rather than a match.
Satin and grosgrain hold up longest outside, especially the wired edges that keep their shape through temperature swings.
Sheer organza wilts in dew within a day or two. For attachment, floral wire threaded through the stem base beats hot glue, which softens in afternoon sun and lets the bow slide.
Wind the wire twice around the stem itself, not the pumpkin skin, since paint layers can crack under pressure.
A trailing ribbon looks romantic but drags in wet leaves and stains within a week.
The bow sitting directly on the stem, sized to the pumpkin’s width, stays cleaner and reads sharper from the sidewalk. Two loops and two tails is enough; more reads costume-party.

Autumn Washi Tape Set 10 Rolls: 10 Rolls Fall color Washi Tape, you can fully create your own DIY projects. Each Roll is 15 mm wide x 5 meters long.

Package Includes: There are 20 rolls of fall washi tape set, each roll measures about 0.6 inch x 16.4 ft/ 1.5 cm x 5 m, plenty of quantity and variety of styles to meet your daily replacement and fall DIY crafts decoration needs

Sufficient Quantity: you will receive 12 rolls of 12 styles of Halloween pink washi tape, 1 for each style in blister pack; The abundant quantity and styles are sufficient to meet your various craft and Halloween decorative tape needs
Put a Hat On It
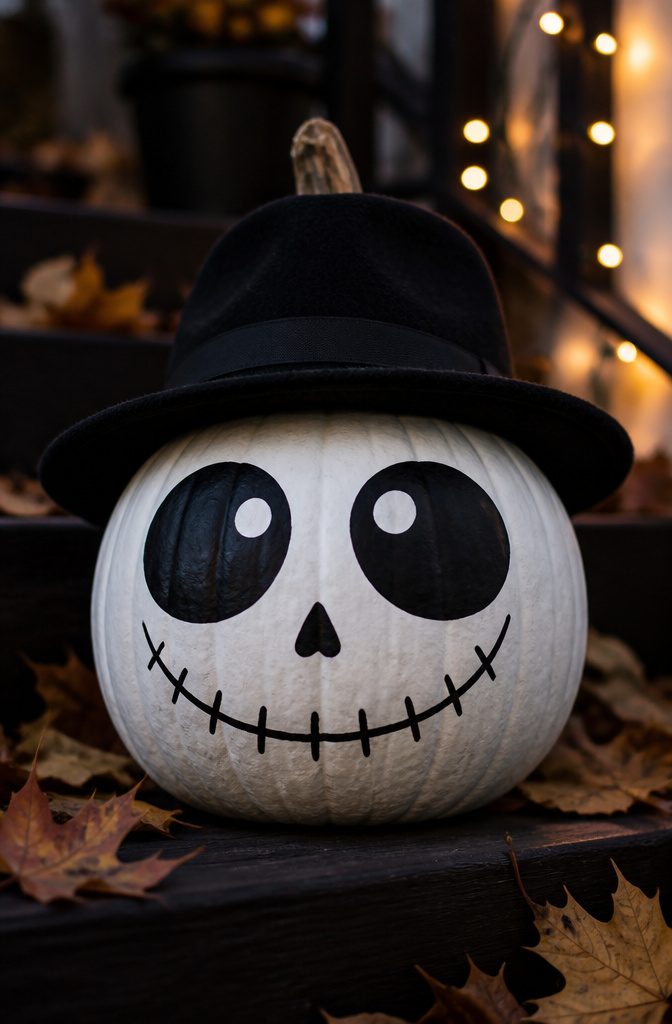
A white base coat reads from the street better than orange ever could, especially once the sun starts setting earlier in October.
Two thin coats of matte acrylic cover the ridges without filling them in; thick paint turns the whole thing into a marshmallow.
Let it dry overnight, not the two hours the bottle claims, or you’ll fingerprint the finish when you start the eyes.
The eyes need to be bigger than feels right. A tall oval, almost a cat’s eye, cuts cleanly with the edge of a foam brush and shows up from twenty feet away.
Small dots or careful detail disappear on a porch; what registers is the negative space between two white slits and the black pupil dropped into each one.
The hat is where this either becomes a character or stays craft-project cute.
A four-inch felt fedora from the doll aisle of a craft store hot-glues flat to the stem end and stays put through wind if you rough up the underside first.
Without the store run, a paper cone works fine. Roll a sheet of black construction paper into a tall cylinder, snip tabs at the base, and fold them out like a brim.
A dot of glue on each tab and the cone sits level for a week, though you’ll want to bring it inside if rain is forecast.

Layered Fall Ribbon Design: Made with mixed burlap, satin and grosgrain ribbons in buffalo plaid, orange, pumpkin, dwarf and autumn leaf patterns, this fall wreath sash adds richer texture than a single ribbon bow.

Holiday Theme Design: these fall wreath bow adopt warm tones, perfectly echoing the festive atmosphere of Thanksgiving Day and Fall Harvest; retro orange color adds a warm festival atmosphere to your porch, living room or outdoor space

Quantity: 6 different styles, 5 yard each style, total 30 yards, all of colors and design are very buautiful.
Get Personal
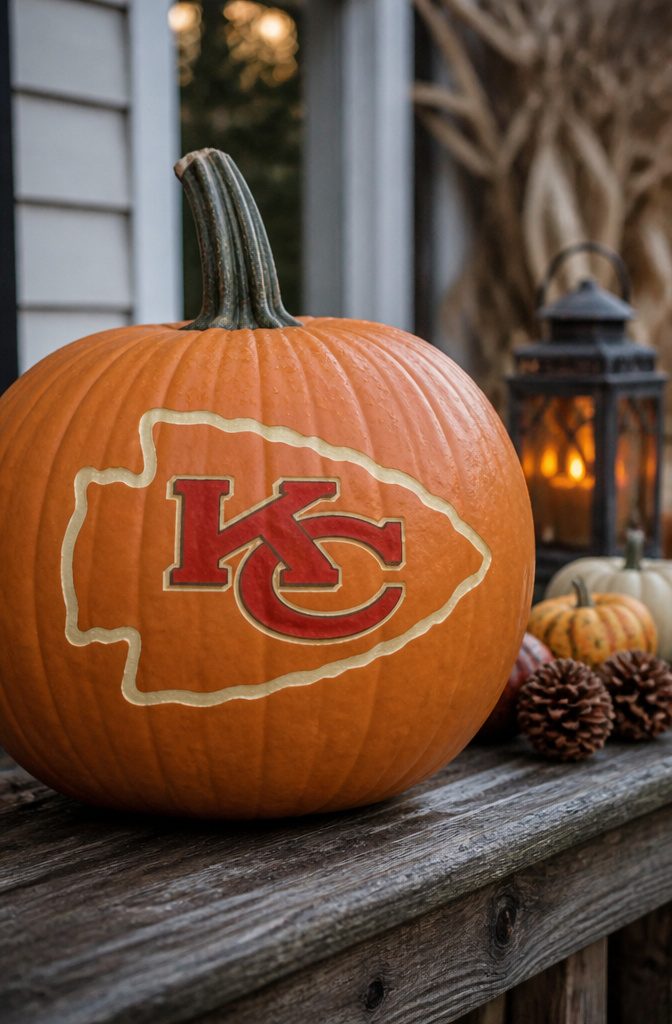
A country outline or a sports team logo lands harder than generic scrollwork because it means something specific to whoever walks past the porch.
The catch is that pumpkins are not flat. A state shape with its long panhandles and jagged borders fights the curve, so simpler shapes with fewer edges survive the surface far better.
Transferring a design starts with scaling it to the pumpkin’s real size on paper, then cutting a stencil from card stock.
Tape the stencil flat, trace the outline with a soft pencil, and peel before the paint goes on. Freehand sketching works too, but the pencil line gives you one dry run to see where the shape distorts.
I learned this the hard way with a detailed skyline that looked crisp on paper and melted into gray stripes once the ridges took over.
A single letter, a silhouette of a dog, a basic fish: these read instantly from ten feet away. The curve becomes part of the charm rather than the enemy when the design is bold enough to bend with it.

THE PACKAGE INCLUDES: 1 roll fall pumpkin wired edge ribbon is included in the package, exquisite design that is quite suitable for crafts making and gift wrapping

THE PACKAGE INCLUDES: 2 rolls wired edge ribbons with different designs are included in the package, exquisite designs that are quite suitable for crafts making and gift wrapping

Autumn-Themed Designs: This set includes 2 rolls of decorative fall ribbon featuring elegant pumpkin, floral, and leaf patterns paired with a classic orange plaid ribbon design. The warm harvest-inspired colors capture the beauty of the autumn season, making these ribbons ideal for seasonal decorating, gift wrapping, and holiday crafts.
Accessorize
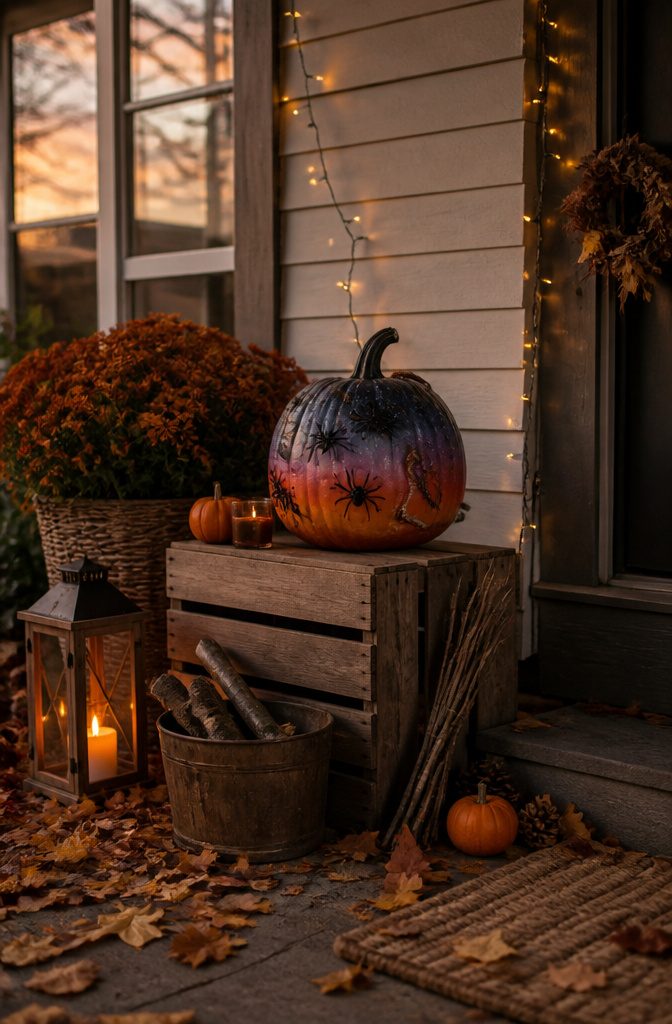
Old plastic spiders and rubber snakes from last year’s bin gain new life when they climb across a painted pumpkin instead of hanging from a doorway. The trick is attaching them without scuffing the finish you spent an afternoon building.
A drop of hot glue on the prop, not the pumpkin, keeps the paint intact and lets you peel the spider away in November with no residue.
Press the glue to the underside of the body where the legs hide it, then set the legs so they grip the curve naturally.
A snake coils best with its head at the stem and tail trailing toward the table; three spiders clustered on one shoulder read as one visual unit, while one spider on each of five pumpkins looks scattered and thin.
Weight matters more than count.
A single large spider at the base of a tall pumpkin grounds the whole piece. Two small ones halfway up fight each other for attention.
If the paint is still curing within the last day, skip the glue entirely and tuck the legs into any natural groove or stem ridge. They’ll stay put through a dinner party and come off clean.

Cozy Seasonal Patterns: Our fall pumpkin washi tape comes with 12 unique fall designs featuring pumpkins, bows, vintage trucks and maple leaves. This watercolor fall collection uses soft pink, peach and cream tones, offering a gentle palette different from classic orange brown autumn tapes.

Package includes: there are 12 rolls 15 mm/0.58inch wide washi masking tape in one package and they are available in different styles for fall Thanksgiving Day; The craft tapes are printed with pumpkin, maple leaf, sunflower, fall gnome and so on, so you can mix and match them randomly, and you can also use them in different situations to add some fun

Halloween Washi Tape Set: There are 12 rolls Halloween washi tape in different designs. With sufficient quantities and diverse styles, these washi tapes can meet your needs for Halloween crafts and gift packaging
Patterns
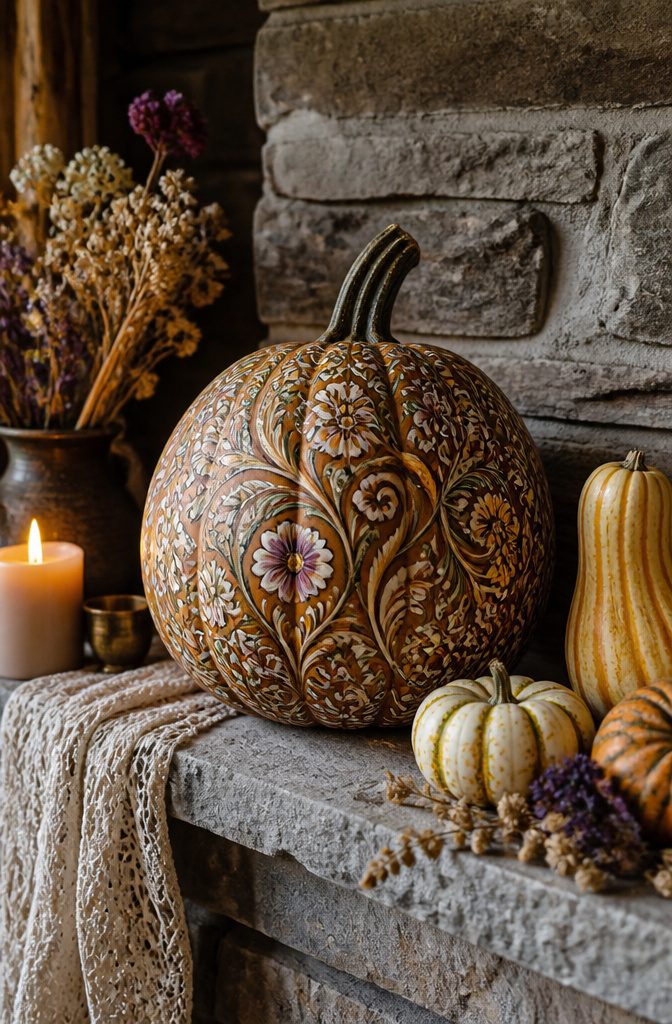
Floral and vine patterns look best when the lines follow the pumpkin’s ridges rather than fight them. A vine that climbs from the stem and curves down into the valley between two ribs reads as grown, not stamped on.
Acrylic paint pens, not brushes, give the control this needs. Posca and Arteza both cover the waxy pumpkin skin in one pass without the streaking that happens when brush bristles skate across the surface.
The 0.7 mm or 1 mm tips draw stems and curling tendrils; the 3 mm or 5 mm chisel ends fill petals fast. FolkArt multi-surface paint in the pen format also works if you already have that line on hand from basecoating.
One color has to dry before the next touches it, or the pens pick up wet pigment and muddy the line. In dry fall air that takes about ten minutes; in humidity, walk away for half an hour.
The work splits naturally across an evening, which matters because a full wrap of vines and layered blossoms runs longer than a single sitting.
For a simple floral, sketch the vine first in light green, add leaves in a darker shade once that sets, then dot five-petal flowers where the vine changes direction.
Let each layer dry. The pumpkin’s own curves become the trellis; the vine climbs, the eye follows, and the shape of the fruit does half the design work.

Quantity and Size: you will get 25 pcs reusable Halloween stencils for painting in our package, measuring approx. 5.31 x 5.31 inches/ 13.5 x 13.5 cm, they are enough for you to use and choose, full of Halloween festival elements


Product description: 4PCS Dots stencils, easily meet your various DIY painting needs.
Monster Faces
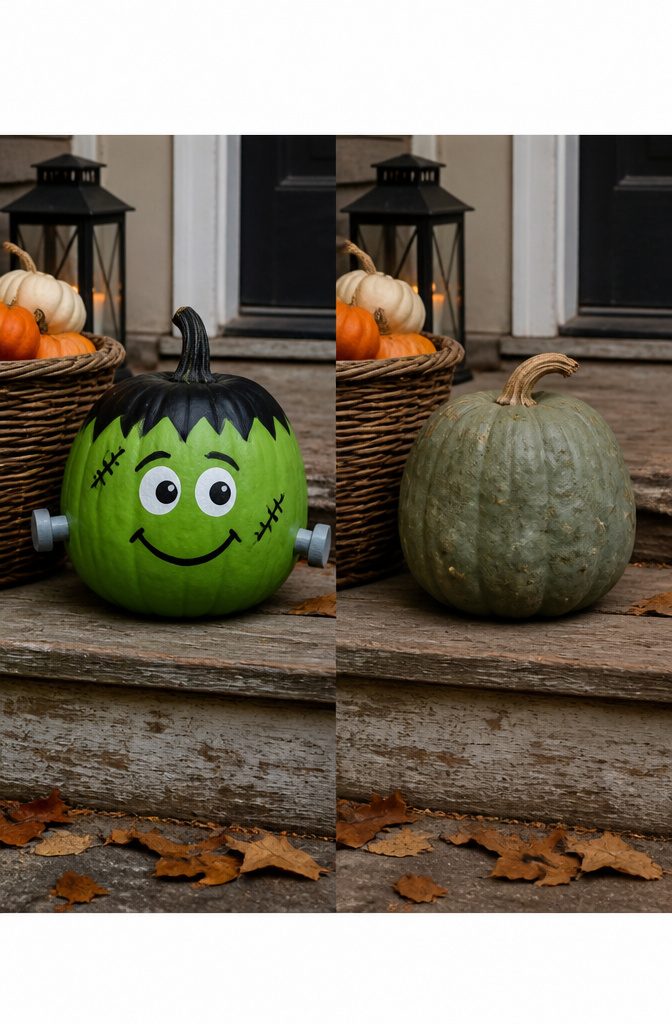
Monster faces turn even lumpy grocery-store pumpkins into something worth setting on the porch railing.
Green craft paint and a stitched black brow make Frankenstein in about ten minutes; the trick is letting the base coat dry before you draw the scar lines, or the black bleeds into wet green and you have a sad swamp creature instead.
Pale gray or off-white works for a vampire, with two small triangles for fangs placed low enough that they read from the sidewalk.
A witch needs only a pointed hat silhouette in black, maybe with a thin orange band if you want to get fancy; the face itself can stay blank or get two dots and a smirk.
The ghost is the easiest and the one that actually looks best on the weirdly shaped pumpkins: white paint covering everything but the stem, two black oval eyes, and a wavy bottom edge that you paint freehand or mask with torn paper.
Let each color dry before adding the next, or the features melt together into gray mud. These four designs share a rule: the simpler the shape, the better it reads from ten feet away on a dim October evening.

16 Spooky-Autumn Designs: Combines Halloween favorites (bats, ghosts, pumpkins) with fall elegance (maple leaves, acorns, plaid) for versatile seasonal crafts.

THE PACKAGE INCLUDES: 8 rolls of Halloween theme washi tape in different designs, they will offer enough quantity and rich styles to you for crafts and wrapping

Packing List - 12 rolls of fall washi tape with various designs and delicate and beautiful designs, sufficient for your crafts and decoration
Stenciling
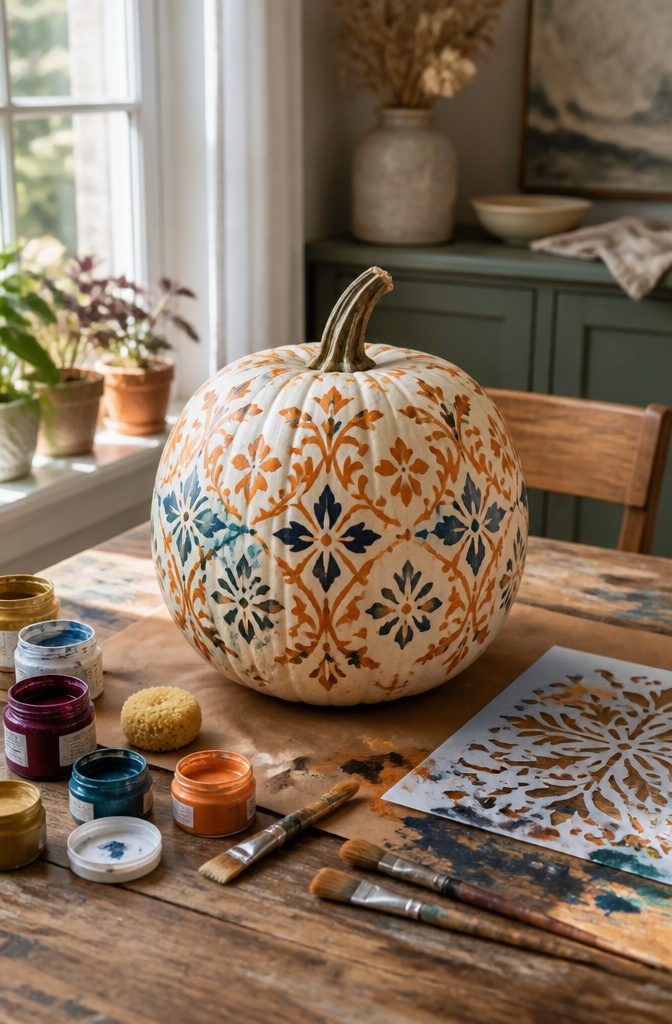
Stenciling on curved pumpkin walls goes smoother with flexible or adhesive stencils. Rigid cardboard or paper ones flatten only against a very large, nearly flat surface; on a typical pumpkin they gap at the ribs and the paint slips underneath.
A basecoat helps. I like to lay down the main color, let it dry fully, then come back with the stencil in a complementary shade.
The trick is holding the stencil flush. Tape works at the edges, but fingers pressing the center matter more; any lift and the paint bleeds through the gap.
Skip the brush. A sponge pouncer or even a regular kitchen sponge cut small dabs paint on with less liquid, so it does not seep under the edges.
Light layers, almost dry, build cleaner than one wet coat. If the color goes on faint, a second pass after the first dries fixes it; rushing blends the layers into a smudge.

Layered Halloween Design: Made with mixed burlap, satin and grosgrain ribbons in different widths, adding a fuller layered look than a single plain bow.

【About Size】The Package Comes With - 1 roll of Thanksgiving grosgrain ribbon, each roll measures 25 yards in length, and 3/8 inch in width, long enough to meet your different needs for DIY crafts and sewing.

Design: This Halloween ribbons are composed of four ribbons, including orange buffalo plaid ribbon, green spider grosgrain ribbon, purple satin ribbon, Halloween ghost ribbon. The exquisite Halloween gift ribbons are lively and colorful, which can make your gift packaging more attractive and add special festival feelings.
Marbling
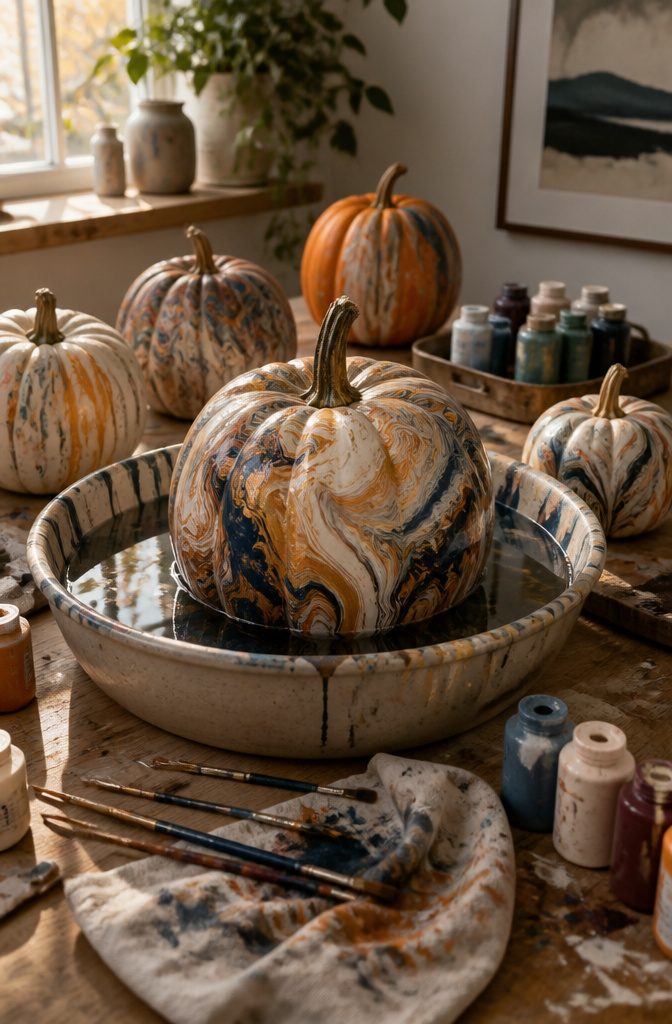
Marbling turns a plain pumpkin into something that looks like it came from a specialty shop, and the water-dip method is the most reliable way to get there.
Thinning acrylic paint with a little water, roughly one part water to three parts paint, lets it spread across the surface instead of clumping.
Thick paint sits on top and dries in ridges; thinned paint flows into those feathered veins that read as genuine stone.
Fill a bucket or wide bowl with a few inches of room-temperature water.
Drip the thinned paint onto the surface, working quickly before it sets up. A skewer or the handle of a thin paintbrush dragged through the drops creates the swirl.
The paint film wants to grab onto something solid, so the pumpkin goes in stem-first, rolled through slowly, then lifted straight out. The undipped bottom becomes the natural base.
Cleanup matters more than with other techniques.
The water gets muddy fast, so plan on changing it every two or three pumpkins. A second dip in fresh water with a contrasting color, just at the stem or just at the base, adds depth without overcomplicating the thing.

Vintage Design: Patterned with blue and leopard print pumpkins, rustic and delicate, matching with the theme of fall for your crafts and decoration

Ample Quantity and Size: with 6 rolls included in each package, our fall burlap ribbon 2 inch width offers plenty of ribbon for your decorating needs; Each roll measures approximately 4.92 yd/ 4.5 meters in length, about 2 inches/ 5 cm in width, providing you with ample ribbon to create beautiful fall crafts and decorations

Lovely Floral and Pumpkin Charm: Adorn your creations with our delightful 2.5-inch wide ribbon featuring a charming floral and pumpkin print on durable polyester. This vibrant yet soft design instantly elevates gift wrapping, adds a touch of spring to home decor accents, creates beautiful wedding bouquets & centerpieces, and inspires countless DIY craft projects. Perfect for adding a feminine and festive touch to any occasion!
Glow-in-the-Dark
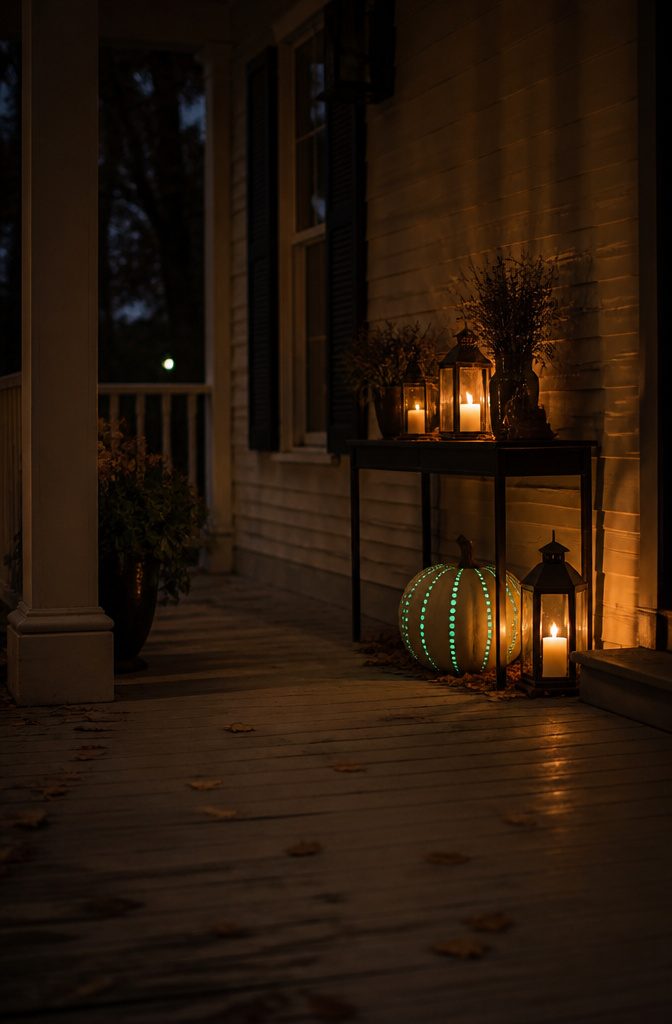
Glow-in-the-dark paint turns an ordinary pumpkin into something that actually startles guests when the lights drop.
Most craft stores stock small bottles near the acrylics, and a little stretches further than you’d expect. Three thin coats give you solid visibility; two leaves you squinting and wondering if the paint expired.
The charging step matters more than the painting itself. A bright desk lamp held close for a couple minutes does more than an afternoon near a window.
The pigments absorb that concentrated light and release it slowly, so the glow peaks right after you flip the switch and fades over an hour or two.
Skip the charge, and you’ve got a pumpkin that looks painted but doesn’t perform.
Placement makes the difference between eerie and invisible. Position these where the lights go down, not where streetlamps or porch fixtures keep them half-lit.
A dark corner of the porch, the center of a dining table before dessert, the bathroom guests visit mid-party. The surprise is half the point.
Decorative Techniques
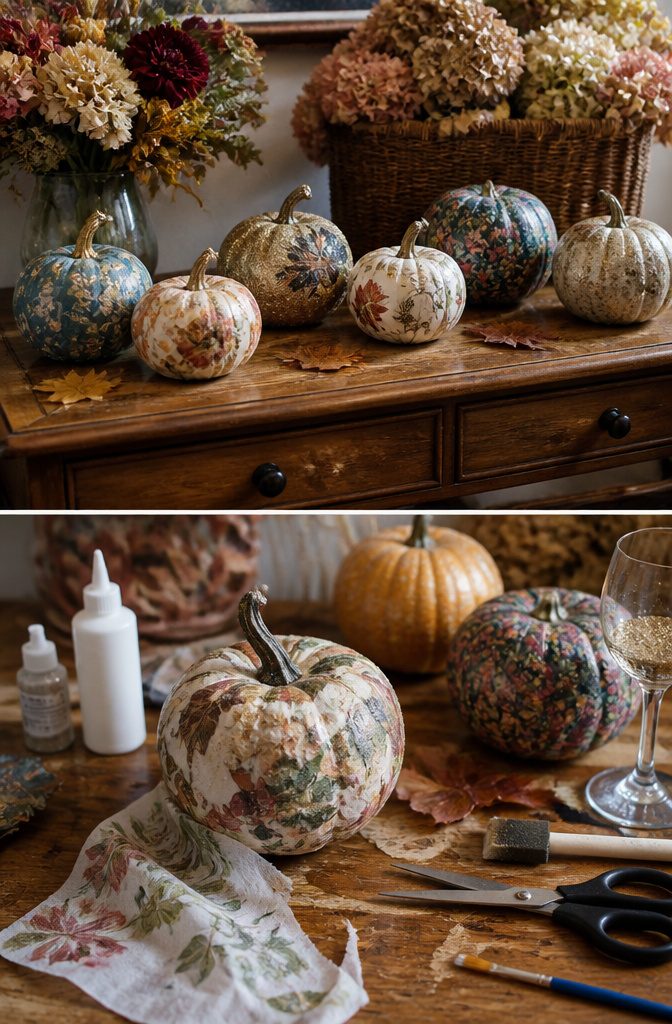
Decoupage on a pumpkin only works if the paper is thin enough to soften and stretch.
Tissue paper, napkin layers, or regular printer paper torn rather than cut will cling to curves without puckering. Thick cardstock fights the shape and leaves seams that lift within a day or two.
Glitter sheds forever unless you lock it down properly.
A spray acrylic sealer over dry tacky glue traps the sparkle without dulling it; brush-on sealers tend to drag glitter into streaks. Two light mist coats beat one heavy one, which pools in the pumpkin’s ridges and dries cloudy.
For embellishments that stick, white school glue holds lightweight items but stays slightly flexible and can loosen in humidity. Hot glue sets fast and grips the waxy skin better, though it leaves a raised bead that shows under thin materials.
Tacky glue splits the difference: thick enough to grab, dries clearer, and holds beads or sequins through a few weeks of display.
What Paint to Use
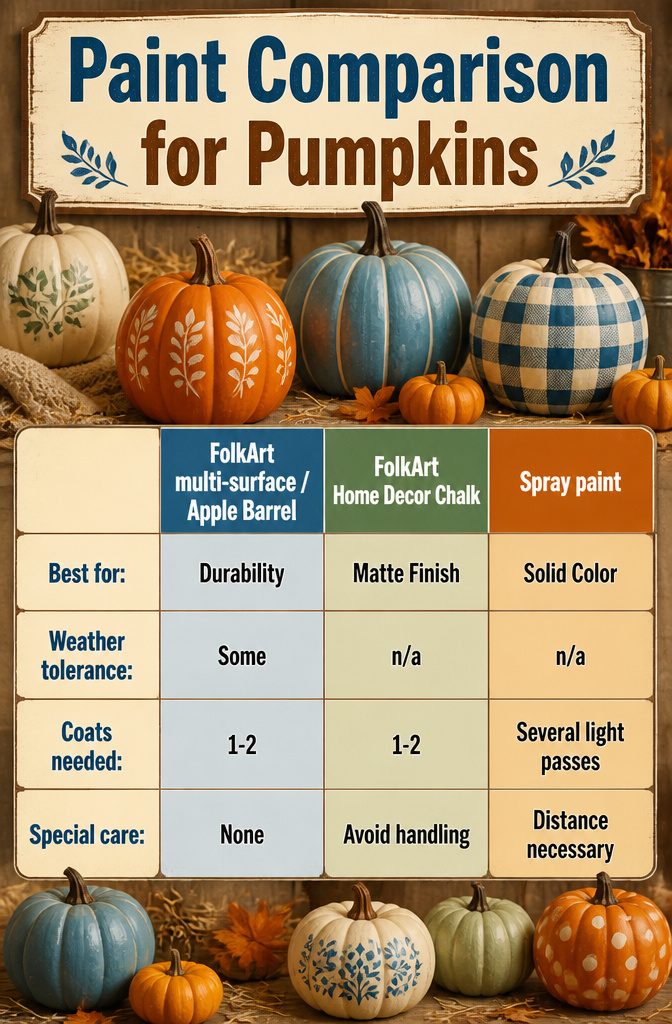
Acrylic craft paint, chalk paint, and spray paint all work on pumpkins real or fake, but the surface is slick enough that anything runny will bead or streak.
FolkArt multi-surface is the one that actually stays put; the colors cover in one pass and hold up to some weather if the pumpkin sits outside.
Apple Barrel and standard FolkArt do the same job for less money, though you may need a second coat on the pale colors.
Chalk paint, specifically FolkArt Home Decor Chalk, gives that matte, farmhouse look but chips if the pumpkin gets knocked around.
Spray paint demands patience: set the gourd on a paper bag, stay at least 12 inches back, and build up light coats so the curves don’t pool.
You will have to wait for the top to dry before you can flip it and finish the bottom.
| FolkArt multi-surface / Apple Barrel | FolkArt Home Decor Chalk | Spray paint | |
|---|---|---|---|
| Best for | Durability and color saturation | Matte, vintage finish | Solid, even base color fast |
| Weather tolerance | Some | n/a | n/a |
| Coats needed | 1–2 | 1–2 | Several light passes |
| Special care | None | Avoid handling edges | Distance, drying between sides |
Cleaning and Prep
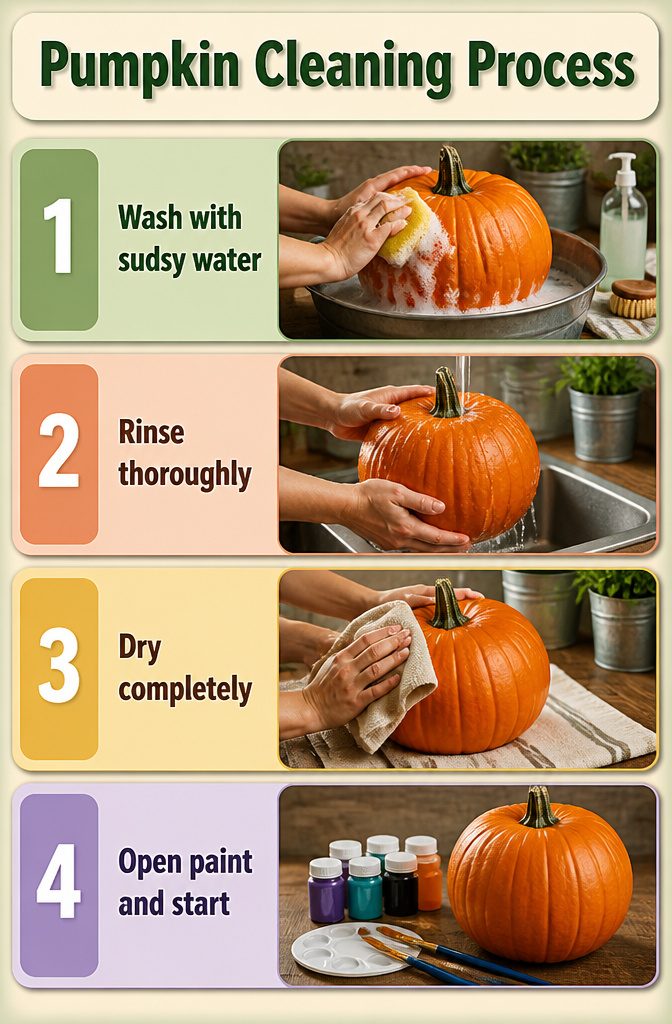
Paint will not stick to a pumpkin that still carries field dust or store grime.
The waxy cuticle that keeps the rind fresh also repels anything you brush onto it, so sudsy water and a rinse are non-negotiable if you want the finish to last more than a week.
A patch of missed dirt becomes a bubble of peeling paint by Halloween; I have seen it happen on pumpkins I only wiped with a damp cloth, thinking the surface looked clean enough.
For lighter dirt, that damp cloth works in a pinch, but the soap step matters more than most people expect.
Dry the pumpkin completely before opening the paint. Water trapped under acrylic turns the first coat milky and weak, and the second coat only seals the problem underneath.
The stem collects the most moisture, so give it an extra minute with the towel. The few minutes of washing and drying save the whole project from flaking off onto the porch steps.
Drying Time Between Coats
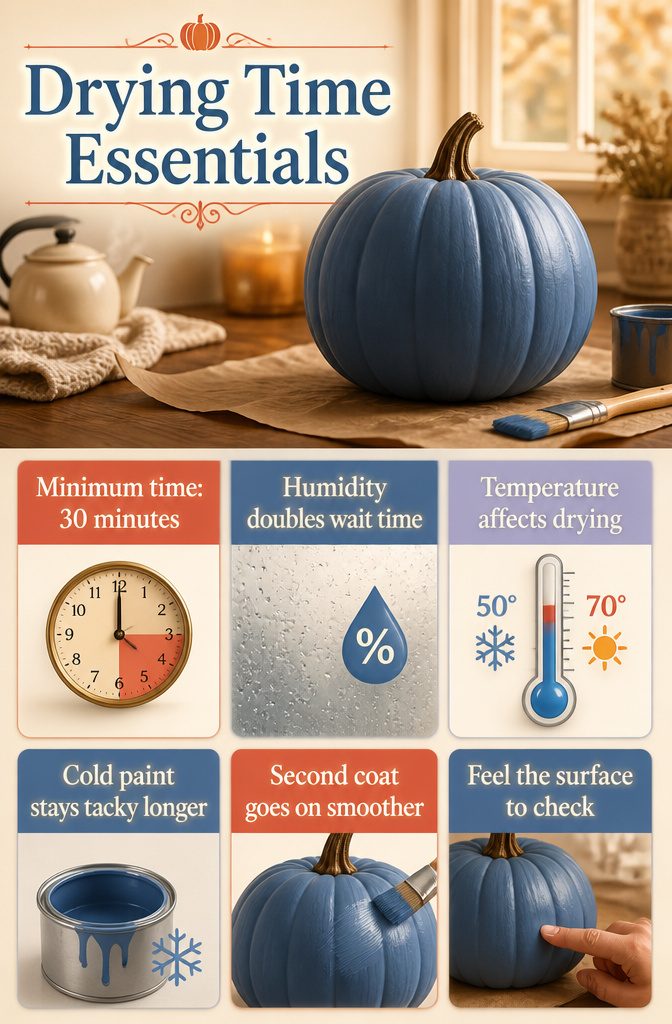
Thirty minutes between coats is the minimum that actually works, and rushing it is the fastest way to ruin the finish.
Paint that looks dry to the eye can still smudge under a brush, leaving ridges or fingerprints you’ll feel every time you pick the pumpkin up for the rest of the season.
Humidity is what stretches that window. A damp October afternoon in the kitchen with the kettle running can double the wait, while a dry, warm spot near a heating vent cuts it closer to the mark.
Temperature matters too; cold paint stays tacky longer, so a garage at fifty degrees is a slower bet than the dining table at seventy.
The surface tells you when it’s ready.
Touch the stem or an unseen patch at the base, not the face you’ve been working on. If it feels cool or drags at your fingertip at all, the water or solvent underneath is still evaporating.
Give it another ten minutes and check again. The second coat goes on smoother when the first has fully set, and that smoothness is what makes the final pumpkin look finished rather than homemade in the wrong way.
Adding Ribbons, Felt, and Beads
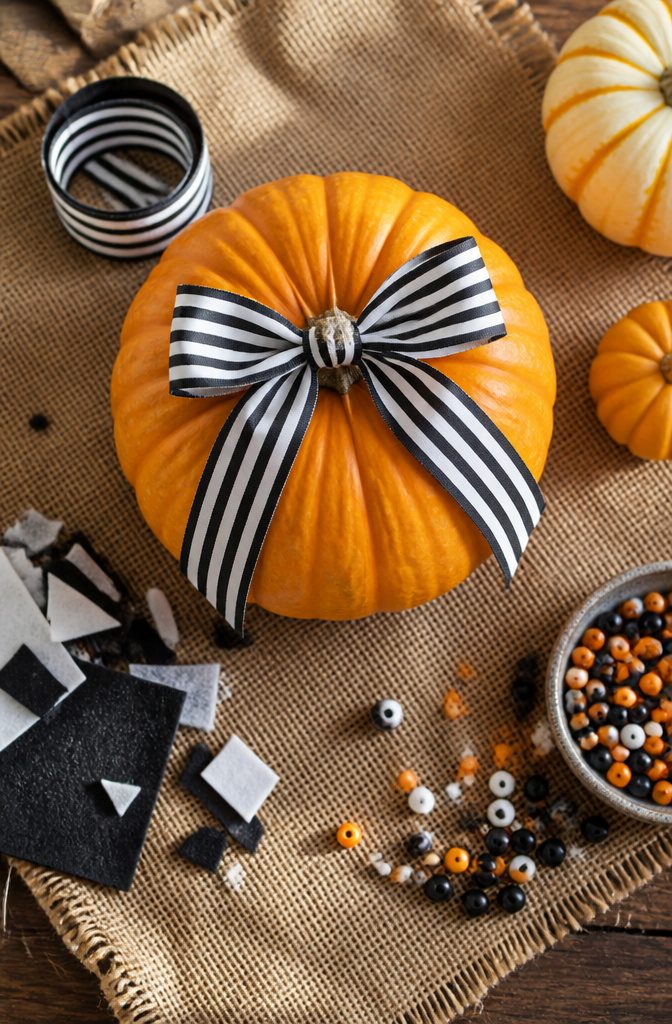
Paint alone sometimes falls flat, and that is where ribbon, felt, and beads earn their keep. The trick is attaching them without lifting the paint you already laid down.
Wait until the craft paint has cured fully, not just dried to the touch.
Thirty minutes between coats is standard, but overnight is safer before you add anything with glue. For ribbon, a thin line of hot glue on the pumpkin’s natural rib, not across the painted face, keeps the finish intact.
Felt shapes, like ears or leaves, need the same treatment: glue the edges that touch bare skin or a rib, and the painted surface stays untouched.
Beads threaded onto wire and poked into the stem cavity stay put without adhesive near the paint at all.
For outdoor pumpkins, ribbon with a tight weave survives dew better than loose gauze, and wool felt holds up longer than the acrylic craft sort. I skip paper elements entirely; one damp morning and they are pulp.
The black-and-white ribbon trick from last year’s gathering still works: dig through your leftover bag for patterns that contrast the orange, tie a bow around the stem, and the pumpkin reads finished without a brushstroke more.
Where to Display Painted Pumpkins
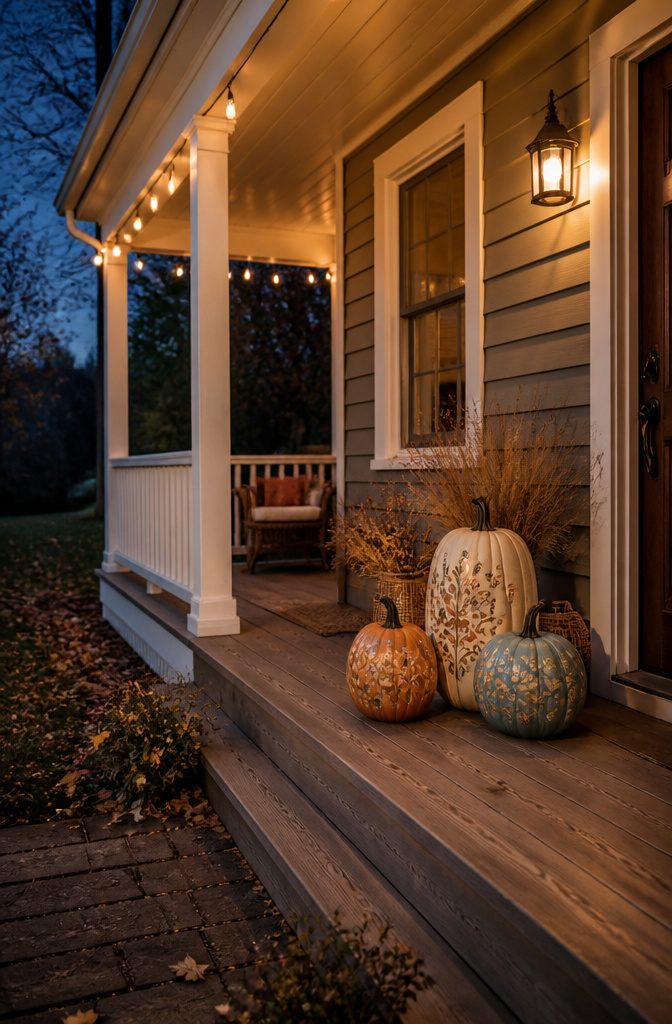
Painted pumpkins work best where the light is soft and indirect.
A covered front porch, a mantelpiece, or the center of a dining table keeps the colors intact far longer than a spot that gets afternoon sun, which will bleach even acrylics within a couple of weeks.
I learned this the hard way with a set of matte navy pumpkins that turned almost periwinkle after ten days on a sunny steps.
For a centerpiece, group three pumpkins in odd numbers at different heights and tuck in some dried grass or a few bare branches.
The paint gives you a cleaner, more modern look than carved jack-o-lanterns, so the arrangement reads as fall decor rather than Halloween leftover.
Bring painted pumpkins inside if a freeze is forecast. Once the interior cells rupture, the skin softens and your paint surface will crack or weep within a day or two, no matter how well sealed.
A garage or mudroom works fine; they do not need house temperature, just above freezing.
Frequently Asked Questions
What kind of paint is best for pumpkins?
Acrylic craft paint, chalk paint, and spray paint all work on real or fake pumpkins. FolkArt multi-surface is the standout choice; it covers in one pass, stays vibrant, and tolerates some weather if the pumpkin sits outside.
Apple Barrel and standard FolkArt are cheaper alternatives, though pale colors may need a second coat. Chalk paint gives a matte farmhouse look but chips easily if knocked around.
How do I clean pumpkins before painting?
Wash the pumpkin in sudsy water and rinse it thoroughly. The waxy cuticle that keeps the rind fresh also repels paint, so skipping the soap step leads to peeling within a week.
Dry the pumpkin completely before opening any paint; water trapped under acrylic turns the first coat milky and weak, and the stem holds the most moisture so it needs extra attention with the towel.
Can I use fake pumpkins for painting?
Yes, fake pumpkins work fine for painting and can be reused year after year.
The article notes that all paint types covered, FolkArt multi-surface, Apple Barrel, chalk paint, and spray paint, work on pumpkins real or fake, so the techniques and paint recommendations apply either way.