The best fall pumpkin crafts for 2026 run from a ten-minute toilet-paper-roll cluster to a full afternoon of yarn and glue, and the deciding factor is almost always drying time, not skill.
A half-inflated balloon wrapped in glue-soaked yarn needs most of a day to harden before you can pop it, while embroidery hoops and a twig stem go from raw materials to mantel-ready in about twenty minutes.
1. Embroidery Hoop Pumpkins
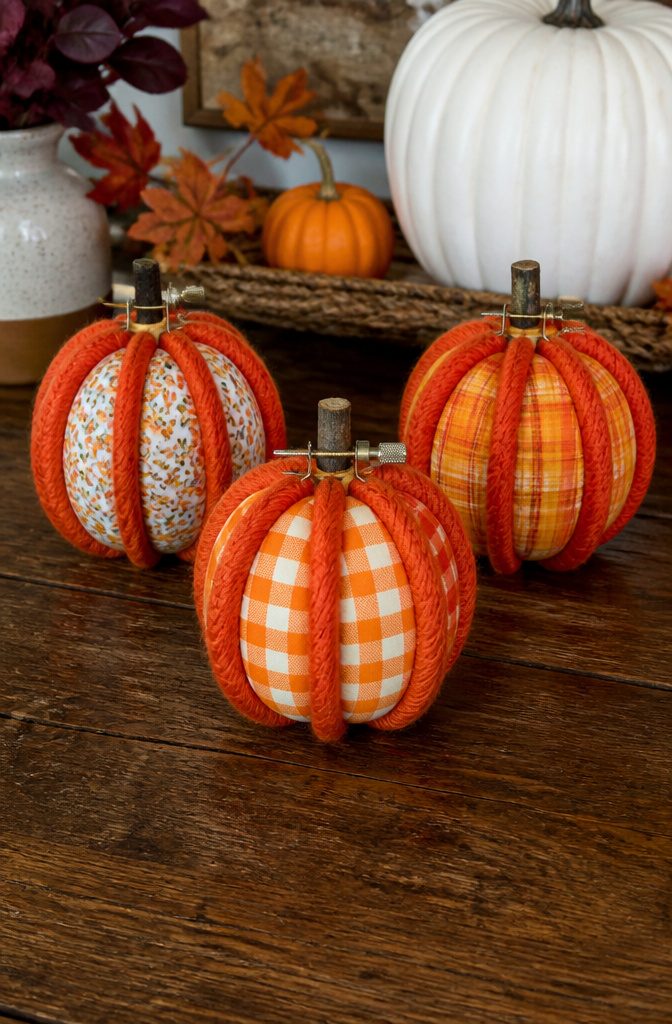
Wooden embroidery hoops make the cleanest pumpkin shape without any carving. A 4-inch hoop hits the sweet spot for small table decor: visible enough to matter, small enough to group in threes.
Wrap the outer ring in orange yarn or a strip of fall-patterned fabric from the thrift store, leave the hardware at the top for texture, and wedge a 1/2-inch twig into the center for a stem.
The yarn tension usually holds the twig without glue, though a dot of hot glue settles any wobble.
I like the gap between inner and outer hoop rings; it casts a thin shadow that reads as pumpkin ribbing in low light.

Product Content: You will receive 12 pieces 10cm/4inch embroidery circles. The rich quantity can perfectly meet your daily needs and replacement. They are fine workmanship and no burrs.

HIGH QUALITY HOOP - Ornament embroidery hoop are made of high quality rubber, thicker and more durable. Embroidery hoop is very flexible and durable. The rubber material has good compression resistance. The wooden texture and heavy-duty design are very textured. Make your embroidery easier.

Material: Made of bamboo, without burr, sturdy, smooth and safety to your body
2. DIY Pumpkin Vase
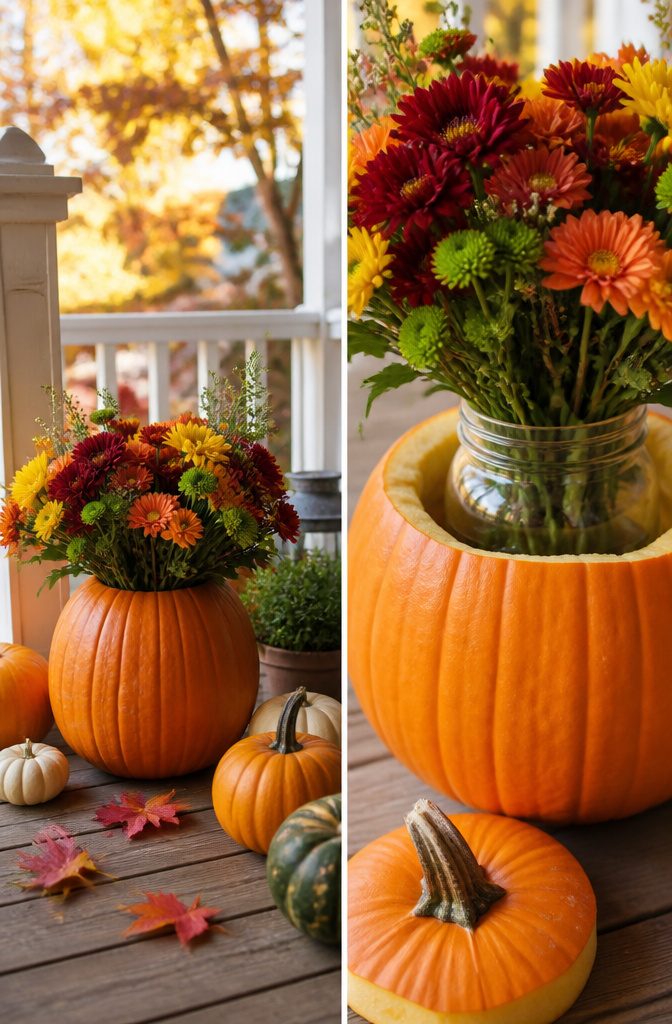
A pumpkin vase works with either real or faux pumpkins, and the build changes slightly depending on which you pick.
For real pumpkins, the hollowed shell lasts about a week before softening, so timing matters if you are using it for a specific dinner.
Faux pumpkins skip the rot issue entirely and can be stored for next fall with the foam left inside.
The opening at the top needs to fit your insert. Floral foam lets you place stems individually, which is the route to take for a loose, asymmetrical arrangement.
A small water-filled vase dropped inside is faster, and a $1 mason jar close to the pumpkin’s diameter does the job without cutting the foam to shape.
I have seen both approaches look sharp; the mason jar wins for cleanup, since you lift the whole bouquet out to change water rather than wrestling soggy foam from the shell.
A box cutter handles the lid cleanly enough for this, no need for specialty carving tools. Measure the insert against the pumpkin before cutting, erring slightly small, you can always widen the hole but you cannot shrink it.
3. Vintage Farmhouse Pumpkin
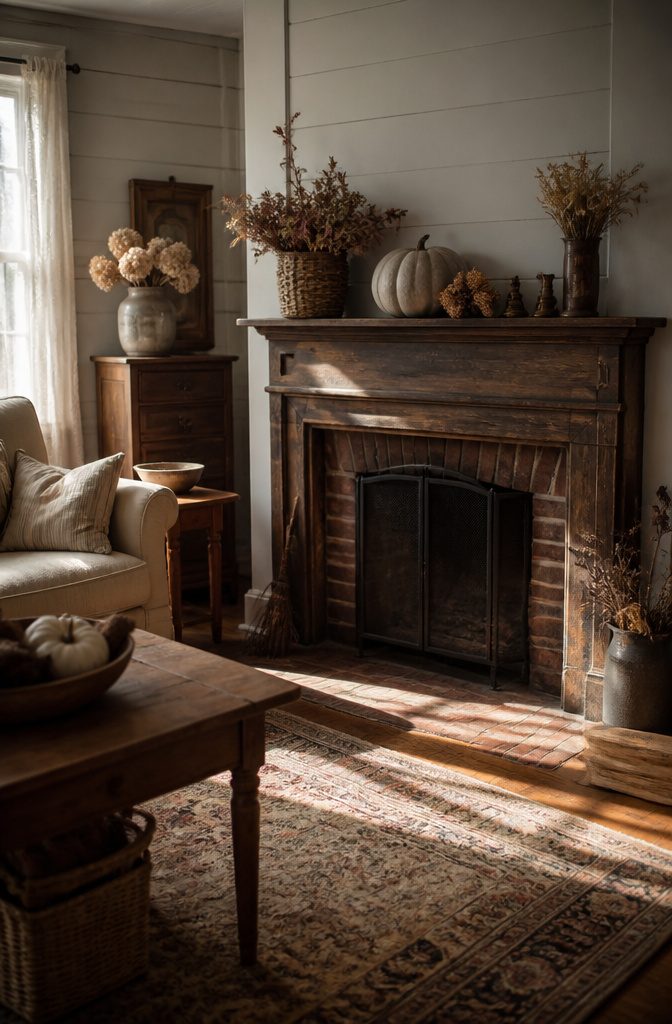
A foam craft pumpkin from Michaels, picked up at 50% off, takes paint in a way the glossy surface never promised. The cheap, obviously fake shell becomes the point once you work against it instead of hiding it.
Dry-brushing is the faster path to the aged look. Load a brush with off-white or pale gray, wipe most of it on a paper towel, then drag the bristles across the ridges so only the high points catch color.
Two or three passes build the dusty, sun-faded finish without any waiting between coats.
For deeper cracks and a real weathered feel, brush on crackle medium first, let it do its work, then paint over; the topcoat splits as it dries, leaving lines that read like old barn wood.
Fabric works too, though the method shifts. Cut strips 2–3 inches wide from soft plaid or a scrap of old quilt, brush Mod Podge directly onto the foam, and smooth the fabric over the adhesive.
The ridges stay visible underneath, and the matte, slightly rough surface reads as something found in a back shed rather than bought last week.
Either finish belongs on a mantel or deep shelf where the light hits from the side. The shadows in the cracks do half the work of making it look collected rather than crafted.

This package contains one 3.25" x 6" green FloraFōM vase insert.

VALUE PACK:12pcs artificial pumpkins are included in total,great quantity for satisfying your needs in home decoration.

🌷【PREMIUM FOAM BLOCKS- Premium supplier for florists and flower arrangement lovers】- 4 PCS small floral foam blocks are included, each them measures about 3.15 inch X 1.6 inch. The dry floral foam is soft, durable and safe,quickly to absorb water. This is a small size flower foam, please make sure you have confirmed the size before purchase!
4. Fabric Pumpkins
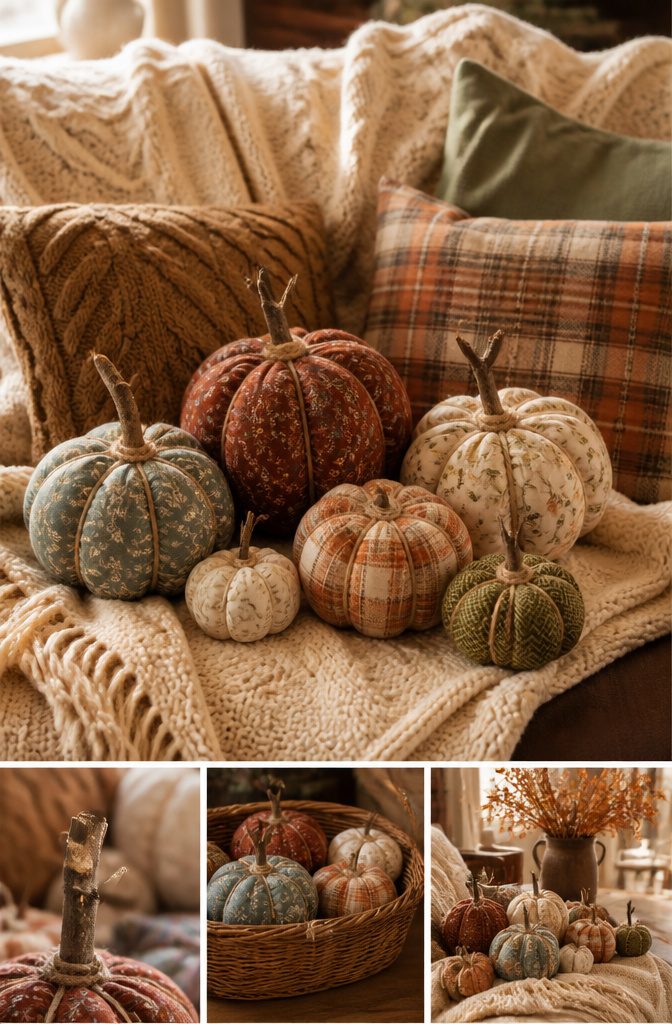
Stuffed fabric pumpkins are the craft that shows up most often when you start pulling ideas for fall, and for good reason: the materials are already in most houses, and the shape forgives uneven work.
A circle of fabric, some filling, and a running stitch around the edge pulled tight creates the basic form.
For the ridged look that reads as pumpkin rather than ball, twine wrapped in sections and pulled into the center before knotting does the work of sewing darts.
The no-sew shortcut uses rubber bands instead of thread. Lay your fabric flat, pile filling in the center, gather the edges and cinch with a rubber band, then wrap additional bands around the outside to create sections.
A branch or cinnamon stick pushed into the center covers the gathering point and reads as a stem. Sources note these take about ten minutes each once the fabric is cut.
Size variation comes from scaling the circle. One source works with 18-to-20-inch squares for large toilet-paper-roll bases, while smaller pumpkins use dinner-plate circles or less.
The same method scales up and down, which means a mantel or tablescape can hold a whole patch without learning new technique for each piece.
What separates the good ones from the craft-fair pile is the stuffing.
Overstuff and the sections bulge flat; understuff and the pumpkin collapses under its own fabric weight. The sweet spot is firm enough to hold a shape, soft enough that the twine sinks in slightly.

Packing quantity: you will receive 24 pieces plastic pumpkin stems, including 6 different colors and sizes, 4 of each style, in sufficient quantity to meet your various Halloween and Thanksgiving decoration needs

Create Your Own Cozy Fall Ambiance: get a set of 7 white foam pumpkins pressed floral pumpkins and 100pcs autumn faux dried flowers kit, 2 tubes of white glue (15 ml each) and 1 black precision tweezers (12.3 cm)— no crafting experience needed

Create Your Own Cozy Fall Ambiance: get a set of 7 white foam pumpkins pressed floral pumpkins and 100pcs autumn faux dried flowers kit, 2 tubes of white glue (15 ml each) and 1 black precision tweezers (12.3 cm)— no crafting experience needed
5. Painted Pumpkins
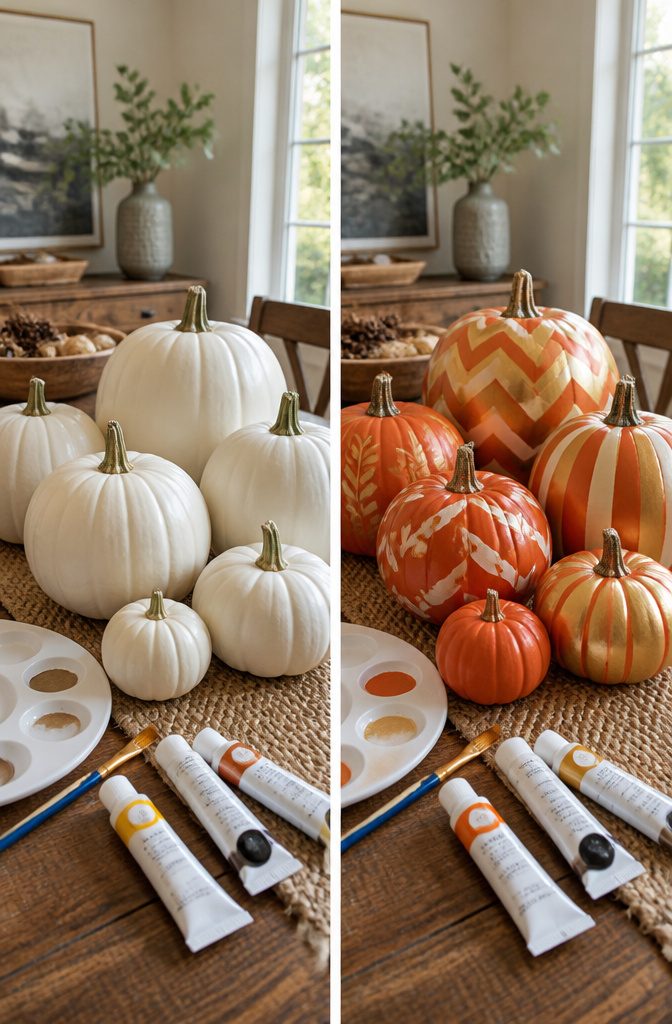
Acrylic paint opens up more options than most people expect from a pumpkin.
Real ones work fine if the surface is clean and dry, but faux pumpkins (foam craft ones from Michaels, glass ones you’ve had for years) take paint without the worry of rot and can be stored for next fall.
Either way, fifteen minutes between coats keeps the finish from dragging or streaking.
Patterns worth trying run from buffalo check to solid gold coverage to color blocking with masking tape.
Foam brushes beat bristle brushes for this job. The flat edge deposits paint evenly across curved ridges and doesn’t leave brush marks the way bristles do, especially on foam craft pumpkins that start out with that cheap, porous look.
Two thin coats usually cover it. For a matte, heirloom-style finish, chalk paint works over regular acrylic.
Save the stems from real pumpkins and glue them onto painted faux ones if you want the natural look without the shelf life.

Charming Set: 2 pcs artificial rattan-wrapped pumpkins, rustic and eye-catching, suitable for creating layered table centerpieces, mantle displays, or pairing with candles and autumn leaves

Quantity: Package includes 12 pcs Artificial Harvest White Pumpkins in assorted sizes.

Timeless Elegance with Terracotta Charm: elevate your home decor with our terracotta pumpkin decoration, designed with an antique terracotta-inspired craftsmanship; Each pumpkin features a delicate matte texture, offering a gentle vintage feel that mimics natural terracotta; This sophisticated design seamlessly enhances any setting with a high-end farmhouse style, making it suitable for any harvest season display; Enjoy the harmonious blend of rustic charm and modern elegance
6. No-Sew Sweater Pumpkins
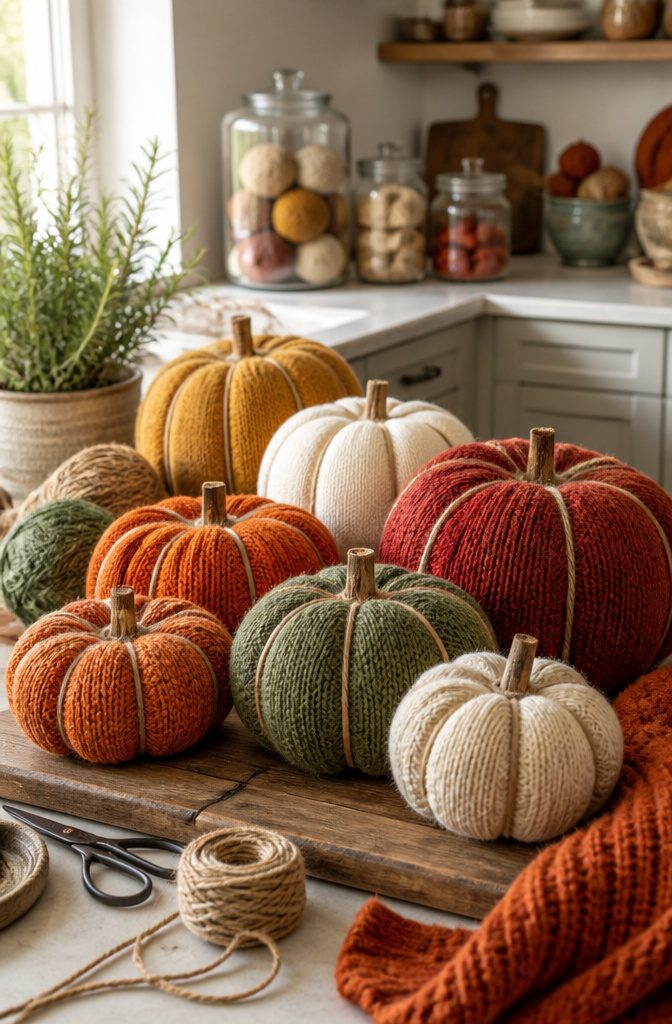
Soft sweaters in fall colors are the starting point, and thrift stores usually have plenty this time of year.
The sleeve already has a finished cuff, which saves one end of the pumpkin from fraying. Cut it a little longer than you want the finished pumpkin to be; the stuffing and the gathering will eat up length.
Stuffing is where fabric thickness matters.
A thin, loose-knit sweater compresses too much and the pumpkin ends up looking deflated. Thick cable-knit or dense wool holds its shape and lets the ridges read clearly.
Very bulky yarn knits can go too far the other way, bunching at the base and refusing to sit flat no matter how much glue you add.
Twine wrapped around the stuffed sleeve does the shaping.
Pull it tight enough to create segments, working from top to bottom, and the ridges get deeper with every pass. Knot it off, then fold the raw bottom edge inward and hot-glue it shut.
Wine corks make better stems than you’d expect; the texture picks up the sweater’s fuzz and the proportions feel right on a palm-sized pumpkin. Each one takes about ten minutes once the glue gun is hot.

Product Content: You will receive 6 pieces 10cm/4inch embroidery circles. The rich quantity can perfectly meet your daily needs and replacement. They are fine workmanship and no burrs.
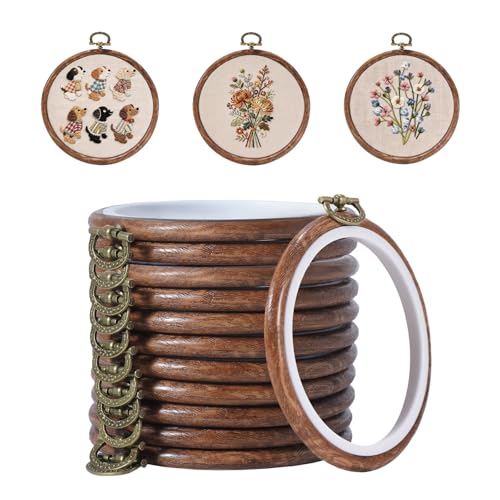
Premium Quality & Flexible Material: Made from high-quality PP + PVC rubber, this embroidery hoop is durable, wear-resistant, and highly flexible without cracking or breaking. The smooth, burr-free surface protects your fabric and hands, making this small embroidery hoop easy to use for both beginners and experienced embroiderers, while also serving as a long-lasting decorative embroidery hoop after your project is finished.

Universal Application---Embroidery rings perfect for Christmas crafts,party decorations,wedding decorations,dreamchasers and more in your DIY project. Fits for needle arts, cross stitching, hand embroidery, fabric painting and much more.
7. Yarn Pumpkins
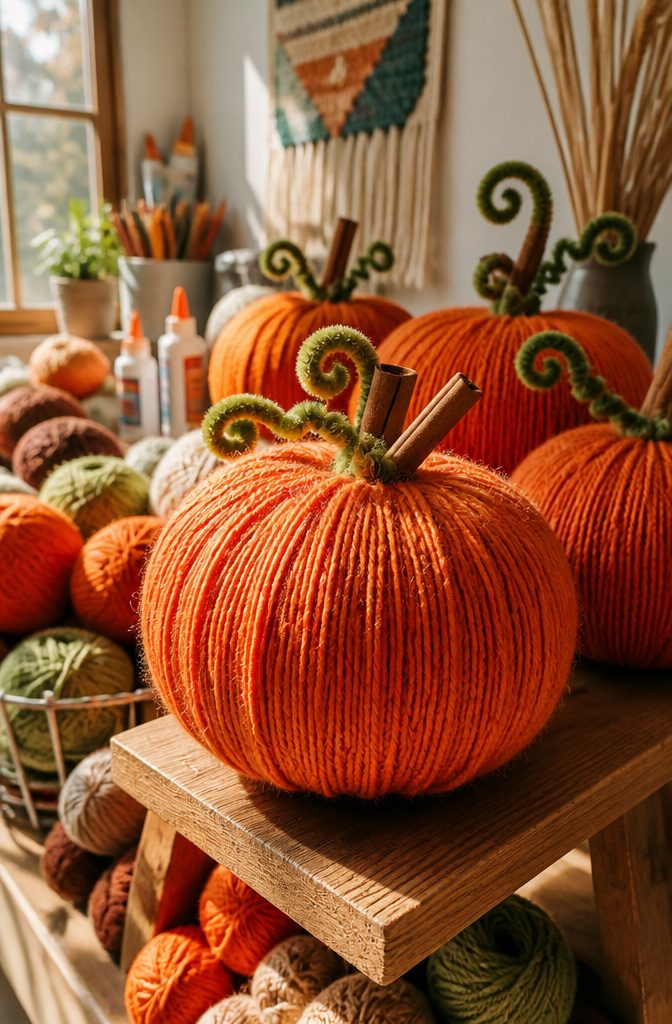
Yarn pumpkins work with either balloons or foam balls, and the choice changes the whole job. Balloons need only orange yarn, white glue, and something to shape the stem afterwards, like a pipe cleaner.
I soak about two to three arm-lengths of yarn in glue, then wrap it around a half-inflated balloon rather than a full one. The tighter curve holds its shape better once hardened.
Drying takes the better part of a day, sometimes longer in humid kitchens.
The glue needs to go fully rigid before the balloon comes out, or the whole sphere collapses. I wait until the shell sounds hollow when tapped, then poke a slow hole near the knot rather than popping it outright.
A sudden burst can warp the still-curing yarn. Once the balloon deflates, it usually peels away clean; any stubborn bits lift out with tweezers.
Foam balls skip the balloon step entirely but need more prep. A serrated knife cuts a larger flat spot on the bottom and a smaller one on top to mimic a pumpkin’s squat shape.
The foam makes less mess if you cut all the balls at once and brush them off before you start wrapping. Either way, the yarn goes on in the evening while something else plays on the television.
8. Toilet Paper Roll Pumpkins
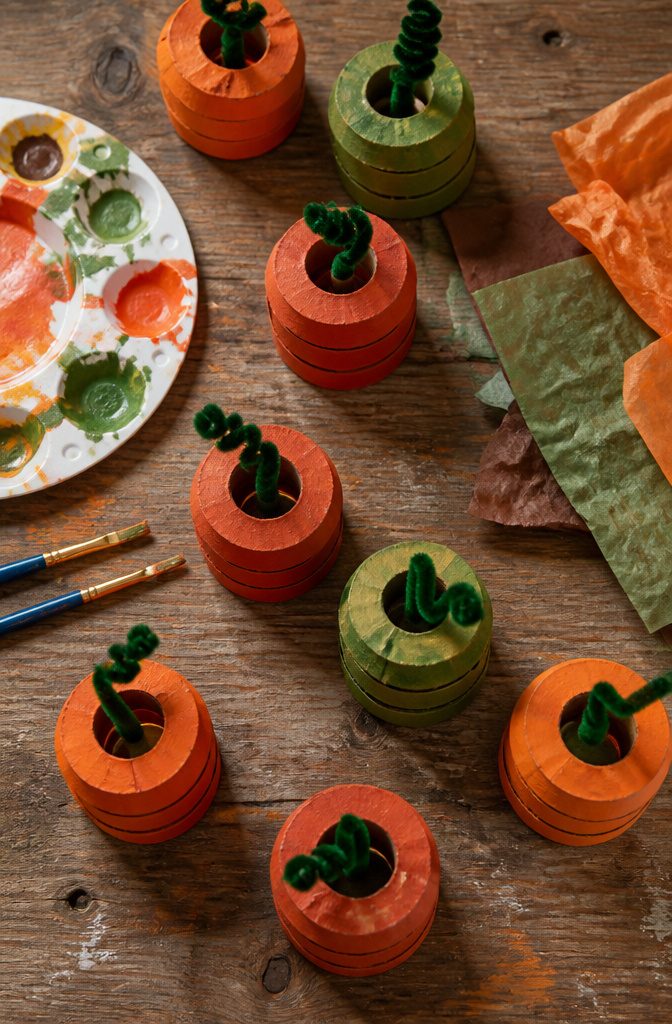
Toilet paper rolls flatten into strips that are easy to cut into rings, and a batch of about six pumpkins takes roughly fifteen minutes once the paint is out.
Four or five rings threaded onto a pipe cleaner pull together into that squat pumpkin silhouette.
Paint them orange first, or leave the cardboard bare for a rougher look. A green pipe cleaner twisted at the top works as a stem, and a leaf cut from construction paper finishes it.
Some versions skip the paint entirely and wrap the rings in orange yarn or tissue paper instead, which hides the cardboard faster and keeps the mess down. The whole thing disassembles when November ends, so storage is not a problem.

🌼 Round Floral Foam Blocks – Pack of 6 Includes six premium round floral foam blocks (4” x 1.4”) designed for beautiful flower arrangements, DIY crafts, weddings, parties, and home décor projects.

Complete DIY Autumn Centerpiece Set: this fall floral centerpiece bulk package includes 6 fall leaf floral cylinder vases and 6 high-density floral foam blocks; This floral arrangement kit provides sufficient quantity for large Thanksgiving dinner tables, harvest festivals, and various seasonal party decorations

【Strong & Durable – Withstands Repeated Use】 Made from dense, high-quality foam that holds artificial and dried flower stems firmly in place. Unlike cheap foam that crumbles, ours stays intact even after multiple arrangements.
9. Egg Carton Pumpkins
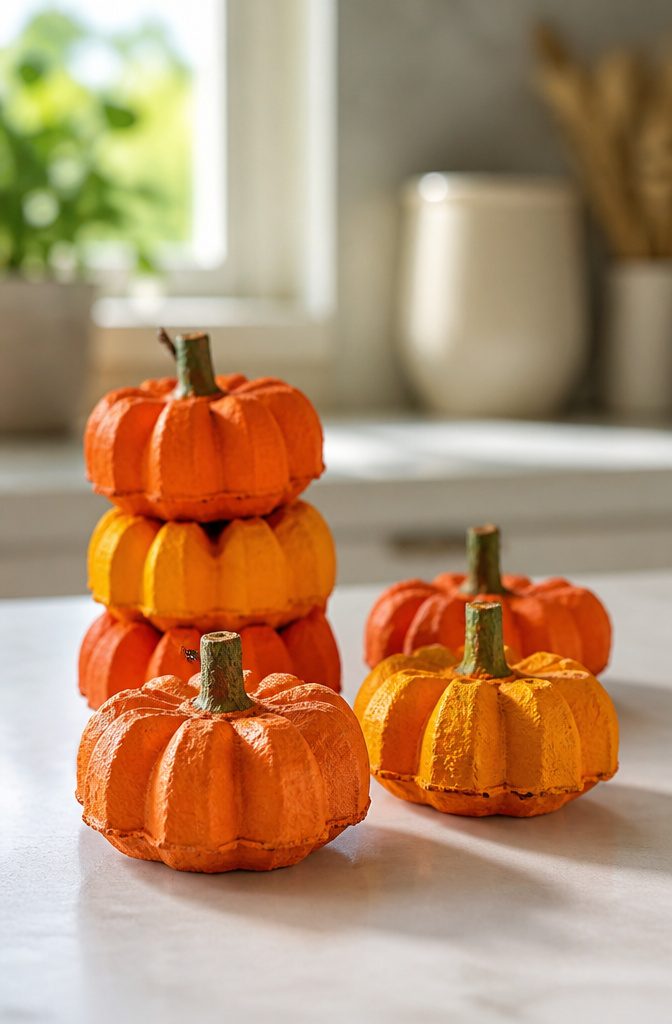
Cardboard egg cartons break apart into perfect little cups that already curve like pumpkin halves. I cut them out with kitchen shears, leaving the center peak attached because that bump becomes the ridge where a real pumpkin creases.
The cardboard drinks up acrylic paint, so two coats of orange cover the gray without the mud-colored streaks that happen when kids rush it.
A brown or green pipe cleaner poked through a small hole at the top finishes the stem; twisting it into a little curl helps it stay put.
Stack two painted cups together, ridges aligned, and the shape rounds out into something that reads as pumpkin from across a room.
Single cups work too, flattened slightly so they sit steady on a windowsill. The whole project stays in the true recycled-craft zone: no trips to the craft store, no waiting for Amazon.
A standard dozen-egg carton yields twelve mini pumpkins, which is either one very committed afternoon or a classroom party solved. Cleanup is water and a rag.

Create Your Own Cozy Fall Ambiance: get a set of 7 light yellow foam pumpkins pressed floral pumpkins and 100pcs autumn faux dried flowers kit, 2 tubes of white glue (15 ml each) and 1 black precision tweezers (12.3 cm)— no crafting experience needed

QUALITY FOAM HALLOWEEN PUMPKINS:Foam Halloween pumpkin are made of soft foam material which is soft and thick, odorless and durable in use. Halloween craft kit is great for DIY decorations for Halloween or Thanksgiving festival. This is not for Children under 14years old.

Quantity: Package Includes 7 Pcs Artificial Harvest White Pumpkins In Assorted Sizes.
10. Paper Plate Pumpkins
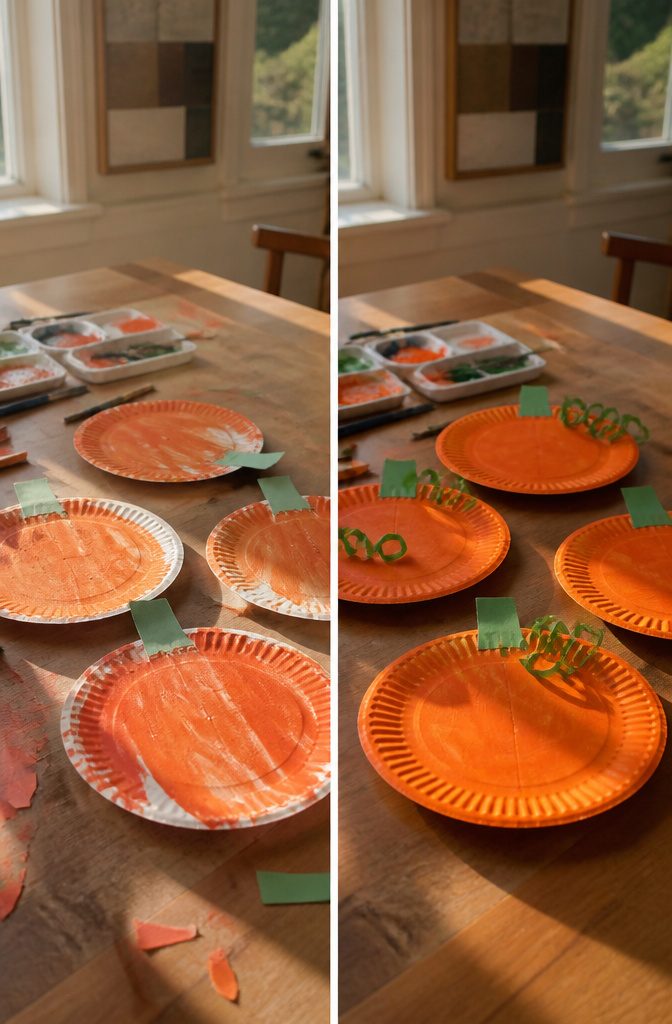
Cheap paper plates are the right canvas for two very different moods. One method is painted solid orange with a green construction paper stem glued on top.
The other is a ripped-paper collage, where you tear construction paper into scraps and layer them until the plate disappears. Toddlers do better with the tearing; the fine motor work is the whole point, and perfection is not.
Painted plates suit anyone old enough to hold a brush and wait for drying. Both versions sit flat on a table, store in a bin without crushing, and cost about the same as the paper goods aisle already costs.

Quantity: Package includes 7 pcs assorted artificial cream pumpkins, enough for your festive decorations. They make an absolutely stunning autumn centerpiece! Decorate your home for the harvest season with these faux cream pumpkins. They can be used to decorate the kitchen, dining table, study room, mantel, shelves, coffee table windowsill, etc. Or combine them with artificial gourds, corn, and other harvest veggies to create an autumn-inspired display.

Quantity: Package includes 12 pcs small artificial pumpkins. You can choose to display these small realistic pumpkins on their own or combine them with other pieces to create an autumn vignette. This pack of 12 orange faux pumpkins will bring a more festive look to your home decor. From your front porch to your kitchen island, these faux pumpkins will make a fun addition to any space and will keep the dull days at bay.

Quantity: Package includes 12 pcs Artificial Harvest Pumpkins in assorted sizes.(come with 5 different sizes ranging from 1.5inches to 5.5inches in diameter)
11. Pumpkin Luminaries
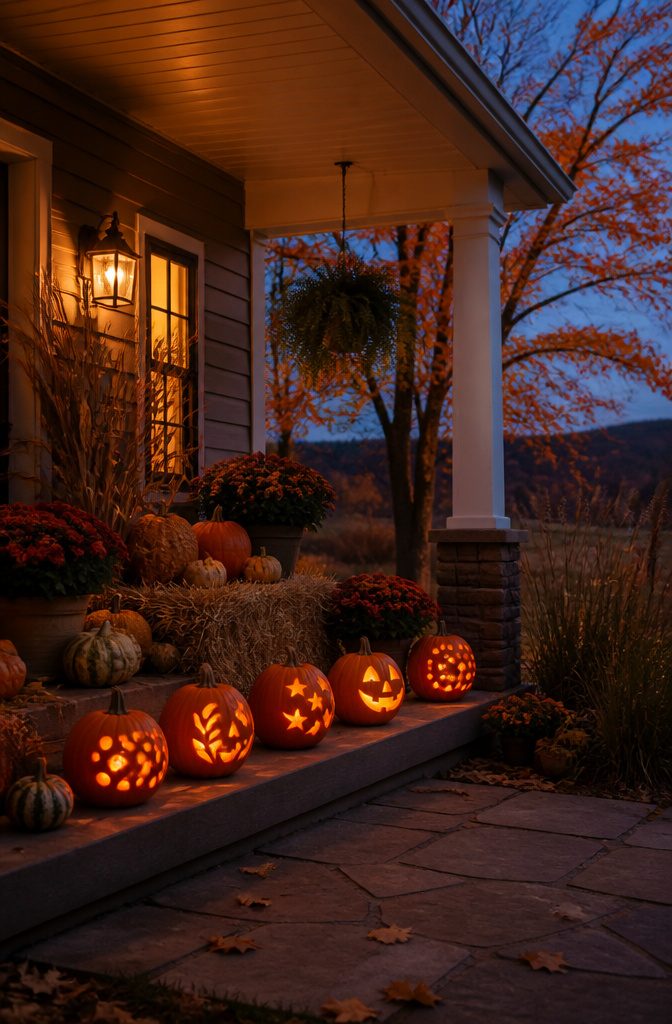
A real candle inside a hollowed pumpkin is only safe on a protected porch, and even then the wind has other plans.
Battery tea lights solve that completely. They flicker convincingly now, last all evening, and won’t turn your jack-o’-lantern into a fire hazard when someone brushes past in a bulky costume.
Paper bag luminaries are cheaper and faster to make. Fold the top inch down twice for a cuff, punch or cut a simple face, and drop in the light.
The problem comes with placement. A paper bag on a concrete porch step looks magical until a rain shower or a gust of wind, or until the neighbor’s dog investigates.
Keep them on a covered stoop or inside a window where they still read from the street but stay dry.
For pumpkins, scrape the interior walls thinner than you would for carving.
Half an inch lets enough light glow through the cut face without the weight of thick flesh dimming the effect. Battery lights sit flat on the bottom; real candles need a level spot or a jar lid to steady them.
12. Pumpkin Mummies
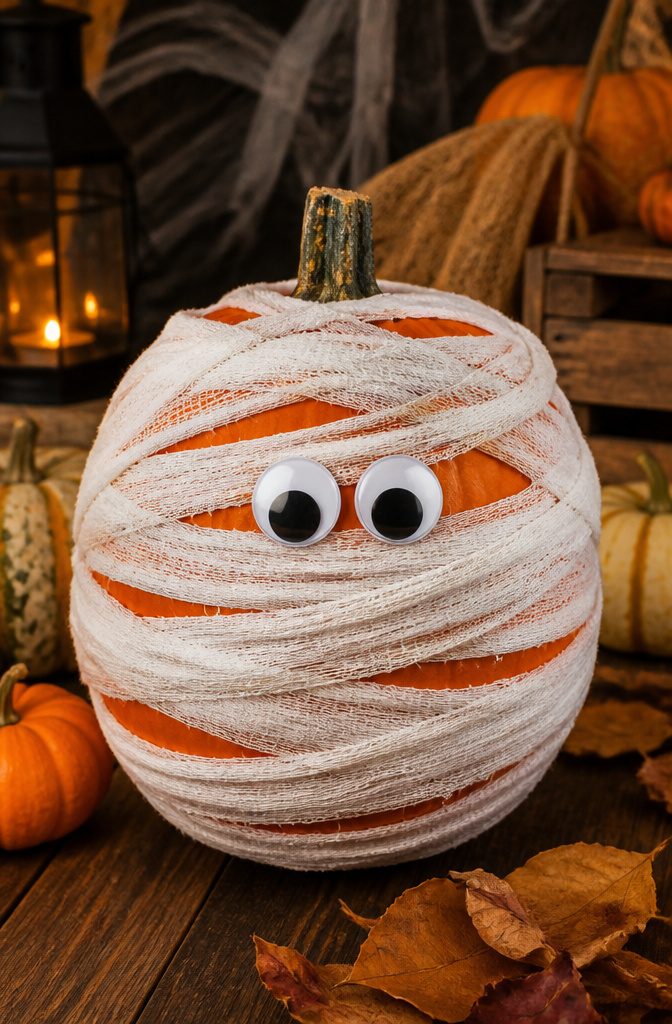
Pumpkin mummies work best with a foam pumpkin from the craft store, something lightweight that survives years of storage in a plastic bin.
The gauze strips need to be the cheap, loosely woven kind from the first-aid aisle; tighter medical gauze fights the glue and never drapes right.
Start at the top and spiral down, overlapping each pass by about half the strip width. Hot glue sets fastest, but a glue gun leaves raised ridges under thin gauze.
Tacky glue lays flatter if you have the patience to let it dry between layers. Leave gaps on the front where the eyes will sit; pulling gauze back to add them later tears the weave.
Two large googly eyes, the kind with black pupils and moveable centers, read as goofy rather than scary, which is the sweet spot for a craft that sits on the mantel through October.
Press them into a dot of glue on bare foam, then tuck a few gauze ends around the edges so they look half-buried in the wrapping.
A six-inch foam pumpkin takes roughly half a roll of gauze. Store it in a cardboard box, not a sealed bag; trapped moisture yellows the fabric over summer.
13. Googly Eye Pumpkins
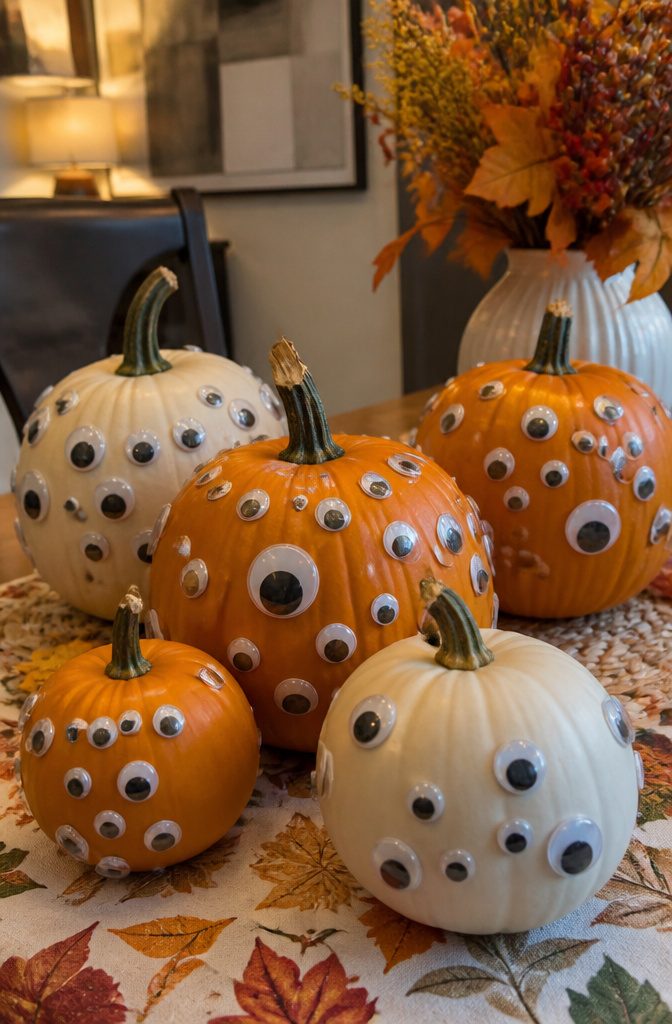
A coat of acrylic paint turns any pumpkin into a backdrop for chaos. I like a matte orange or off-white base so the eyes read as the joke, not the color underneath.
Once the paint is dry, the real decision is coverage: a dense cluster in one spot, or eyes creeping up the ribs like something escaped from a lab.
Both read as funny from the sidewalk, but partial coverage takes half the time and half the bag of eyes.
The adhesive matters more than people expect. A hot glue gun is the only choice that survives October humidity outdoors; craft glue and school glue soften and let go after a damp night.
Press each eye into the bead for three seconds so the glue mushrooms slightly around the plastic rim. That lip is what keeps rainwater from working underneath.
Mini pumpkins work best for windowsills and table runners.
Standard pumpkins need more eyes than you think; buy the bulk bag. Orange beads or glitter pressed into the wet glue between eyes add sparkle without changing the joke.
14. Paper Bag Pumpkins
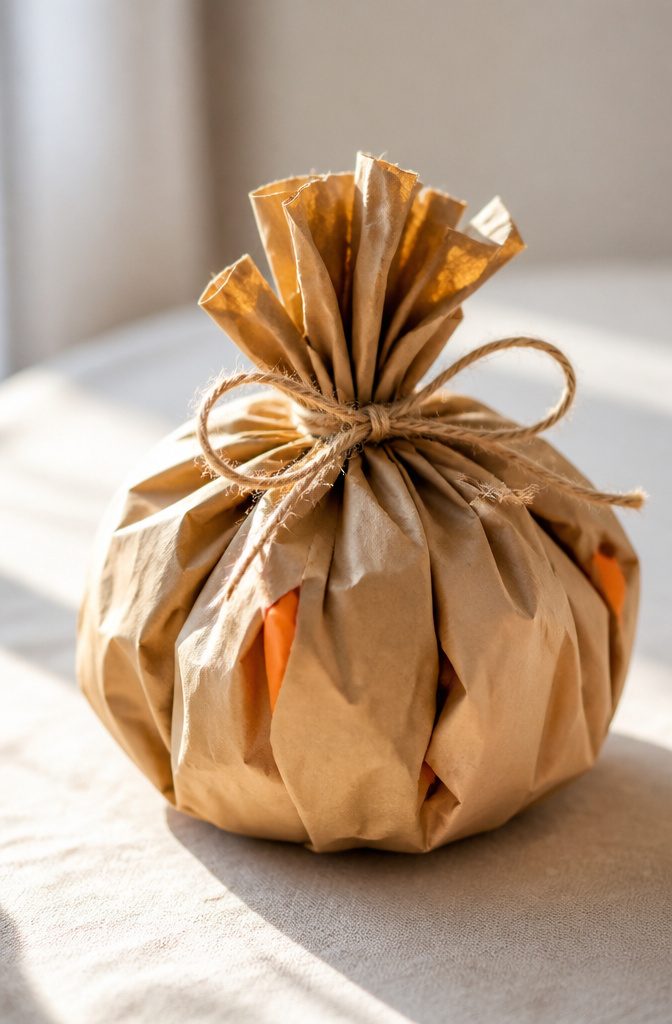
Lunch bags and grocery bags both work for this, but the finished size changes enough to matter. A standard lunch bag, roughly 5 by 10 inches, fills out to something you can cluster on a mantel or line down a table runner.
Grocery bags run closer to 12 inches tall and need more stuffing material; they read as floor pumpkins or porch accents rather than shelf pieces.
The method is the same either way. Crumple newspaper or scrap paper inside until the bag is about half full, then gather the excess paper above the fill and twist it into a stem.
A length of twine tied in a bow separates the round pumpkin body from that stem more cleanly than a rubber band, which sinks into the paper and disappears.
Paint is optional. The brown paper already carries the neutral, rustic palette that tends to dominate fall decorating now; leaving it bare skips a step and dries instantly.
If you do paint, acrylic craft paint in warm orange or muted mustard covers in one coat over the paper surface.
15. Pumpkin Handprint Art
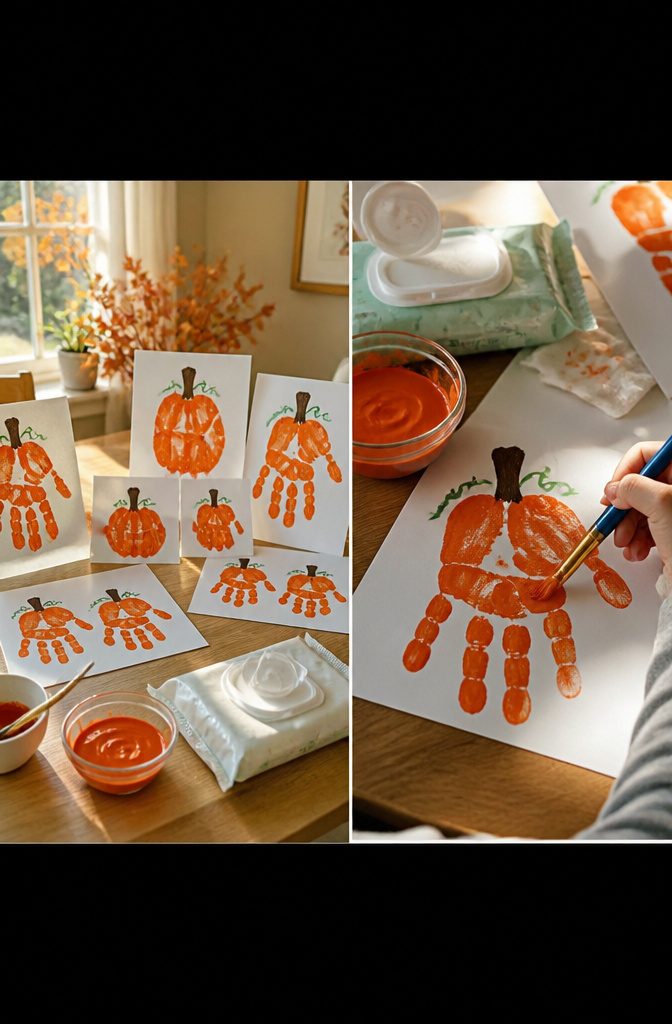
Orange paint on a small palm leaves ridged pressure lines that read unmistakably as pumpkin once a brown stem and curling green vine get added with a thin brush.
The keepsake quality sneaks up on you. That hand will be driving in six years, and the paper will still show the span of fingers at three.
Dish soap right at the sink before you start changes the cleanup from a twenty-minute scrub to something closer to two.
Tempera paint lifts fine with warm water and a little soap if you hit it before it dries; acrylic does not, and the ridges between fingers hold onto pigment like a sieve.
I keep a wet washcloth draped over the faucet edge and wipe each finger individually rather than sending a painted child toward the bathroom to touch every doorknob in between.
Thin paper wrinkles under wet paint, so something with a little weight holds the impression cleaner. A name and date in the corner before it goes on the fridge keeps the when of it from fading into guesswork later.
16. Ripped Paper Pumpkins
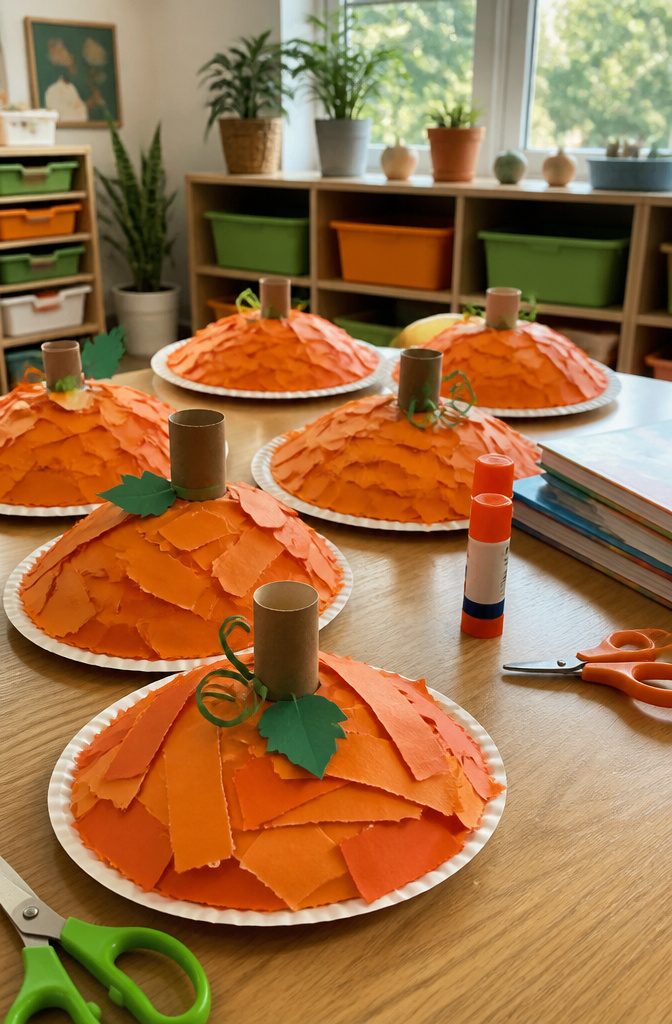
Torn orange construction paper and a glue stick are the only real supplies here, which is part of why this craft keeps showing up in toddler activities.
The child tears the paper into pieces themselves, then pastes them in overlapping layers to fill a pumpkin outline. That tearing motion is where the fine-motor practice lives, more than in the gluing.
The patience required runs higher than most adults predict.
A three-year-old who tears enthusiastically for ninety seconds may spend the next ten minutes deciding each strip is already the right size. The overlapping matters more than the coverage; gaps show less when pieces are layered rather than laid edge-to-edge.
Some versions use a printable outline, others freehand the shape. The paper plate base mentioned in similar crafts works here too, though plain printer paper holds up fine if the glue is applied with restraint.
One variation swaps the torn paper for scrunched tissue or dot markers, which speeds the process but loses the tearing practice entirely.
For a finished piece that travels home from school, have them write their name at the bottom before the glue dries.
17. Pumpkin Seed Crafts
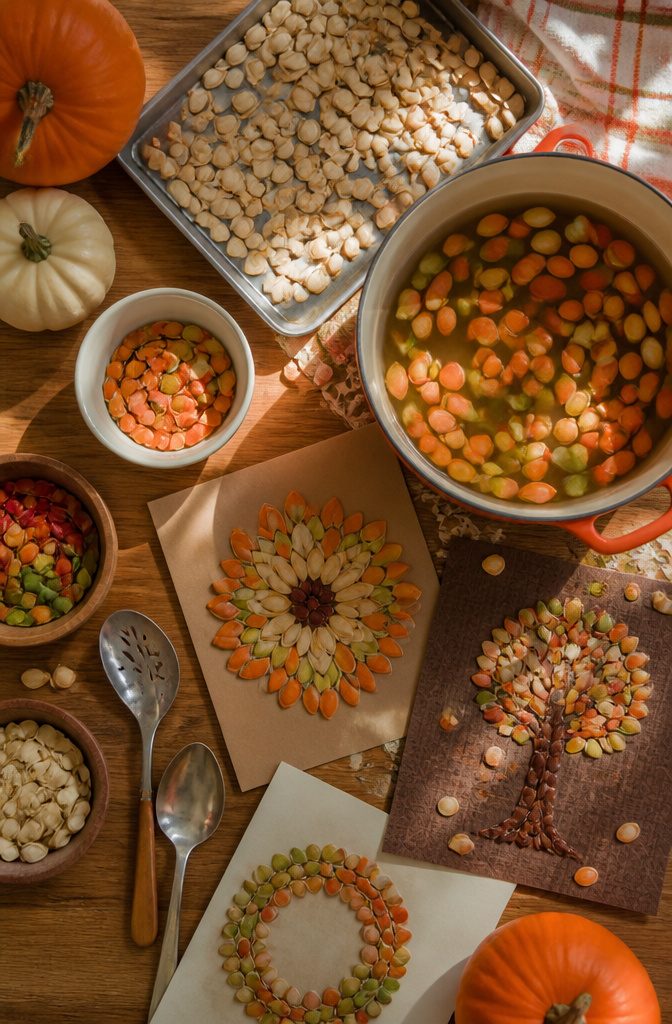
The seeds from a single carving session can fill a whole afternoon of crafts once they are actually clean.
Rinsing off the pulp takes longer than most people budget, and the real mistake is starting a project before the seeds are fully dry.
Mold sets in within a day or two if moisture lingers inside the shell, so spread them across a baking sheet in a single layer and let them sit for at least a full week, stirring once daily so the undersides get air.
Dyed seeds strung into garlands hold color best if you simmer them in water with a splash of vinegar first, then bake at low heat to finish the drying.
For mosaics, the natural ivory tone works better than dye, and a simple grid drawn in pencil keeps the pattern from drifting.
Younger kids use the same dried seeds for counting games, one flat surface makes them easier to handle than beads, though they are light enough that a tipped board sends the whole pile scattering.
18. Pumpkin Garland
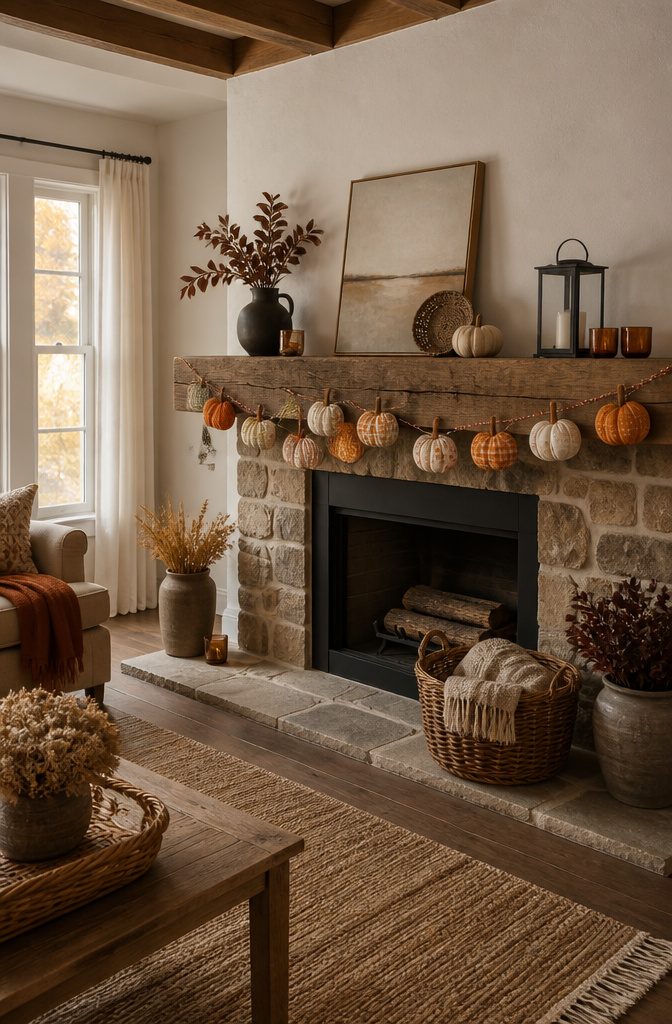
A garland of paper, fabric, or wood slice pumpkins works best when the weight stays light and the spacing stays tight. I learned this the hard way after a heavy twine version pulled the center low across my mantel.
Space the pumpkins four to six inches apart, which keeps the line from bowing and gives each piece room to read as its own shape.
Paper pumpkins are the lightest option, cut from cardstock or scrapbook paper and folded into dimension.
Fabric pumpkins need just small scraps, 2–3 inch strips wrapped or stuffed, and they carry a little more heft, so keep them smaller than your fist.
Wood slice pumpkins, the kind from dollar-store plaques painted orange and black, look charming but add up fast; alternate them with lighter shapes or keep the strand short.
For a straight hang, start with baker’s twine or fishing line rather than ribbon, and anchor both ends with removable hooks or small nails.
Test the drape before you commit: a doorway needs more support than a mantel because the garland hangs in a true curve with no shelf to cheat against.
19. Pumpkin Suncatchers
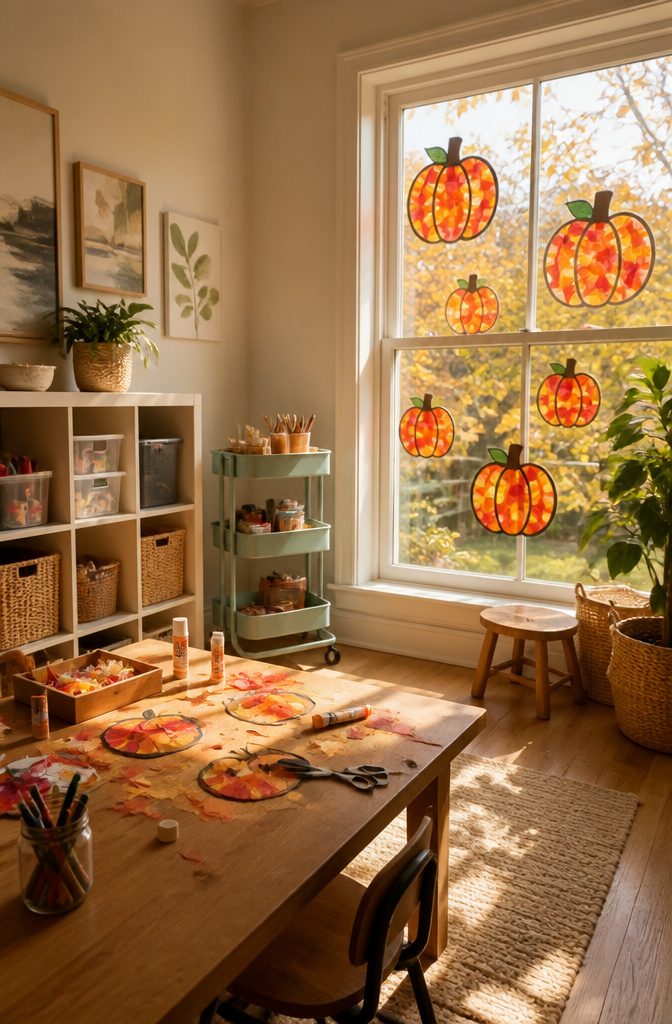
Tissue paper and contact paper are the pairing that works here. Cut a pumpkin shape from the contact paper, sticky side up, and press squares of orange, yellow, and red tissue onto it until the shape is full.
Top with a second sheet to seal, trim the edges, and tape to the window.
The light quality changes dramatically through the day. Morning sun coming in low gives the colors a soft, glowing depth that almost looks lit from within.
By afternoon, with direct sun behind it, the same piece can read flat and washed out. East-facing windows show these off best; south-facing ones tend to burn them out by midday.
Waxed paper is the alternative if contact paper isn’t on hand, but the seal is trickier.
Glue between layers tends to dry uneven and leave wrinkles that catch light the wrong way. The bigger problem, either way, is curling.
Humidity from the glass side makes the edges pull up within a few days. A thin line of glue stick around the rim before the final seal helps, as does pressing the finished piece under a book overnight before hanging.
20. Fabric-Wrapped Pumpkins
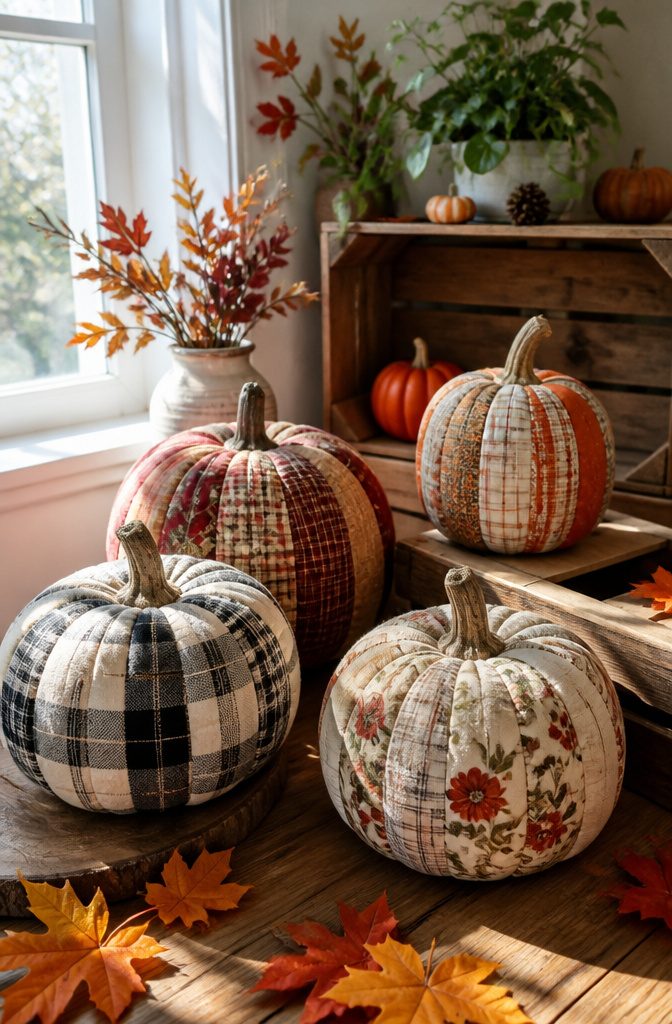
Foam craft pumpkins from the craft store make a solid starting point for this, though the finish on them reads cheap up close. Wrapping them in fabric solves that without the sewing machine time that stuffed fabric pumpkins demand.
Cut strips about 2 to 3 inches wide.
Brush Mod Podge onto the pumpkin and smooth the fabric over it, working in sections so the adhesive stays tacky. Plaid flannel in muted fall colors gives a quieter, cozier result than the glossy orange surface underneath.
Thrift store fabric works well here, and the irregular shapes of real or faux pumpkins underneath the wrapping give each one a slightly different silhouette.
The strips can overlap or butt together; both read as texture from a few feet away. The Mod Podge dries clear, so a little excess at the edges is forgivable.
Pinning works in a pinch if you do not want to wait for glue to set, though the heads show unless you tuck them deep into the fabric folds.
For scrap fabric users, this is one of the lower-commitment ways to burn through a stash without matching prints or cutting precise pattern pieces.
Frequently Asked Questions
What materials do I need for fall pumpkin crafts?
Acrylic paint, yarn, glue, paper, and natural elements like twigs and leaves cover most projects.
Many crafts also use household items such as toilet paper rolls, egg cartons, and fabric scraps. Foam craft pumpkins from craft stores and thrifted sweaters or plaid shirts are common starting points for no-sew and fabric-wrapped versions.
What are some easy fall pumpkin crafts for kids?
Paper plate pumpkins, toilet paper roll pumpkins, and painted pumpkins are the simplest entry points.
Torn-paper collages let toddlers practice fine motor skills without precision, while handprint art creates keepsakes. Egg carton pumpkins use only cardboard, paint, and a pipe cleaner stem, and a dozen-egg carton yields twelve mini pumpkins in one session.
What can I use to decorate pumpkins?
Paint, fabric, glitter, and natural elements like twigs and leaves all work.
Acrylic paint and foam brushes handle patterns from buffalo check to solid metallics. Fabric strips brushed with Mod Podge, loosely woven gauze for mummy wraps, or clusters of googly eyes glued on with hot glue each give a different mood.
Save real stems to glue onto painted faux pumpkins for a natural look that lasts.
How do you make a pumpkin vase?
Cut a lid from the top of a real or faux pumpkin, hollow it out, and fit an insert inside.
A small water-filled mason jar close to the pumpkin’s diameter works faster than floral foam, since you lift the whole bouquet out to change water.
For real pumpkins, time the project carefully; the shell lasts about a week before softening. A box cutter handles the opening cleanly, and measuring slightly small lets you widen if needed.
How do you make a no-sew pumpkin?
Gather fabric around a filling and secure it with glue, twine, or rubber bands rather than stitching.
For sweater pumpkins, cut a sleeve, stuff it thickly so the knit holds its shape, wrap twine to create segments, and hot-glue the bottom shut.
For fabric-wrapped foam pumpkins, brush Mod Podge onto the surface and smooth on 2-to-3-inch fabric strips. Wine corks or cinnamon sticks pressed into the center finish the stem.