Are you ready to bake the ultimate birthday treat? If you’ve ever wanted to impress your friends and family with a stunning *cake ultah coklat*, you’re in the right place. I created this post because I know how satisfying it is to serve a delicious, beautifully made chocolate cake at a celebration. Whether it’s for a birthday party or any festive occasion, a chocolate cake can steal the show and satisfy even the pickiest of sweet tooths.
This guide is for everyone who loves baking, from beginners to seasoned pros. If you’re the kind of person who enjoys whipping up treats in the kitchen or simply wants to make someone’s day special, these tips will have you covered. You might be worried about getting the textures just right or figuring out the best way to layer and frost your cake. Don’t fret! You’ll find helpful advice that addresses common challenges in baking a chocolate cake.
In this post, I’m sharing 14 pro tips that are practical, straightforward, and guaranteed to elevate your cake-baking game. From choosing the best cocoa powder to mastering the art of chocolate ganache, you’ll get the insider knowledge you need for a moist and flavorful celebration cake. Get ready to bring your cake dreams to life with strategies that will make your next baking adventure a total success!
So grab your apron, preheat your oven, and let’s dive into the secrets of creating the perfect *cake ultah coklat*. You and your taste testers are in for a delightful treat!
Key Takeaways
– Choosing high-quality cocoa powder can significantly enhance the flavor of your *cake ultah coklat*.
– Maintaining the right moisture levels is crucial for achieving a soft and fluffy cake that everyone will love.
– Mastering the ganache technique elevates your cake with a rich, glossy finish that looks as good as it tastes.
– Experimenting with fillings can add exciting surprises to each slice, making your cake even more appealing.
– Focusing on presentation, including creative decorations, can transform your cake into a stunning centerpiece for any celebration.
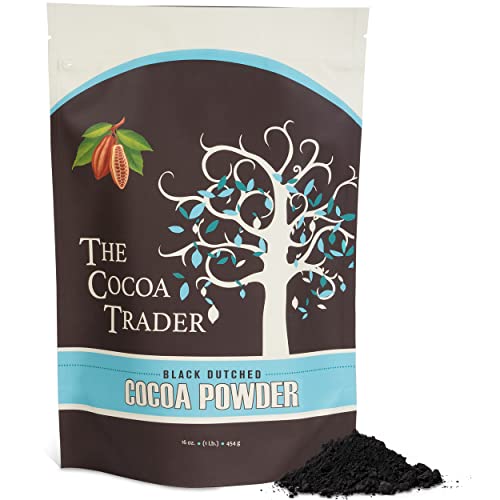
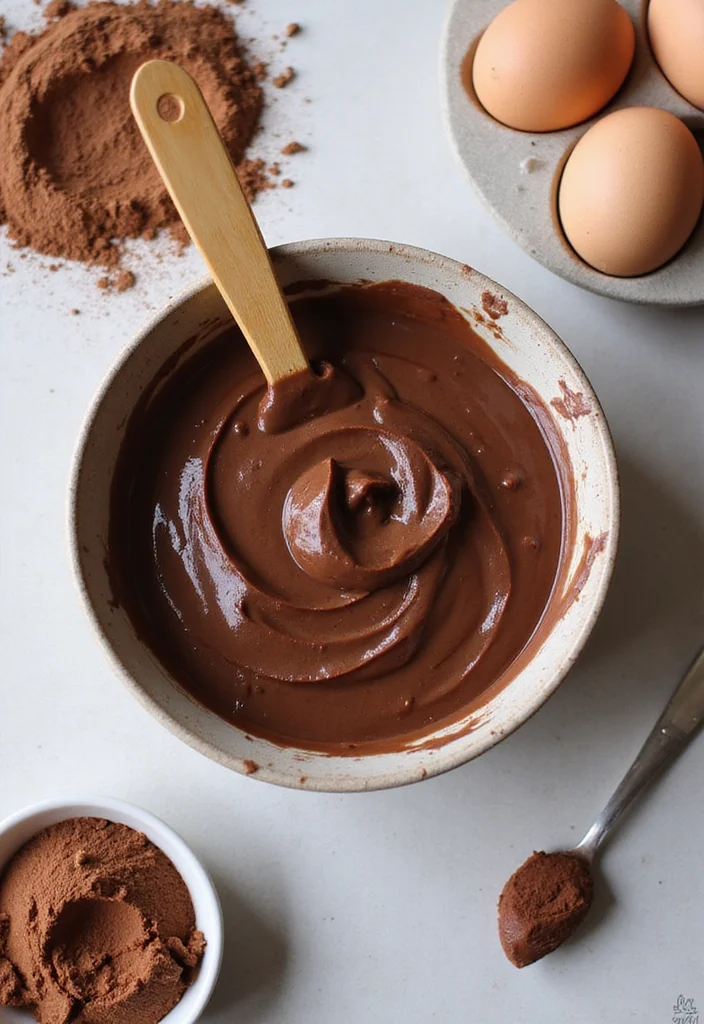
1. Choose the Right Cocoa Powder
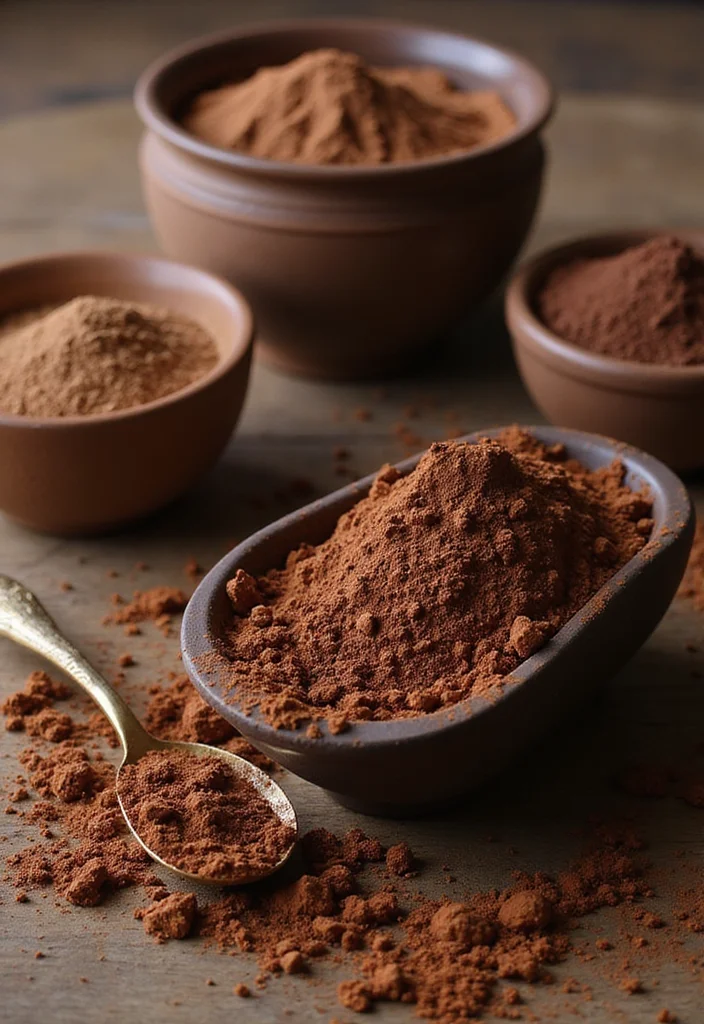
Choosing the right cocoa powder is essential for your chocolate cake. High-quality Dutch-processed cocoa brings a deep flavor and a dark color, making your cake look and taste amazing. If you prefer a more subtle chocolate taste, natural cocoa powder is a good option. The choice you make will greatly impact the flavor and appearance of your cake, so think carefully about which one to use before starting your baking adventure.
Here’s a quick tip: always sift your cocoa powder before adding it to your batter. This helps eliminate lumps and ensures a smooth texture for your cake. You can even mix cocoa with a bit of coffee or espresso to deepen the chocolate flavor without overpowering it.
Servings: 8-10
Prep Time: 20 minutes
Cook Time: 30 minutes
Total Time: 50 minutes
Calories: Approximately 350 per slice
Ingredients:
– 1 cup all-purpose flour
– 1 cup unsweetened cocoa powder
– 1 cup sugar
– 1/2 cup butter, softened
– 2 eggs
– 1 cup buttermilk
– 1 tsp baking powder
– 1 tsp baking soda
– 1 tsp vanilla extract
Instructions:
1. Preheat your oven to 350°F (175°C) and grease your cake pans.
2. In a bowl, mix flour, cocoa powder, baking powder, and baking soda. Set aside.
3. In another bowl, cream butter and sugar until fluffy. Add eggs one at a time.
4. Mix in buttermilk and vanilla, then gradually blend in the dry ingredients.
5. Pour the batter into prepared pans and bake for 30 minutes.
6. Let cool before frosting.
FAQs:
– Can I use dark chocolate instead of cocoa powder? Yes, but adjust sugar based on sweetness.
– Is buttermilk necessary? It adds moisture; you can substitute with milk and vinegar.


2. Moisture Matters
Keeping your cake moist is key to deliciousness. Ingredients like buttermilk or sour cream add richness and help the cake stay moist while baking. Be careful not to overmix your batter. Overmixing can create too much gluten, making your cake dense rather than light and fluffy.
Here’s a handy tip: keep an eye on your baking time and use the toothpick test. Insert a toothpick in the center of the cake, and if it comes out clean, you’re good to go! Wrapping your cakes in plastic wrap while they cool also helps trap steam, keeping them moist.
Servings: 8-10
Prep Time: 10 minutes
Cook Time: 35 minutes
Total Time: 45 minutes
Calories: Approximately 340 per slice
Ingredients:
– 1 ½ cups all-purpose flour
– 1 cup sugar
– ½ cup butter, softened
– 2 eggs
– 1 cup buttermilk
– 1 tsp vanilla extract
– 1 tsp baking soda
Instructions:
1. Preheat oven to 350°F (175°C) and grease two 9-inch round pans.
2. Cream butter and sugar until light and fluffy.
3. Beat in eggs one at a time.
4. Mix in buttermilk and vanilla.
5. Gradually add flour and baking soda; mix until just combined.
6. Divide batter between pans and bake for 30-35 minutes.
7. Cool before frosting.
FAQs:
– What if my cake is too dry? You can brush it with simple syrup.
– How do I store leftover cake? Wrap it in plastic wrap and refrigerate.


3. Infuse Flavors
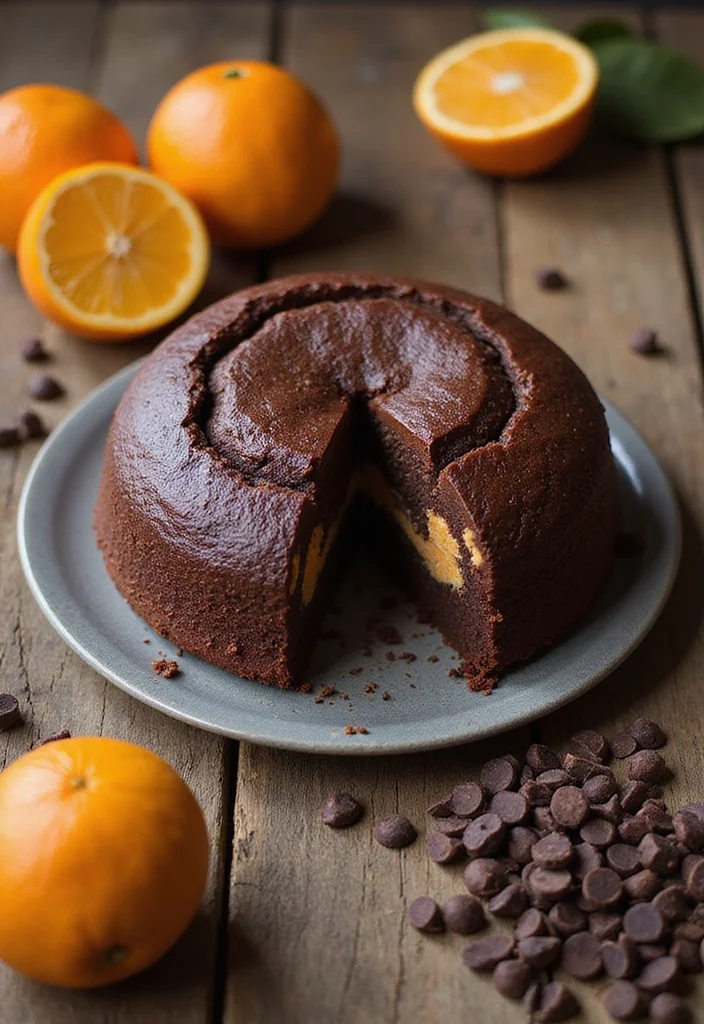
Adding special flavors can take your chocolate cake to the next level. A pinch of sea salt can enhance the chocolate taste, while a bit of orange zest adds a refreshing twist. You can also use spices like cinnamon or cardamom for warmth and depth, creating a flavor that surprises everyone.
When you add ingredients like nuts or fruits, make sure they’re evenly mixed in the batter. This helps prevent them from sinking to the bottom. You can even create a marbled effect with different colored batters for a stunning look.
Servings: 8-10
Prep Time: 15 minutes
Cook Time: 30 minutes
Total Time: 45 minutes
Calories: Approximately 350 per slice
Ingredients:
– 1 cup all-purpose flour
– 1 cup chocolate chips
– 1 cup sugar
– ½ cup butter, softened
– 2 eggs
– Zest of one orange
– 1 tsp baking powder
Instructions:
1. Preheat oven to 350°F (175°C) and grease cake pans.
2. In a bowl, combine flour, sugar, and baking powder.
3. Cream butter and sugar, then add eggs and zest.
4. Gradually add dry ingredients to the wet mixture.
5. Fold in chocolate chips.
6. Pour into pans and bake for about 30 minutes.
7. Cool and frost.
FAQs:
– Can I add alcohol for flavor? Yes, but reduce other liquids slightly.
– What can I use instead of chocolate chips? You can use chopped chocolate or cocoa nibs.


4. Master the Ganache Technique
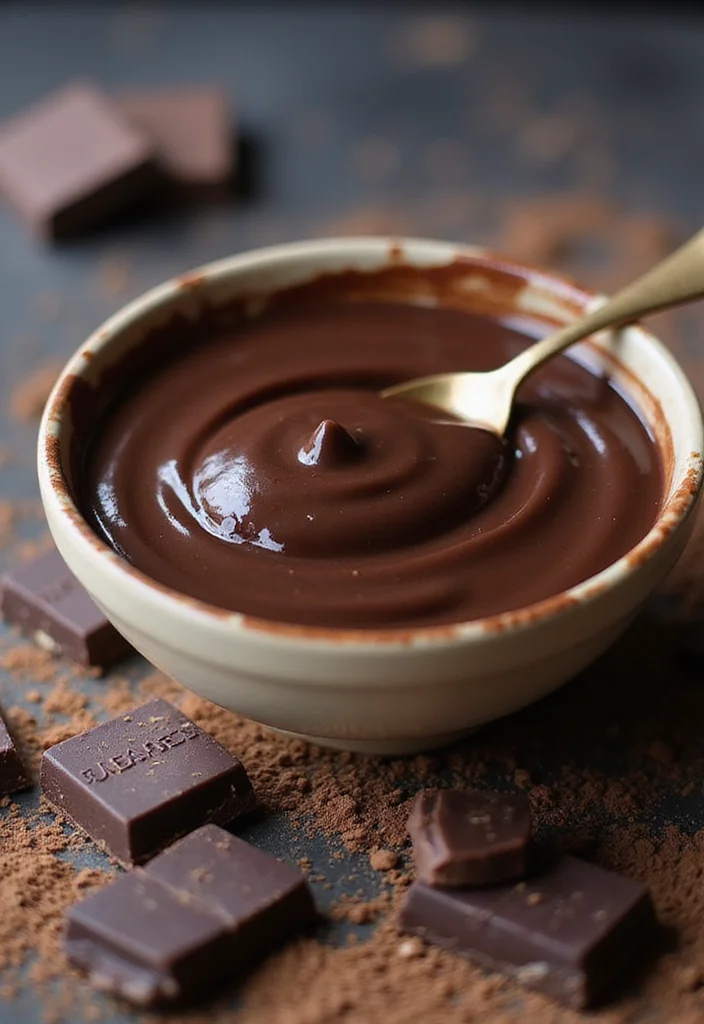
A silky chocolate ganache makes your cake look professional. For the best ganache, use equal parts chocolate and cream. Heat the cream until it almost boils, then pour it over chopped chocolate. Let it sit for a few minutes before stirring until smooth. This rich sauce is perfect for drizzling over your cake!
If you want a firmer ganache, use less cream, which makes it easier to spread for frosting. Let it cool slightly before pouring it on the cake to ensure it doesn’t slide off. Top it with chocolate shavings or sprinkles for a nice touch.
Servings: 8-10
Prep Time: 10 minutes
Cook Time: 5 minutes
Total Time: 15 minutes
Calories: Approximately 200 per serving
Ingredients:
– 8 oz dark chocolate, finely chopped
– 1 cup heavy cream
Instructions:
1. Heat the cream in a saucepan until it just begins to boil.
2. Remove from heat and add the chopped chocolate.
3. Let it sit for 5 minutes, then stir until smooth.
4. Allow to cool slightly before using.
FAQs:
– How do I store leftover ganache? Refrigerate and reheat gently before using again.
– Can I use milk chocolate instead? Yes, but it may be sweeter than dark chocolate.
5. Layering Like a Pro
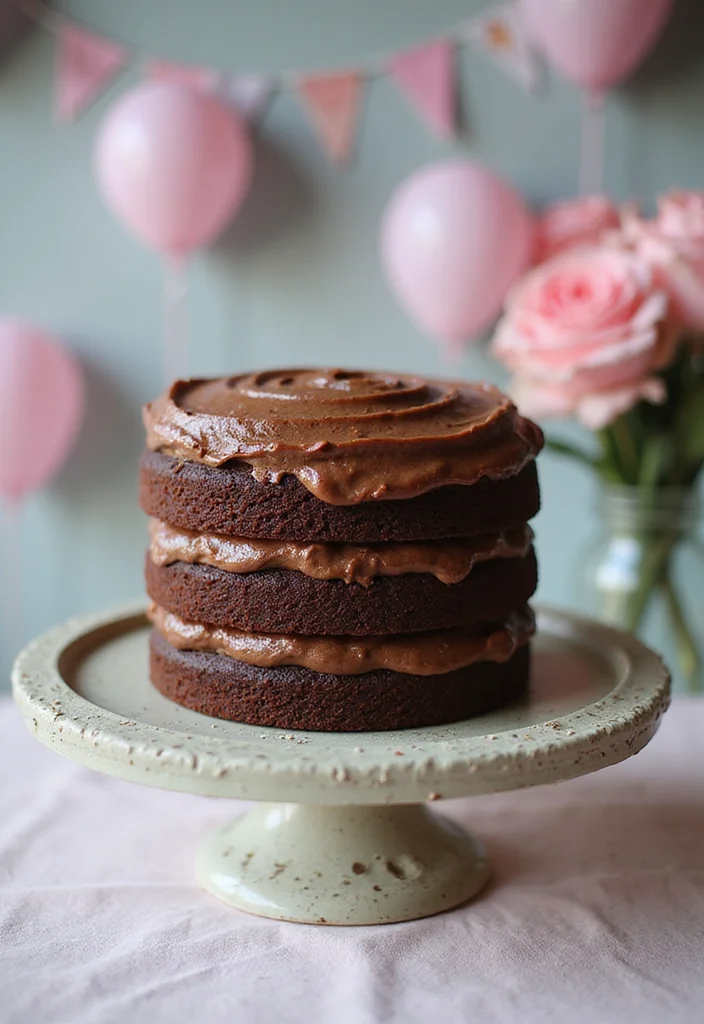
Layering adds height and beauty to your cake. To do it right, make sure each layer is flat. Use a serrated knife to trim the tops if needed. Once level, brush each layer with simple syrup to keep them moist and tasty.
A smart trick is to use a cake board between layers for stability, especially with tall cakes. When frosting, start with a thin layer called a crumb coat. This locks in crumbs and creates a smooth base for the final layer. Remember, rustic is trendy, so don’t worry about perfection!
Servings: 8-10
Prep Time: 20 minutes
Cook Time: 30 minutes
Total Time: 50 minutes
Calories: Approximately 360 per slice
Ingredients:
– 3 layers of chocolate cake (from previous recipes)
– 2 cups chocolate frosting
– ½ cup simple syrup (1 cup water + 1 cup sugar, boiled until dissolved)
Instructions:
1. Level each layer of cake with a serrated knife.
2. Place the first layer on a cake board; brush with simple syrup.
3. Add a layer of frosting on top.
4. Repeat with remaining layers, finishing with frosting on the top and sides.
5. Chill before serving to set layers.
FAQs:
– Can I make it ahead of time? Yes, freeze layers and assemble when ready.
– What’s the best way to store leftovers? Keep it in an airtight container in the fridge.
Fun fact: A flawless layer stack uses 2-3 levelled cuts and a kiss of simple syrup for moisture. Pro tip: add a cake board for stability on tall cakes—then crumb coat for a smooth, professional finish. Your cake ultah coklat will wow every guest.
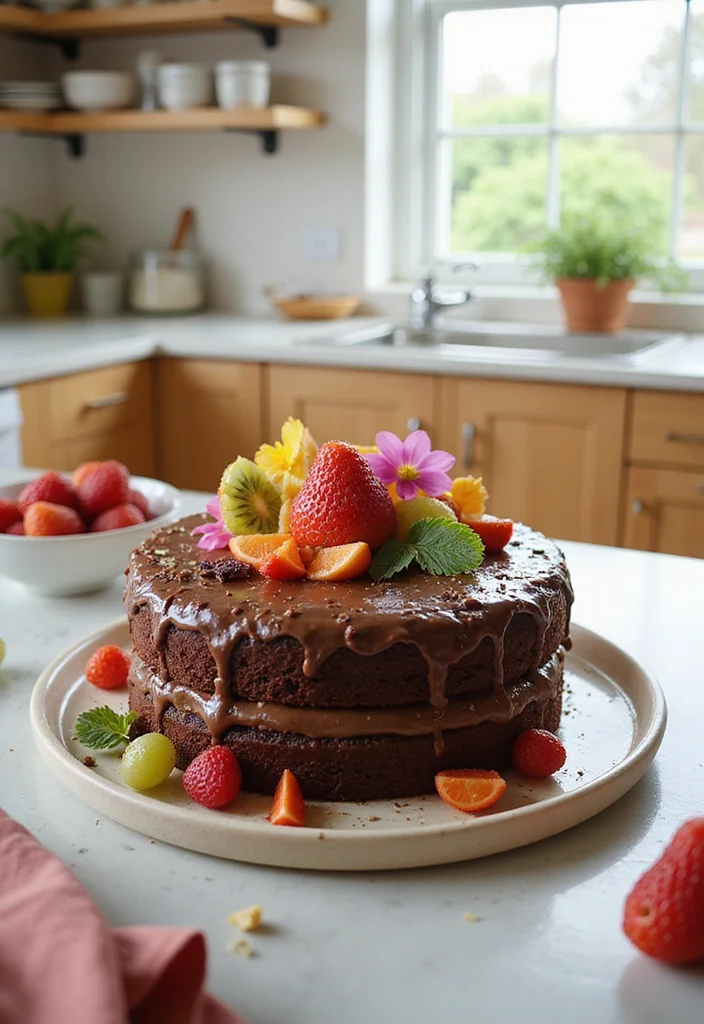
6. Tempting Toppings
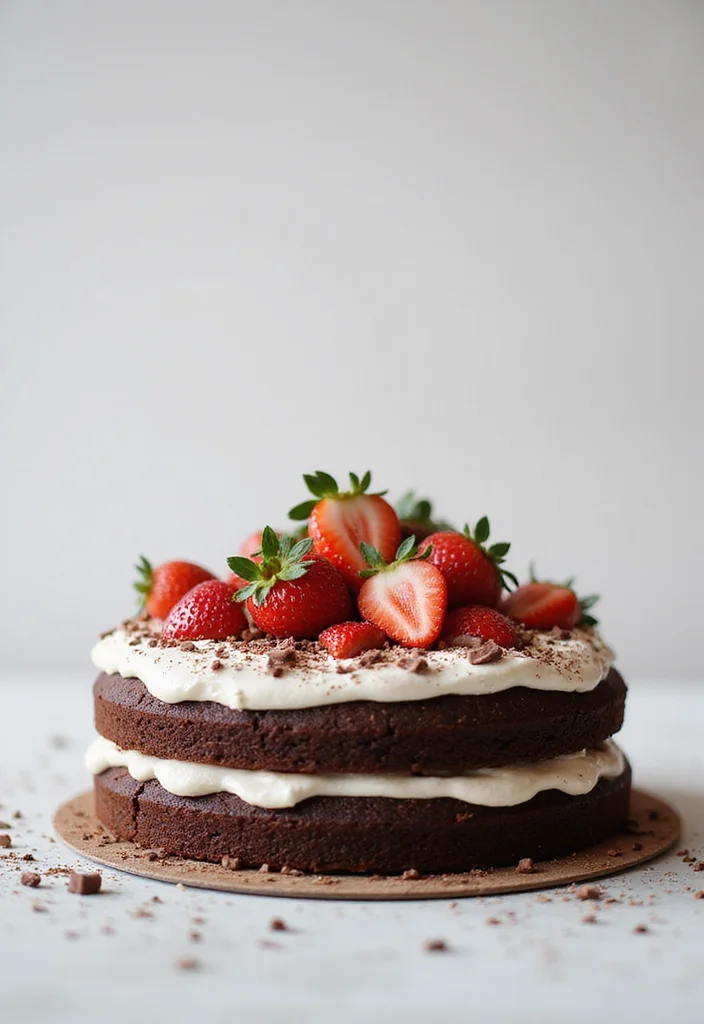
The toppings can elevate your cake from good to extraordinary. After frosting, think about adding whipped cream, fresh fruits like strawberries or raspberries, or even crunchy nuts. Edible flowers can also add a lovely touch that makes your cake pop.
Here’s a fun tip: drizzle some chocolate ganache on top or around the cake for an extra indulgent treat. Try different toppings for various occasions, like colorful sprinkles for birthdays or berries and mint leaves for more elegant gatherings.
Servings: 8-10
Prep Time: 10 minutes
Cook Time: 0 minutes
Total Time: 10 minutes
Calories: Varies based on toppings
Ingredients:
– 1 cup whipped cream
– Fresh fruit (strawberries, raspberries)
– Chocolate shavings or sprinkles
– Edible flowers (optional)
Instructions:
1. After frosting your cake, add dollops of whipped cream on top.
2. Arrange fresh fruits artistically.
3. Drizzle ganache or sprinkle chocolate shavings.
4. Add edible flowers for decoration if desired.
FAQs:
– Can I use frozen fruit? Yes, but make sure it’s thawed and dry to prevent sogginess.
– What if I can’t find edible flowers? You can skip them; fresh fruits look beautiful too.
Fun fact: toppings can boost flavor perception by up to 40%—think whipped cream, fresh berries, and a chocolate ganache drizzle for cake ultah coklat. Try layering textures for every celebration; it makes your cake pop without extra effort.


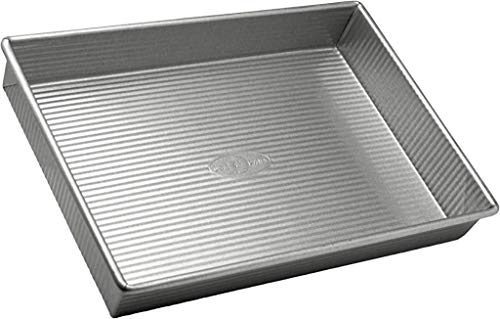
7. The Right Baking Pan
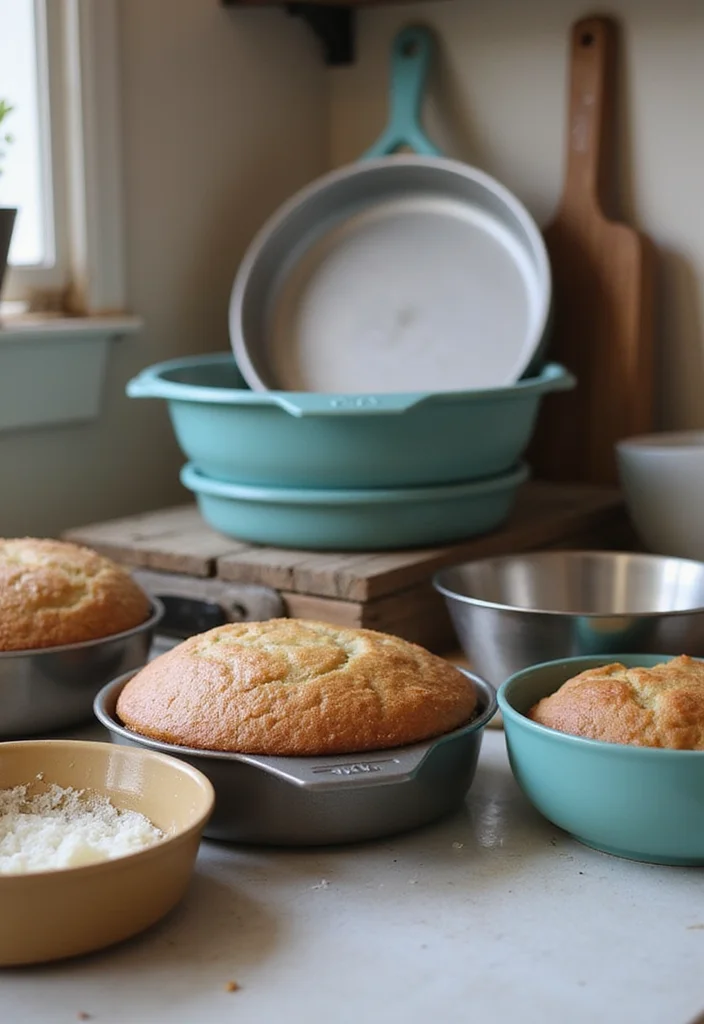
The baking pan you select can change how your cake turns out. Dark pans absorb more heat, leading to a browner cake, while shiny pans reflect heat and can result in a lighter cake. Glass or silicone pans are also great choices for baking chocolate cakes evenly.
Here’s a tip: always check how baking time varies with different pan types, as some require adjustments. To avoid sticking, line your pans with parchment paper and don’t skip greasing them! A well-prepared pan is essential for a successful cake flip.
Servings: 8-10
Prep Time: 5 minutes
Cook Time: 30 minutes
Total Time: 35 minutes
Calories: Approximately 350 per slice
Ingredients:
– Cake batter from previous recipes
Instructions:
1. Preheat the oven to 350°F (175°C).
2. Prepare your baking pan by greasing and lining with parchment paper.
3. Pour in your cake batter.
4. Bake according to the recipe and adjust based on pan material.
5. Allow to cool before flipping out.
FAQs:
– Do I need to change pans for different recipes? Not necessarily; just pay attention to time.
– Can I use disposable pans? Yes, but they may not provide the best browning effect.


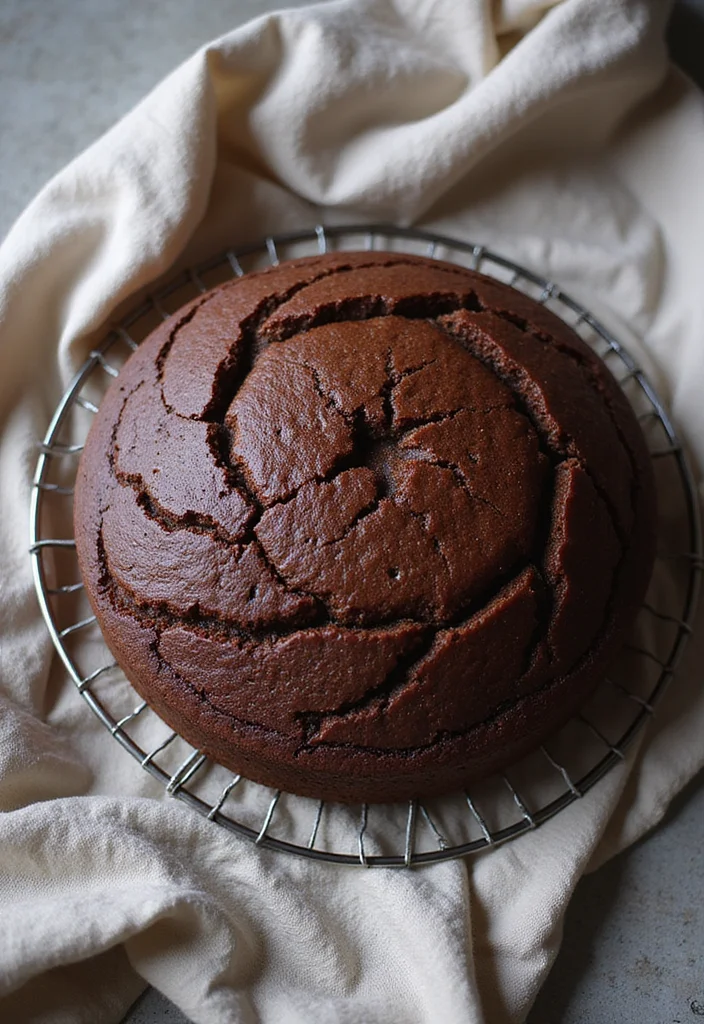
8. Cool Completely Before Frosting
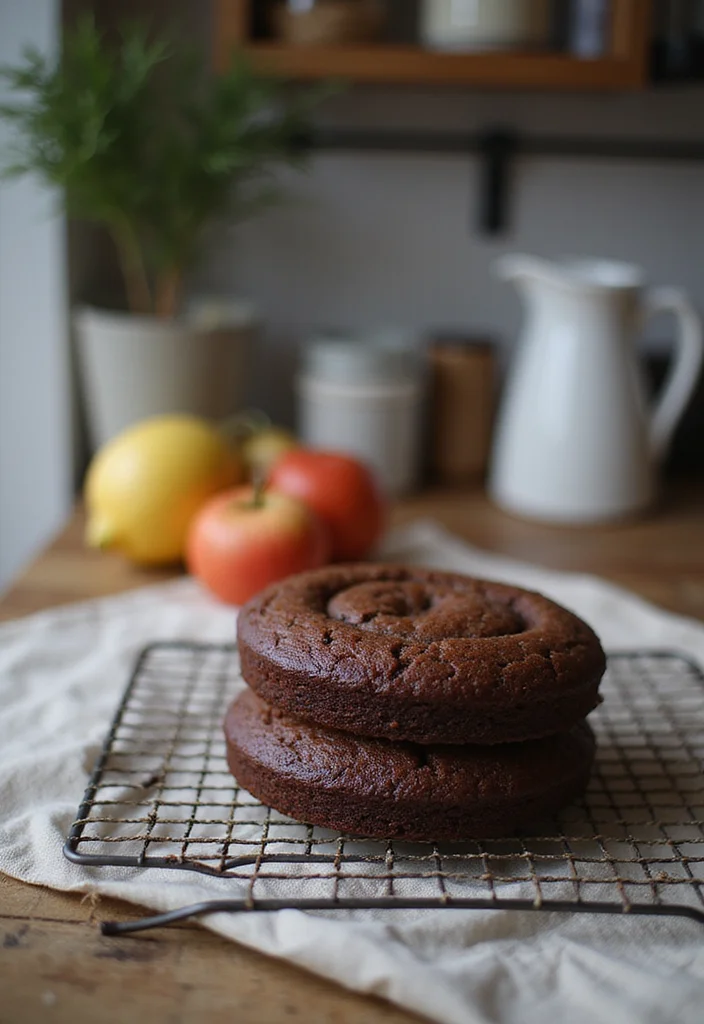
A key step in cake decorating is letting your cake cool completely before frosting. If it’s even a bit warm, the frosting may melt and create a mess. Patience is crucial! Allow your cake layers to cool in the pan for about 10 minutes before transferring them to a wire rack.
If you’re in a hurry, you can speed up cooling by placing the cakes in the fridge after they’ve cooled on the rack for a bit. This way, your cake will be stable and ready for frosting, looking like it came from a bakery!
Servings: 8-10
Prep Time: 15 minutes
Cook Time: 30 minutes
Total Time: 45 minutes
Calories: Approximately 340 per slice
Ingredients:
– Cake from previous recipes
Instructions:
1. After baking, let the cakes cool in the pans for 10 minutes.
2. Transfer to a wire rack and cool completely before frosting.
3. Once cool, frost and decorate as desired.
FAQs:
– What happens if I frost too soon? The frosting will melt and slide off.
– How long do I need to cool the cake? At least 1 hour or until completely cool.


9. Experiment with Fillings
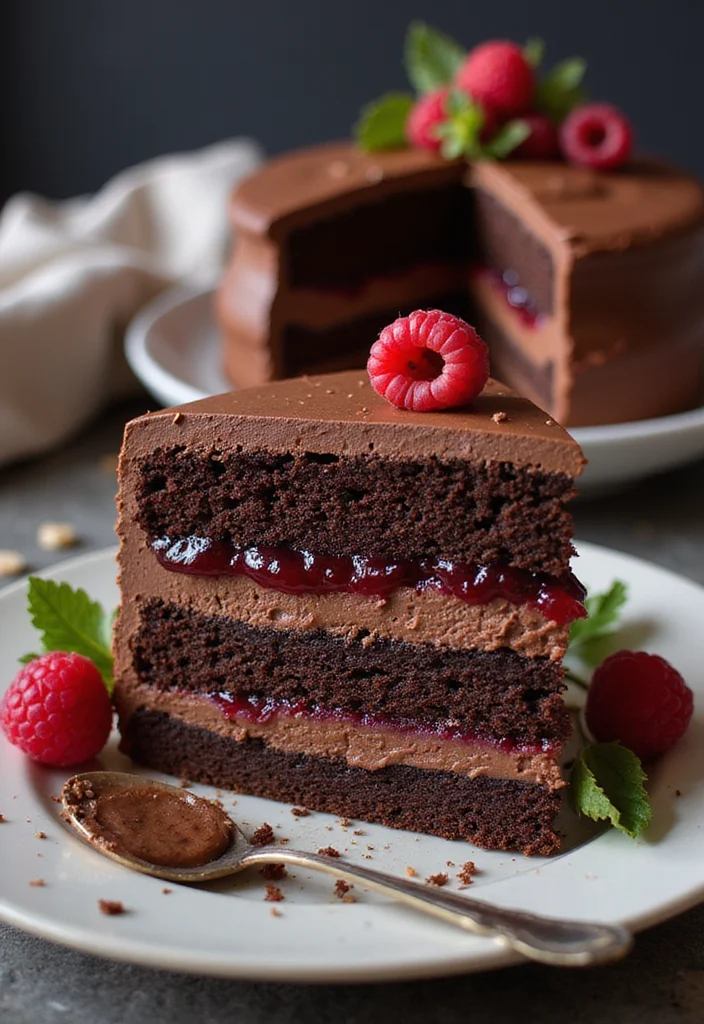
Don’t stop at frosting! Fill your cake with delightful surprises to wow your guests. You can use fruit jams, flavored creams, or even chocolate mousse. A good filling can complement the chocolate and create a memorable experience. For instance, a raspberry filling pairs wonderfully with rich chocolate.
Here’s a tip: when adding fillings, pipe a ring of frosting around the edge of the layer. This creates a barrier that prevents the filling from leaking out and keeps your layers intact.
The options are endless! You can also alternate different fillings in each layer for a more adventurous flavor.
Servings: 8-10
Prep Time: 15 minutes
Cook Time: 0 minutes
Total Time: 15 minutes
Calories: Varies by filling
Ingredients:
– 1 cup fruit jam (raspberry, strawberry)
– 1 cup chocolate mousse (or any preferred filling)
Instructions:
1. Once your cake layers are cool, place the first layer on a cake board.
2. Pipe a ring of frosting around the edge.
3. Spread your filling inside the ring.
4. Place the next layer on top and repeat.
5. Frost the top and sides when finished.
FAQs:
– Can I use store-bought fillings? Absolutely, but homemade is often fresher.
– How long can the filling last? Depends on the type; fruit fillings are usually best used fresh.
10. Get Creative with Decor
Decorating your cake can be just as enjoyable as eating it! Unleash your creativity when personalizing your chocolate cake. Use edible glitter, custom cake toppers, or colors that match the occasion to make it special.
Here’s a tip: a palette knife can create texture on the frosting for added visual appeal. Mixing colors also allows you to create a beautiful ombre effect.
Don’t stress over perfection—embrace the charm of a handmade look. Enjoy the process of decorating your cake!
Servings: 8-10
Prep Time: 20 minutes
Cook Time: 10 minutes
Total Time: 30 minutes
Calories: Varies by decoration
Ingredients:
– 1 bag of edible glitter or sprinkles
– Fondant or chocolate decorations
– Fresh fruits for garnish
Instructions:
1. After frosting your cake, add your edible decorations.
2. Use a palette knife or spatula to create texture.
3. Place fruits or decorations creatively on top.
FAQs:
– Can I make my own decorations? Yes, there are many tutorials available!
– How do I store decorated cakes? Keep in a cool place covered lightly with plastic wrap.
11. Choose the Right Frosting
Frosting is what puts the finishing touch on your cake. The right frosting enhances the chocolate flavor and adds a sweet balance. Classic chocolate buttercream is always a favorite, but you might also like cream cheese frosting for a tangy twist or whipped cream for a light finish.
To achieve a smooth finish, use a bench scraper for clean edges on your frosting. If you prefer a rustic look, simply use a spatula to spread it around.
Flavoring your frosting with extracts or spices can make a big difference. Try vanilla, coffee, or almond extracts to elevate your frosting game!
Servings: 8-10
Prep Time: 15 minutes
Cook Time: 0 minutes
Total Time: 15 minutes
Calories: Approximately 150 per serving
Ingredients:
– 1 cup butter, softened
– 3-4 cups powdered sugar
– 1/2 cup cocoa powder
– 1/4 cup heavy cream
– 1 tsp vanilla extract
Instructions:
1. Beat softened butter until creamy.
2. Gradually add powdered sugar and cocoa powder.
3. Pour in heavy cream and vanilla extract; beat until smooth.
4. Use on cooled cake layers.
FAQs:
– Can I use store-bought frosting? Yes, but homemade is usually tastier.
– How do I make it less sweet? Add a pinch of salt or use less powdered sugar.
12. Always Practice Food Safety
Food safety is very important when baking. Always wash your hands before touching ingredients and keep your utensils clean. When storing your cake, make sure to cover it well to keep out bacteria or contaminants. If your cake has perishable fillings or frostings, refrigerate it right away, especially if it won’t be eaten immediately.
Here’s a tip: use a toothpick to check for doneness, but also be mindful of expiration dates on your ingredients. Staying cautious means everyone can enjoy your tasty creations without worry.
Servings: 8-10
Prep Time: 10 minutes
Cook Time: 0 minutes
Total Time: 10 minutes
Calories: Varies based on ingredients
Ingredients:
– All ingredients used in previously mentioned recipes
Instructions:
1. Ensure cleanliness of your workspace and equipment.
2. Always check expiration dates on ingredients before use.
3. Store cakes properly, especially with fillings.
FAQs:
– What’s the best way to store leftovers? Wrap tightly with plastic wrap or store in an airtight container.
– Can I freeze my cake? Yes, cakes freeze well; just wrap properly to avoid freezer burn.


13. Don’t Forget About Presentation
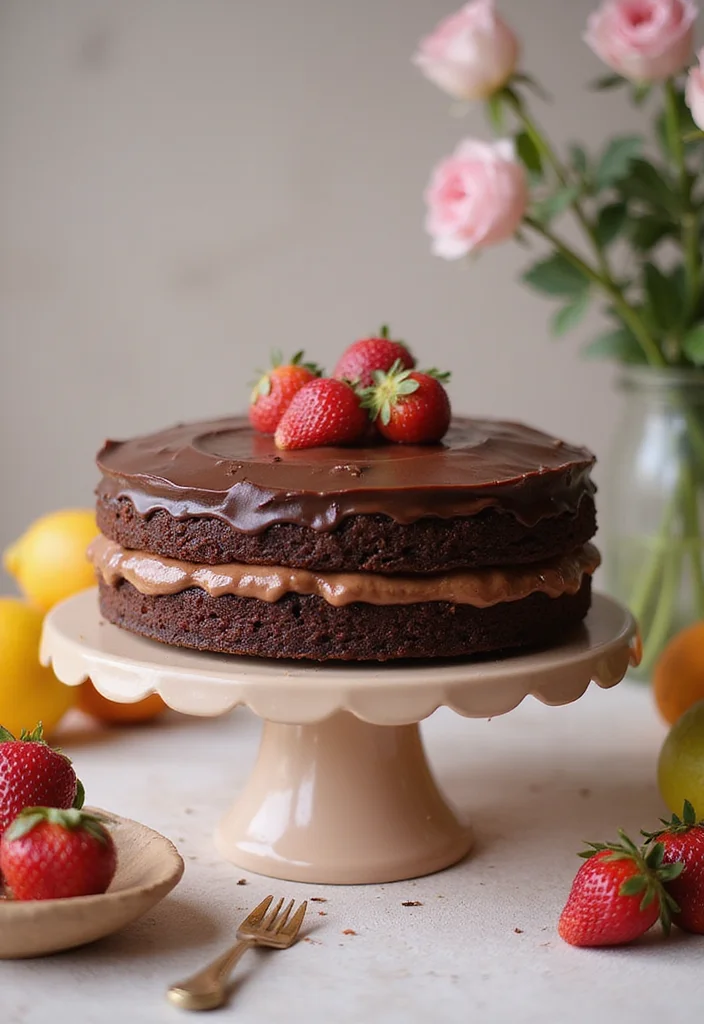
The way you present your cake can make it look amazing. Invest in a nice cake stand or platter to showcase your creation. A beautiful presentation not only looks appealing but also makes it more inviting.
Consider adding decorative touches around the base with fruits, nuts, or a drizzle of ganache. Make sure your cake is centered on the stand for visual balance. Fresh herbs or edible flowers can add an elegant touch, too!
Remember, we eat with our eyes first! A stunning presentation can entice guests to dig in right away and make your celebration memorable.
Servings: 8-10
Prep Time: 10 minutes
Cook Time: 0 minutes
Total Time: 10 minutes
Calories: Varies based on presentation
Ingredients:
– Your beautifully decorated chocolate cake
– Fresh fruits or nuts for decoration
– Edible flowers or herbs (optional)
Instructions:
1. Place your cake on a beautiful stand or plate.
2. Add decorative elements around the base.
3. Present at your gathering or event.
FAQs:
– Can I use any plate? Yes, but choose one that complements your cake’s colors.
– How do I make it look elegant? Fresh garnishes and clean edges do wonders.
14. Practice Makes Perfect
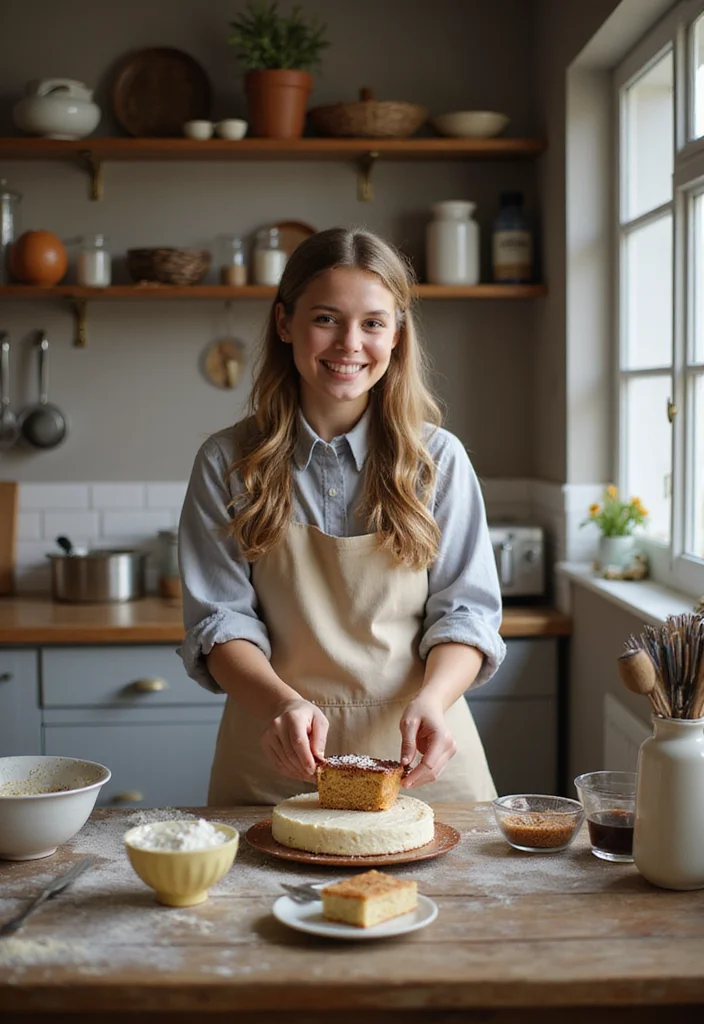
Baking gets better with practice. Don’t worry if your first cake isn’t perfect. Learn from any mistakes, and remember that each bake brings you closer to mastering cake making. Feel free to experiment with flavors, techniques, and decorations to find what you love best.
Here’s a tip: keep a baking journal to track changes you made and what worked or didn’t. This will help you improve over time.
So, roll up your sleeves and start baking! Enjoy the process as much as the yummy results. The more you bake, the better your ‘cake ultah coklat’ will become!
Servings: 8-10
Prep Time: 0 minutes
Cook Time: 0 minutes
Total Time: Ongoing
Calories: N/A
Ingredients:
– All ingredients from previous recipes
Instructions:
1. Bake whenever you can and try new things.
2. Reflect on your baking journey to improve.
FAQs:
– How long before I get better? It varies, but practice leads to improvement.
– Should I always follow recipes? Use them as guides, but feel free to experiment!
Fun fact: with consistent practice, most home bakers improve decorating accuracy by about 40% after just four to six tries. For cake ultah coklat, keep a journal, note what works, and don’t fear experiments—each bake brings you closer to perfect.
Conclusion
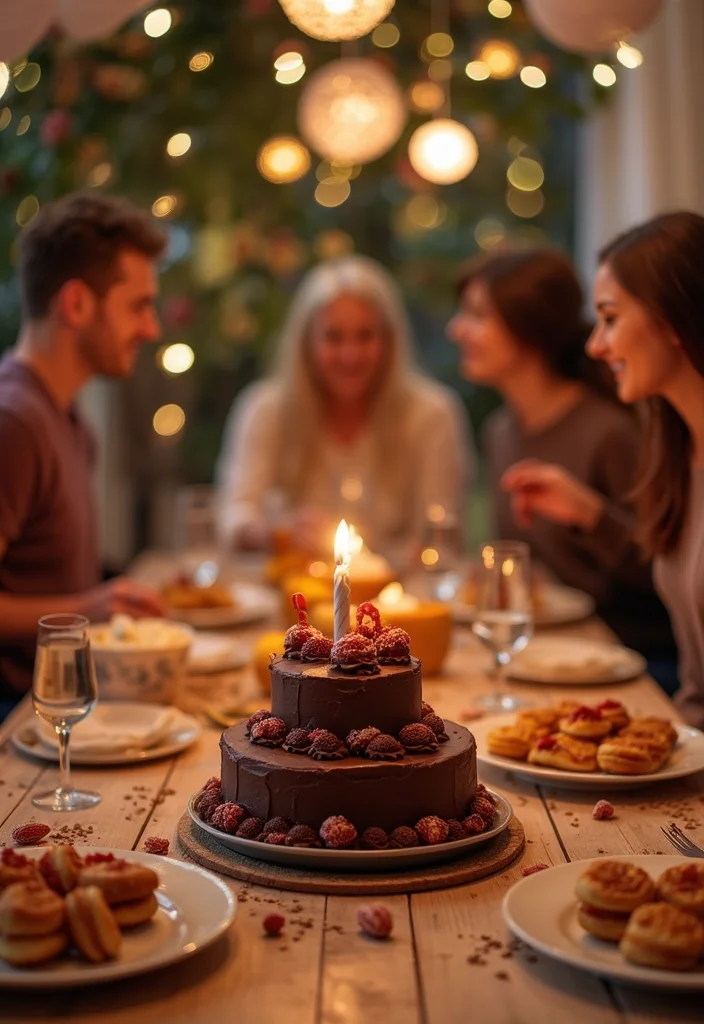
Creating the perfect ‘cake ultah coklat’ is an exciting journey filled with experimentation and joy. With these 14 pro tips, you’re well-equipped to bake a chocolate cake that will not only taste divine but also look stunning. Remember, it’s about enjoying the process, sharing with loved ones, and, of course, indulging in that delicious slice of cake at the end!
So gather your ingredients, unleash your creativity, and make your next celebration unforgettable with a beautifully crafted chocolate cake!
Frequently Asked Questions
What Makes a ‘Cake Ultah Coklat’ Different from Other Chocolate Cakes?
A ‘Cake Ultah Coklat’ is specifically designed for celebrations, making it a standout among regular chocolate cakes. It’s often decorated elaborately and served at birthday parties, enhancing the festive atmosphere. The use of rich chocolate ganache and creative toppings can elevate its taste and appearance, making it a true centerpiece for any celebration!
How Can I Achieve the Perfect Chocolate Ganache for My Cake Ultah Coklat?
Achieving the perfect chocolate ganache is easier than you think! Start with a 1:1 ratio of heavy cream to high-quality chocolate. Heat the cream until it’s just about to boil, then pour it over the chopped chocolate. Let it sit for a few minutes, then stir until smooth. This velvety ganache will add a luxurious finish to your ‘Cake Ultah Coklat’ and keep it moist and delicious!
What Are the Best Decorations for a Celebration Cake?
When it comes to decorating your ‘Cake Ultah Coklat’, the sky’s the limit! Fresh fruits, edible flowers, or even chocolate shavings can make your cake visually stunning. You can also consider using colorful sprinkles or fondant decorations to match the party theme. Remember, the key is to keep it fun and festive to capture the essence of celebration!
Can I Make a Cake Ultah Coklat in Advance? If So, How Should I Store It?
Absolutely! You can make your ‘Cake Ultah Coklat’ in advance. Just ensure it’s fully cooled before wrapping it tightly in plastic wrap. Store it in the refrigerator for up to 3 days or freeze it for longer storage. If freezing, let it thaw in the fridge overnight before serving, and reapply the chocolate ganache for that fresh taste!
What Are Some Flavor Variations for a Chocolate Celebration Cake?
While a classic ‘Cake Ultah Coklat’ is always a hit, you can play around with flavors! Consider adding a hint of espresso for a mocha twist, or incorporate orange zest for a citrusy kick. You could even mix in some hazelnut or mint extracts to create a unique flavor profile. The possibilities are endless, so feel free to get creative and tailor it to your taste!
Related Topics
cake ultah coklat
chocolate ganache
celebration cakes
advanced baking
party desserts
easy chocolate cake
baking tips
decorating techniques
moist chocolate cake
birthday treats
homemade cakes
festive desserts