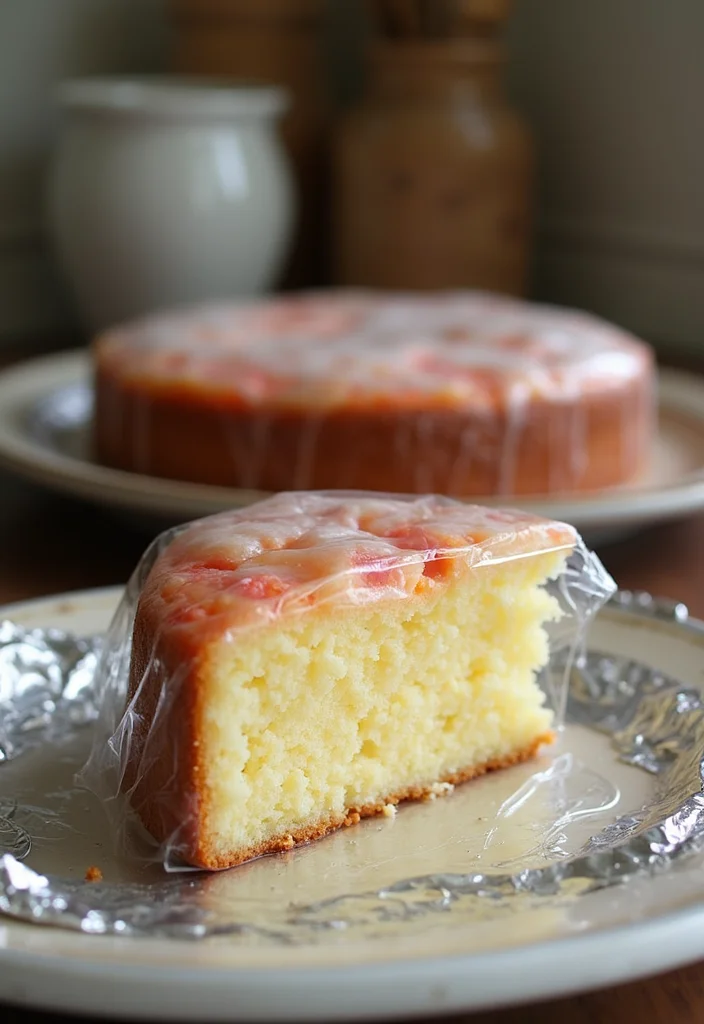
Spring is here, and that means flowers are blooming everywhere. Among them, tulips stand out with their vibrant colors and elegant shapes. It’s the perfect time to bring that beauty into your baking! That’s why I’m excited to show you how to create a stunning tulip cake that will not only impress your guests but also delight your taste buds. Whether you’re preparing for a special occasion or simply want to surprise your family with something unique, this cake is sure to be a showstopper.
If you’re someone who loves baking or enjoys trying new recipes, then you’re in for a treat. This post is tailored just for you! Each tip and technique is designed to make your baking experience enjoyable and successful. Whether you’re a novice baker or more experienced, you will find something valuable that speaks to your skill level.
So, what can you expect? I’ve gathered 12 essential tips that will guide you step-by-step through the entire process of making a tulip cake. From gathering your essential ingredients to crafting the perfect design, this tutorial is packed with baking tips that will elevate your cake-making game. You’ll learn how to master the batter, create luscious layers, and finish with eye-catching decorations that will make your tulip cake the star of any gathering. Get ready to unleash your inner baker and create a cake that’s as beautiful as it is delicious!
Let’s dive in and start making your dream tulip cake a reality!
Key Takeaways
– Gather essential baking tools like measuring cups, mixing bowls, and a good cake stand for the best results.
– Choose flavors that complement the tulip design, such as vanilla or lemon, to enhance your cake’s appeal.
– Pay attention to baking times and temperatures to ensure your cake layers rise perfectly without drying out.
– Use a smooth frosting as a base for your tulip design and practice the piping technique to create beautiful flower shapes.
– Always allow your cake to cool completely before decorating and storing, ensuring it maintains its shape and flavor.
1. Gather Your Baking Essentials
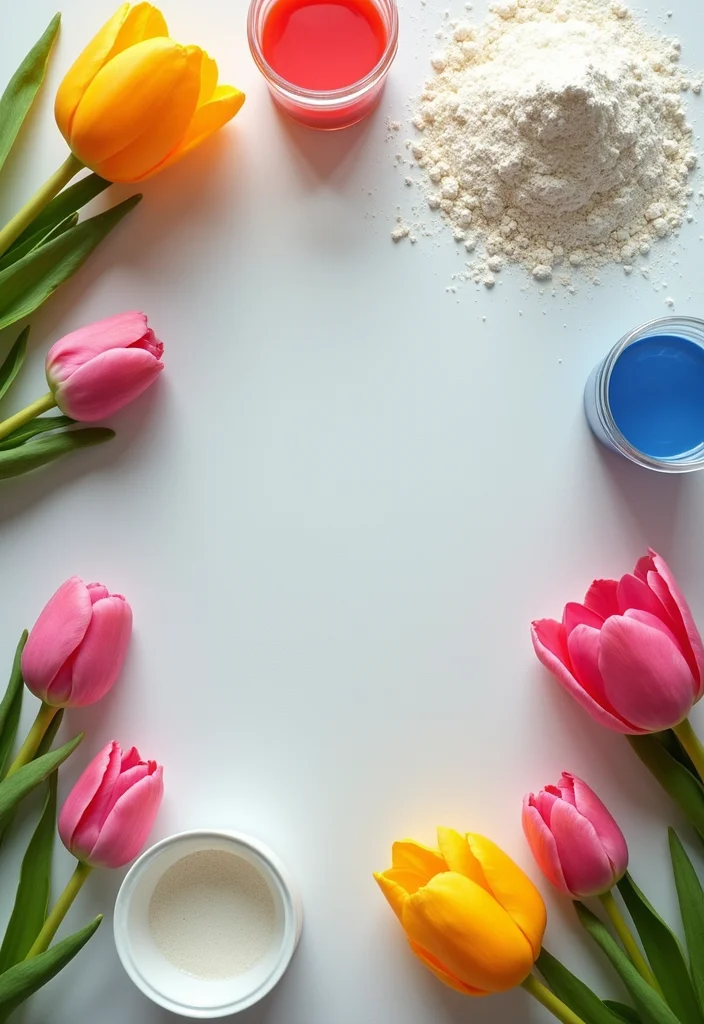
Before you start your cake masterpiece, gather all your baking essentials. Having everything organized makes baking much more enjoyable. It saves you time and stress in the kitchen. You need basic ingredients like all-purpose flour, sugar, eggs, and butter. For that lovely tulip design, grab some bright food coloring and piping bags with different nozzles. Quality cake pans are essential too; use 8-inch round pans for the best results. A rotating cake stand will help you decorate with ease. Here’s a checklist of what you need:- All-purpose flour- Granulated sugar- Baking powder- Eggs- Unsalted butter- Food coloring (red, yellow, green)- Piping bags and tips- Cake pans (8-inch round)- Rotating cake standWith everything in place, you can focus on creating a cake that’s both beautiful and delicious.
2. Choose the Perfect Flavor
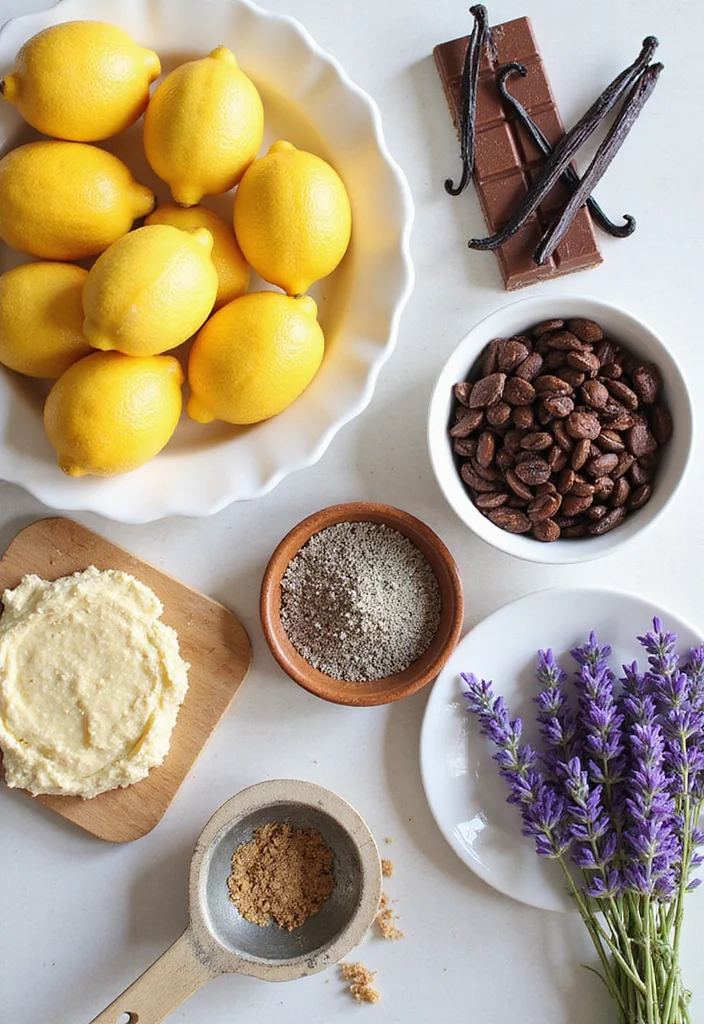
Selecting the right flavor for your tulip cake is key to its overall appeal. You want a flavor that complements its beautiful design. Classic choices like vanilla, lemon, or almond are great. If you’re feeling adventurous, try chocolate or lavender for something different! To make your cake rich and moist, use high-quality ingredients. Incorporating sour cream or buttermilk can greatly improve flavor and texture. Here’s a quick flavor guide:- Vanilla: A timeless choice that pairs well with any frosting.- Lemon: Adds a refreshing zing that brightens the cake.- Almond: Offers a subtle nutty flavor that’s delightful.- Chocolate: For those who crave something rich and indulgent.- Lavender: Introduces a unique floral note that fits the theme.Pick wisely, and your tulip cake will surely impress!
Fun fact: choosing the perfect tulip cake flavor can boost perceived moisture—vanilla, lemon, or almond pair beautifully with the design. If you’re feeling adventurous, chocolate or lavender adds elegance; use sour cream or buttermilk for a richer, moister bite.
3. Master the Batter
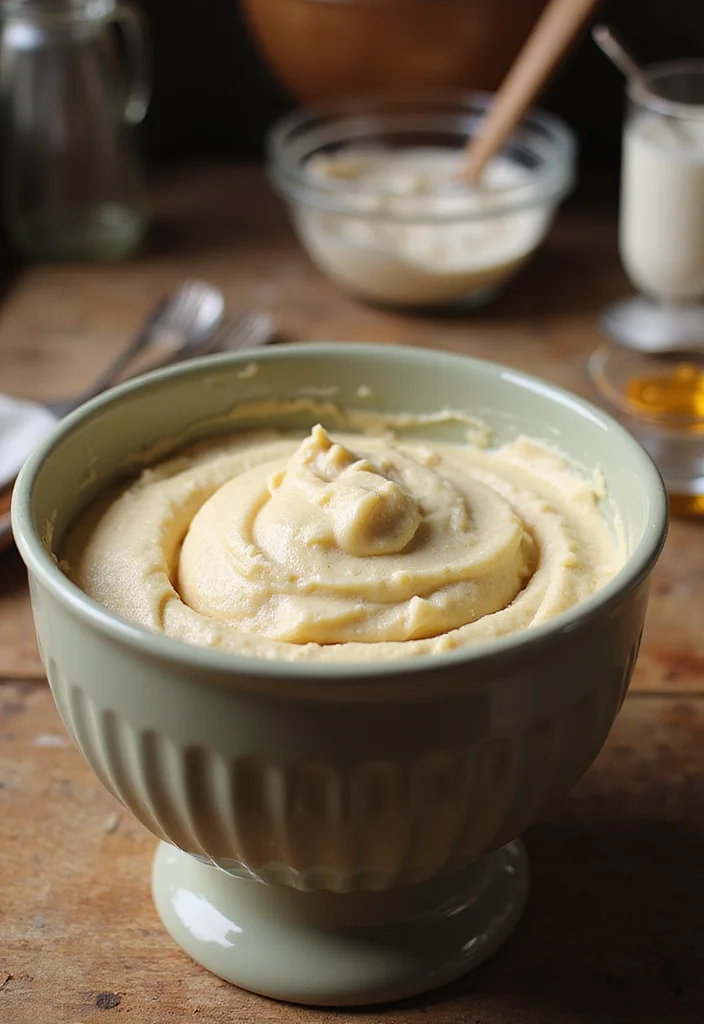
Ready to create that perfect cake batter? Start by creaming together your butter and sugar until it’s light and fluffy. This step is crucial for a tender cake. In another bowl, sift your dry ingredients: flour, baking powder, and a pinch of salt. Mixing dry and wet separately leads to a smoother batter. Gradually combine the dry ingredients with the creamed butter, alternating with eggs and milk. This technique helps achieve that fluffy texture. Don’t forget to fold in any extras like chocolate chips or fruit! Follow these steps for success:1. Preheat your oven to 350°F (175°C).2. Cream butter and sugar until fluffy.3. Sift dry ingredients together.4. Mix wet and dry ingredients gradually.5. Pour into prepared pans and bake for about 25-30 minutes.These steps will give you a moist, delicious base for your tulip design.
4. Bake to Perfection
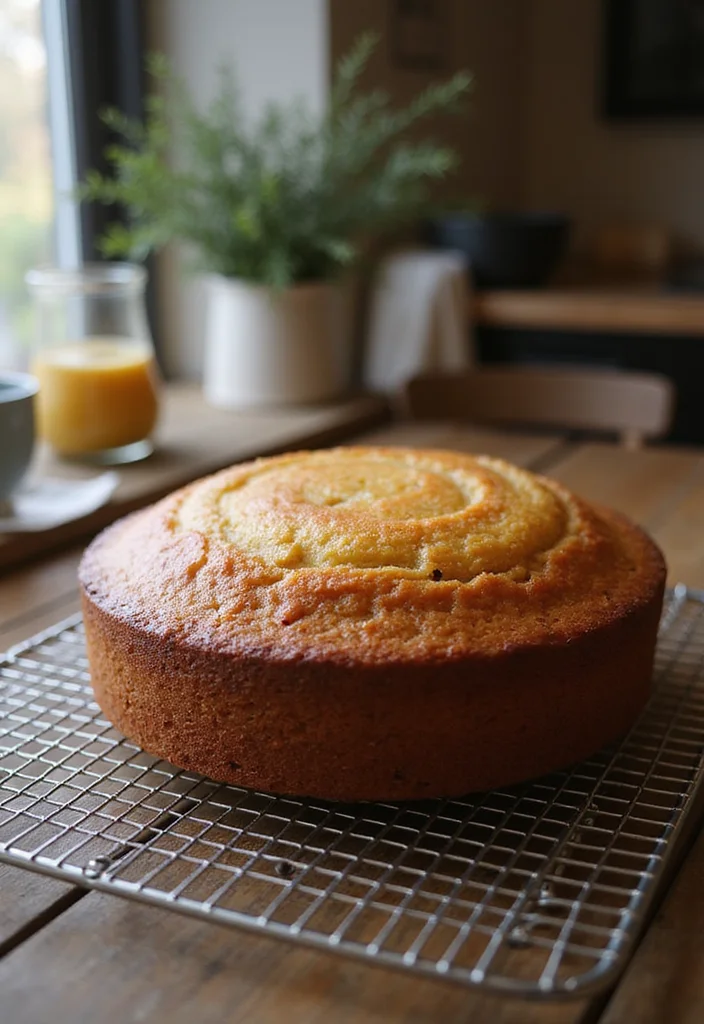
Baking your cake to perfection is crucial for a beautiful tulip cake. Start by preheating your oven to ensure the batter cooks evenly. A well-baked cake should be golden brown and bounce back when lightly pressed. Keep an eye on the baking time; ovens vary, so check for doneness using a toothpick. If it comes out clean, your cake is ready! Let your cakes cool for about 10 minutes in the pans before transferring to a wire rack. Remember these tips:- Check for doneness on the lower end of baking time.- Allow cakes to cool to prevent frosting from melting.- Level the tops with a knife if needed.These tips will help you achieve a flawless cake that’s ready for decoration.
5. Crafting the Ideal Frosting
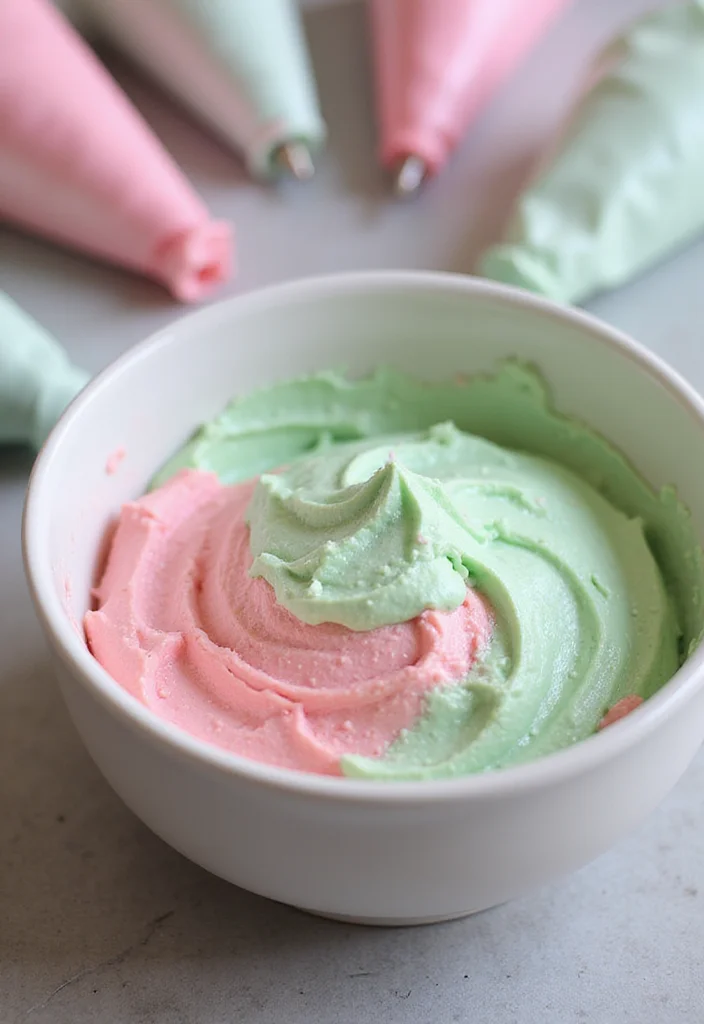
The frosting makes your tulip cake shine! A smooth buttercream frosting is a top choice for its versatility. To make it, beat room temperature butter with powdered sugar, a splash of milk, and vanilla extract until creamy. Add food coloring to create vibrant floral designs using a piping bag with a petal tip. Cream cheese frosting is another tasty option if you prefer a tangy contrast. Here’s how to make your frosting:1. Beat 1 cup of unsalted butter until creamy.2. Gradually mix in 4 cups of powdered sugar.3. Add 1-2 tablespoons of milk for the right consistency.4. Stir in vanilla extract.With these steps, you’ll whip up the perfect frosting to make your tulip cake both beautiful and delicious.
6. Building the Layers
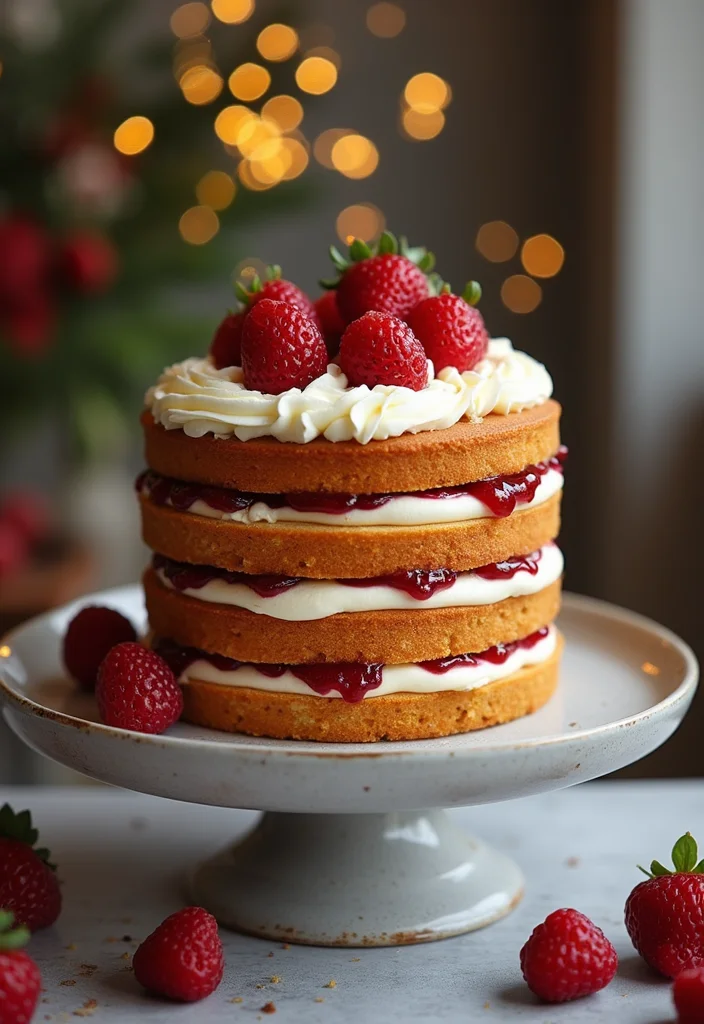
Now, it’s time to assemble your tulip cake! Start by leveling your cooled cakes if needed. Place the first layer on a serving plate and add a layer of frosting on top. Repeat this for each layer, stacking carefully. You can add jam or fruit between layers for extra flavor and moisture. Make sure each layer is centered for a stunning final look. Use a cake leveler or serrated knife for even layers. Here’s a simple summary:- Level each cake layer.- Alternate layers with frosting and jam.- Use a cake leveler for uniform layers.- Apply a crumb coat before the final layer.These steps will set you up for success as you create your cake masterpiece.
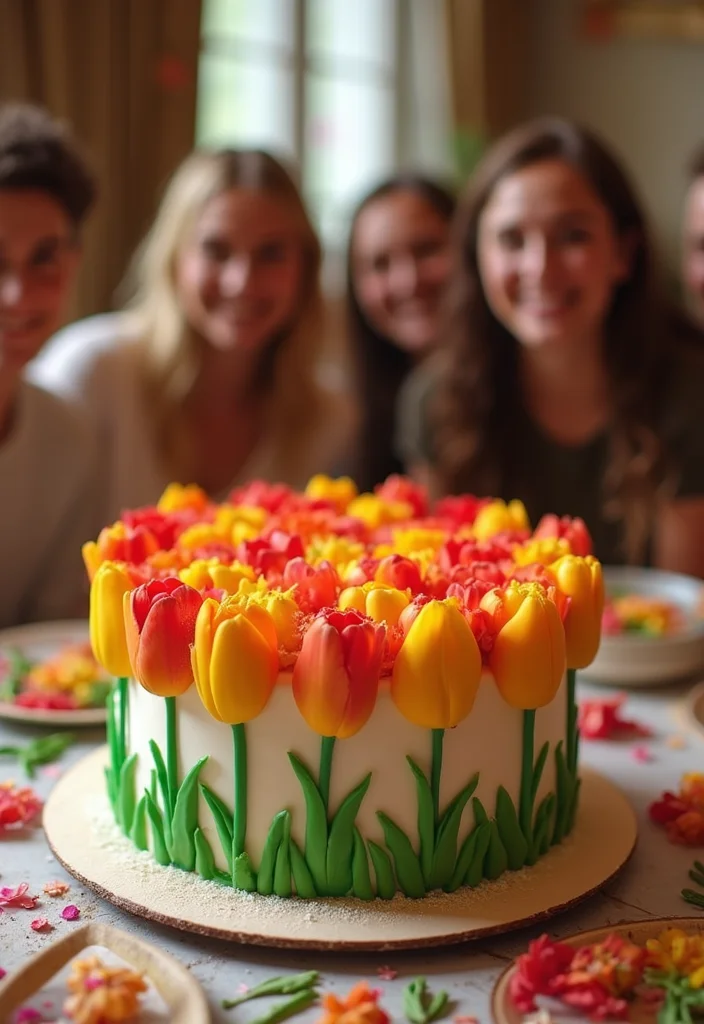
7. The Tulip Design Technique
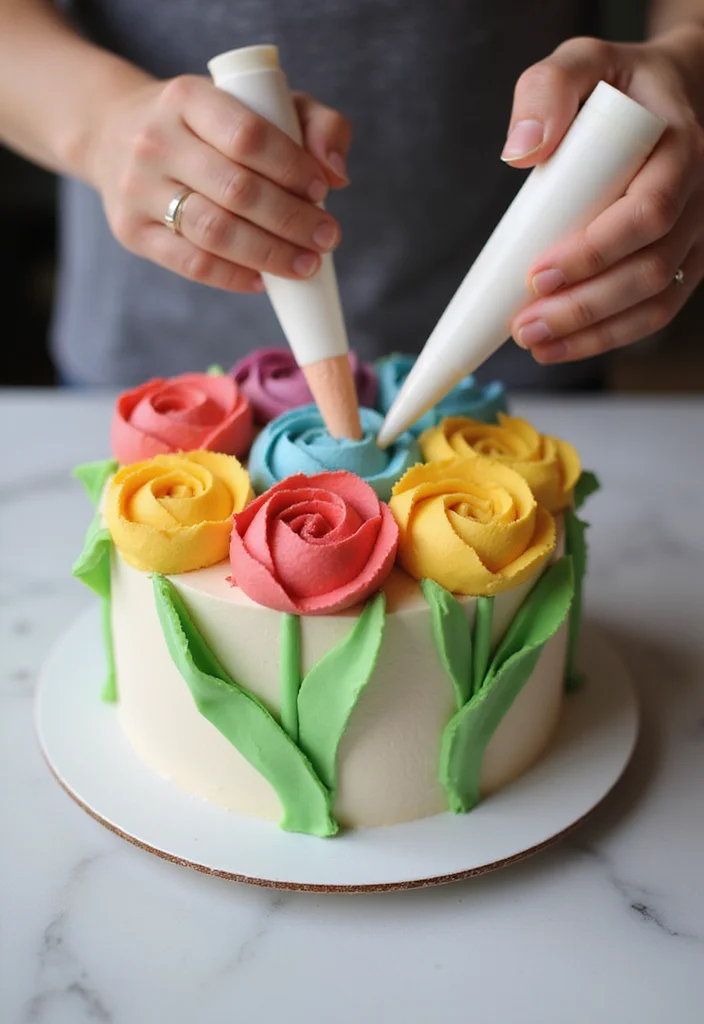
Now comes the exciting part: creating the tulip design! Fill your piping bags with different colored frostings and use petal tips. Start at the cake’s base and pipe petals in a circular motion. Use a small round tip for the tulip center and layer petals around it. This technique makes your cake look like a real flower! Using multiple colors can create a beautiful mixed bouquet effect. Practice on parchment paper before piping on the cake. Here’s a quick guide:1. Fill piping bags with colored frosting.2. Pipe petals in a circular motion from the base.3. Use a small round tip for the tulip center.4. Experiment with colors before decorating the cake.This step brings your tulip cake to life!
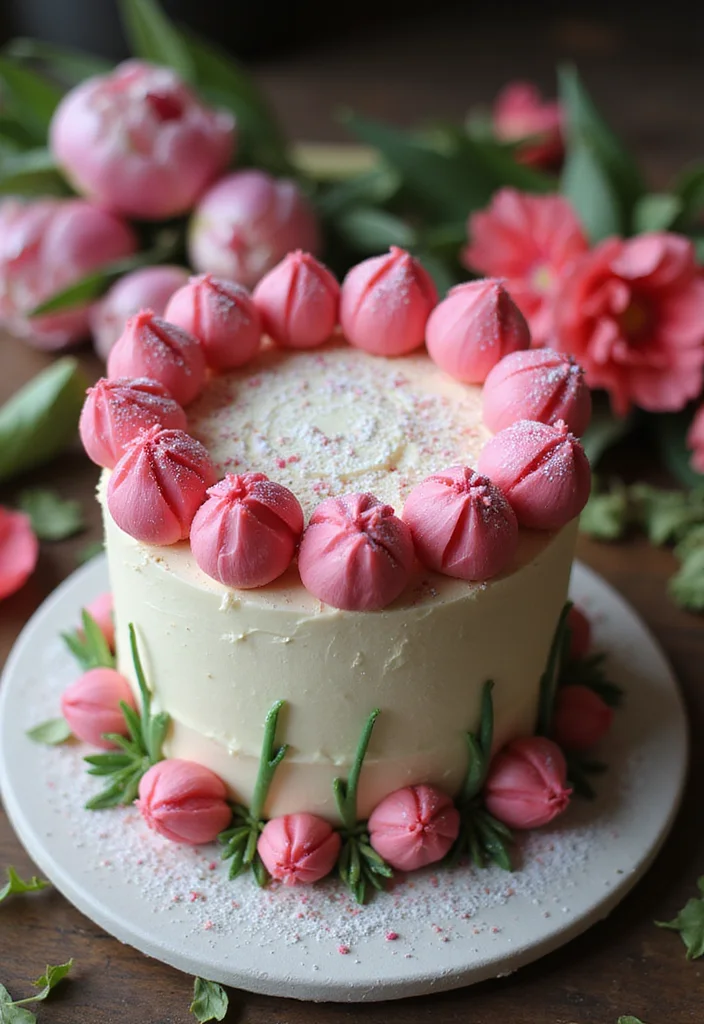
8. Adding Greenery

Every tulip cake needs some greenery to enhance those beautiful flowers. Use green frosting to create leaves and stems around your tulips. A leaf piping tip helps you make realistic leaves that add depth. Position the leaves strategically to guide the eye through your design. Vary the sizes and angles to create a natural look. Consider adding small flowers or buds to fill in gaps for a fuller appearance. Here’s how to add greenery:1. Use a leaf piping tip for realistic leaves.2. Vary sizes and angles of leaves.3. Fill gaps with smaller flowers or buds.4. Layer green elements for depth.These details will turn your cake into a sweet garden.
Greenery is the secret hype man for a tulip cake—use a leaf piping tip, mix leaf sizes, and place stems to guide the eye. Those tiny greens fill gaps and elevate your tulip cake from pretty to show-stopping.
9. Final Touches and Decoration
Let’s add the finishing touches to your tulip cake! Consider using edible glitter, sprinkles, or fresh flowers on top for elegance. A light dusting of powdered sugar creates a whimsical look. If you use fresh flowers, secure them with a toothpick if they aren’t edible! Before serving, chill your cake so the frosting sets perfectly. Here are a few ideas for final touches:- Edible glitter for sparkle.- Fresh flowers for a natural touch.- A dusting of powdered sugar for charm.- Sprinkles for extra fun.These finishing touches will enhance your cake’s visual appeal and delight your guests.
10. Serving Tips

When it’s time to serve your gorgeous tulip cake, presentation matters! Slice the cake into wedges and serve on beautiful plates. For an extra special touch, pair with fresh whipped cream or a scoop of vanilla ice cream. This combo enhances the dessert’s flavor and adds to the visual appeal. To make it more festive, serve at a themed party or alongside floral tea. Keep the cake refrigerated, especially in warm weather. Here are some serving tips:- Pair with fresh whipped cream or ice cream.- Serve at a themed gathering for charm.- Keep refrigerated for freshness.- Use a beautiful cake server for elegance.These serving tips will make your tulip cake a delightful experience for everyone.
Fun fact: presentation can boost perceived flavor by up to 30%. When you slice a tulip cake on beautiful plates, it instantly elevates the dessert’s wow factor—pair with vanilla ice cream for a show-stopping finish.
11. Storing Your Tulip Cake
If you have leftover tulip cake (which is rare!), it’s important to store it properly. Keep it in an airtight container in the refrigerator for up to 3 days. If you want to save it longer, freeze it. Wrap the cake tightly in plastic wrap and then aluminum foil before freezing. When you’re ready to enjoy it again, let it thaw overnight in the fridge. Here’s a quick storage guide:- Store in an airtight container in the fridge for up to 3 days.- For longer storage, wrap tightly and freeze.- Thaw overnight in the fridge before serving.- Use a cake dome to keep it fresh.These storage tips will help you enjoy your beautiful cake even after the celebration.
12. Troubleshooting Common Issues
Even experienced bakers face challenges, but don’t worry! Here are some common issues and how to fix them. If your cake sinks in the middle, it may not have baked long enough or was under-mixed. A dry cake often results from overbaking or too much flour. If your frosting is runny, add more powdered sugar to firm it up. Here’s a quick troubleshooting guide:- Sinking middle: Check baking time and mixing.- Dry cake: Watch flour amounts and baking time.- Runny frosting: Add more powdered sugar.- Crumbly cake: Ensure proper mixing and moisture.By knowing these common problems and solutions, you’ll feel more confident in your baking!
Conclusion
Creating a show-stopping tulip cake is an art form that combines technique, creativity, and a lot of heart. Each step, from choosing flavors to adding those delicate piping details, is a chance to showcase your passion for baking.
With these 12 tips in your toolkit, you’re more than ready to impress family and friends with a cake that’s not just a dessert but a stunning piece of art. Get baking, and remember to enjoy the journey—your tulip cake will be a celebration of your creativity and love for baking.
Frequently Asked Questions
What Ingredients Do I Need to Make a Tulip Cake?
To create a stunning tulip cake, you’ll need some basic ingredients like flour, sugar, eggs, butter, and milk. Don’t forget to add your favorite flavorings, such as vanilla or almond extract, and a good quality frosting to bring it all together. For the tulip decorations, you might want to use fondant or edible flowers to really elevate your cake’s appearance!
How Do I Achieve the Perfect Tulip Shape for My Cake?
Achieving that perfect tulip shape is all about technique! Use a piping bag fitted with a petal tip to create the tulip petals. Start at the base and work your way up, allowing the frosting to build in layers for a more realistic look. Practice makes perfect, so don’t be afraid to try out a few designs before you settle on your favorite!
Can I Make a Tulip Cake in Advance?
Absolutely! Making your tulip cake in advance can save you a lot of stress. You can bake the cake layers a day or two ahead and store them wrapped in plastic wrap. Just make sure to frost the cake closer to your event to keep it looking fresh and beautiful. Also, consider chilling the cake in the fridge after frosting to set everything nicely.
What Are Some Creative Decorating Ideas for My Tulip Cake?
Get ready to unleash your creativity! You can enhance your tulip cake by using edible glitter for a touch of sparkle, or fresh fruits and berries for a pop of color. Consider adding a swirl of contrasting frosting or even chocolate drizzle for added flair. The options are endless—just let your imagination bloom!
What Common Mistakes Should I Avoid When Baking a Tulip Cake?
When creating a tulip cake, steer clear of common pitfalls like overmixing your batter, which can lead to a dense cake. Also, ensure you’re using the right oven temperature; too hot can lead to burnt edges while leaving the center raw. Always test for doneness with a toothpick. Lastly, don’t rush the cooling process before frosting, as it can lead to a melted mess!
Related Topics
tulip cake
baking tips
cake decorating
tutorial
beginner friendly
spring desserts
show-stopping cakes
advanced baking
floral designs
party cakes
easy recipes
dessert trends